Introduction
If you have a WordPress website and use the Newspaper theme, adding an email subscription form is easy. Although the setup process may initially seem confusing, we’ve created an article that covers all the steps needed to create and configurate your first email subscription section with the help of our tagDiv newsletter plugin.
After reading this article, you will find that it’s not as difficult as it sounds; it’s pretty straightforward.
How to create a newsletter section on your website with tagDiv Newsletter Plugin.
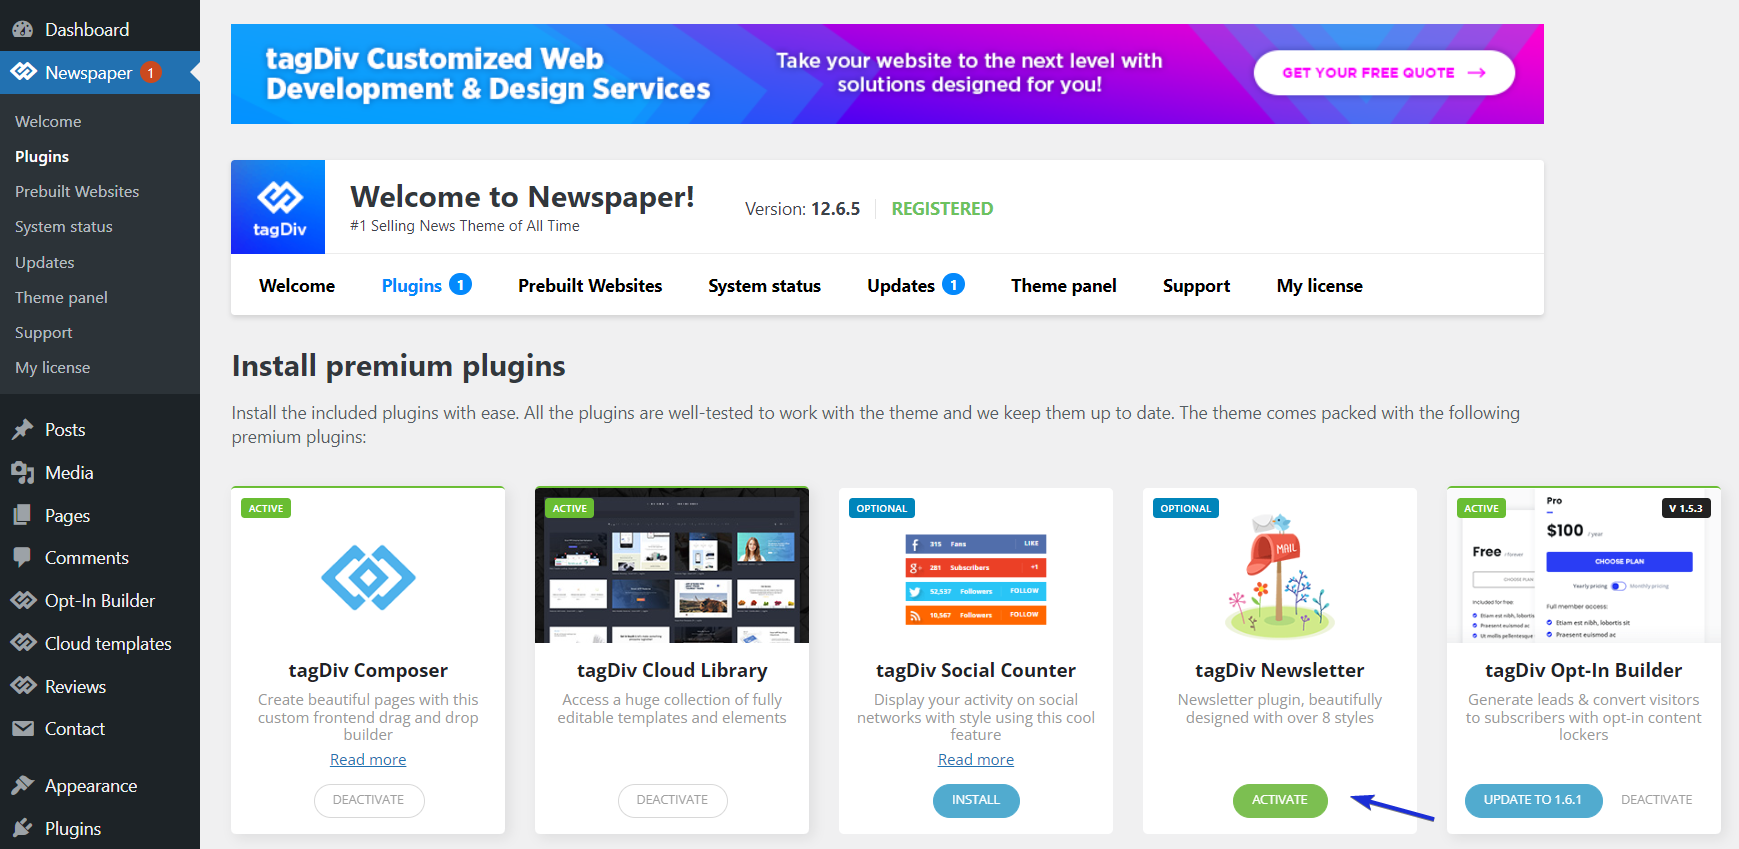
Install the tagDiv Newsletter Plugin.
Go to Newspaper -> Plugins -> tagDiv Newsletter-> Activate
Customize the plugin
Once the plugin is installed, it will be available in your tagDiv Composer element list.
You can create a newsletter element from scratch or choose a pre-built cloud template.
From scratch
- Go to the page you want to include the newsletter section;
- Edit with tagDiv Composer -> Add element -> Search for the “Newsletter” shortcode;
- Drag the Newsletter element and drop it to your preferred area;
- Style the form.
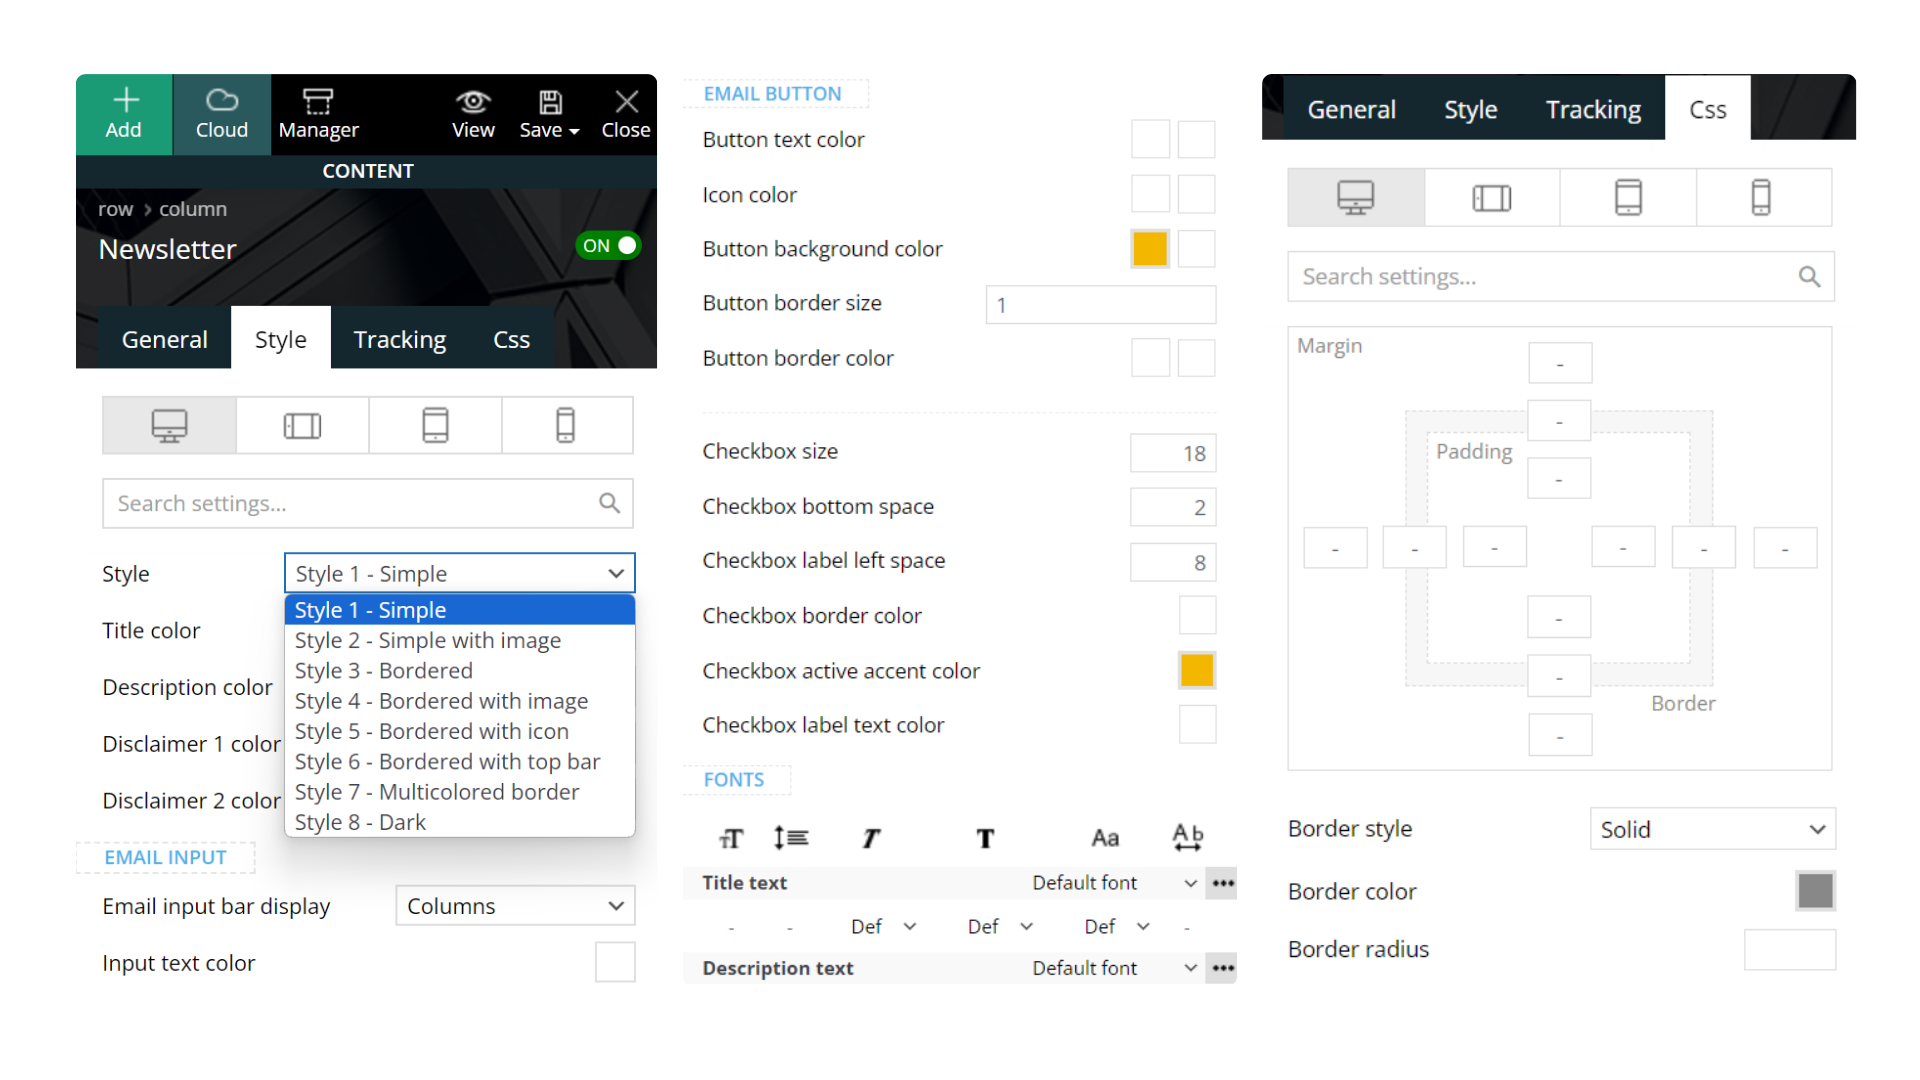
To customize the newsletter form, start by going to the Style tag on the left panel. There, you can choose from 8 different newsletter form styles and make adjustments if necessary. Additionally, within the same tab, you have access to other style options.
You can modify the input border size, background color, and border radius and customize the email button by changing the text, icon color, and more. Furthermore, in the CSS tab, you can fine-tune the margins of the newsletter element and adjust border styles, colors, radius, and more.
By using a pre-built cloud template
- Go to Cloud Templates;
- Select the section of the page where you want to display the newsletter form.
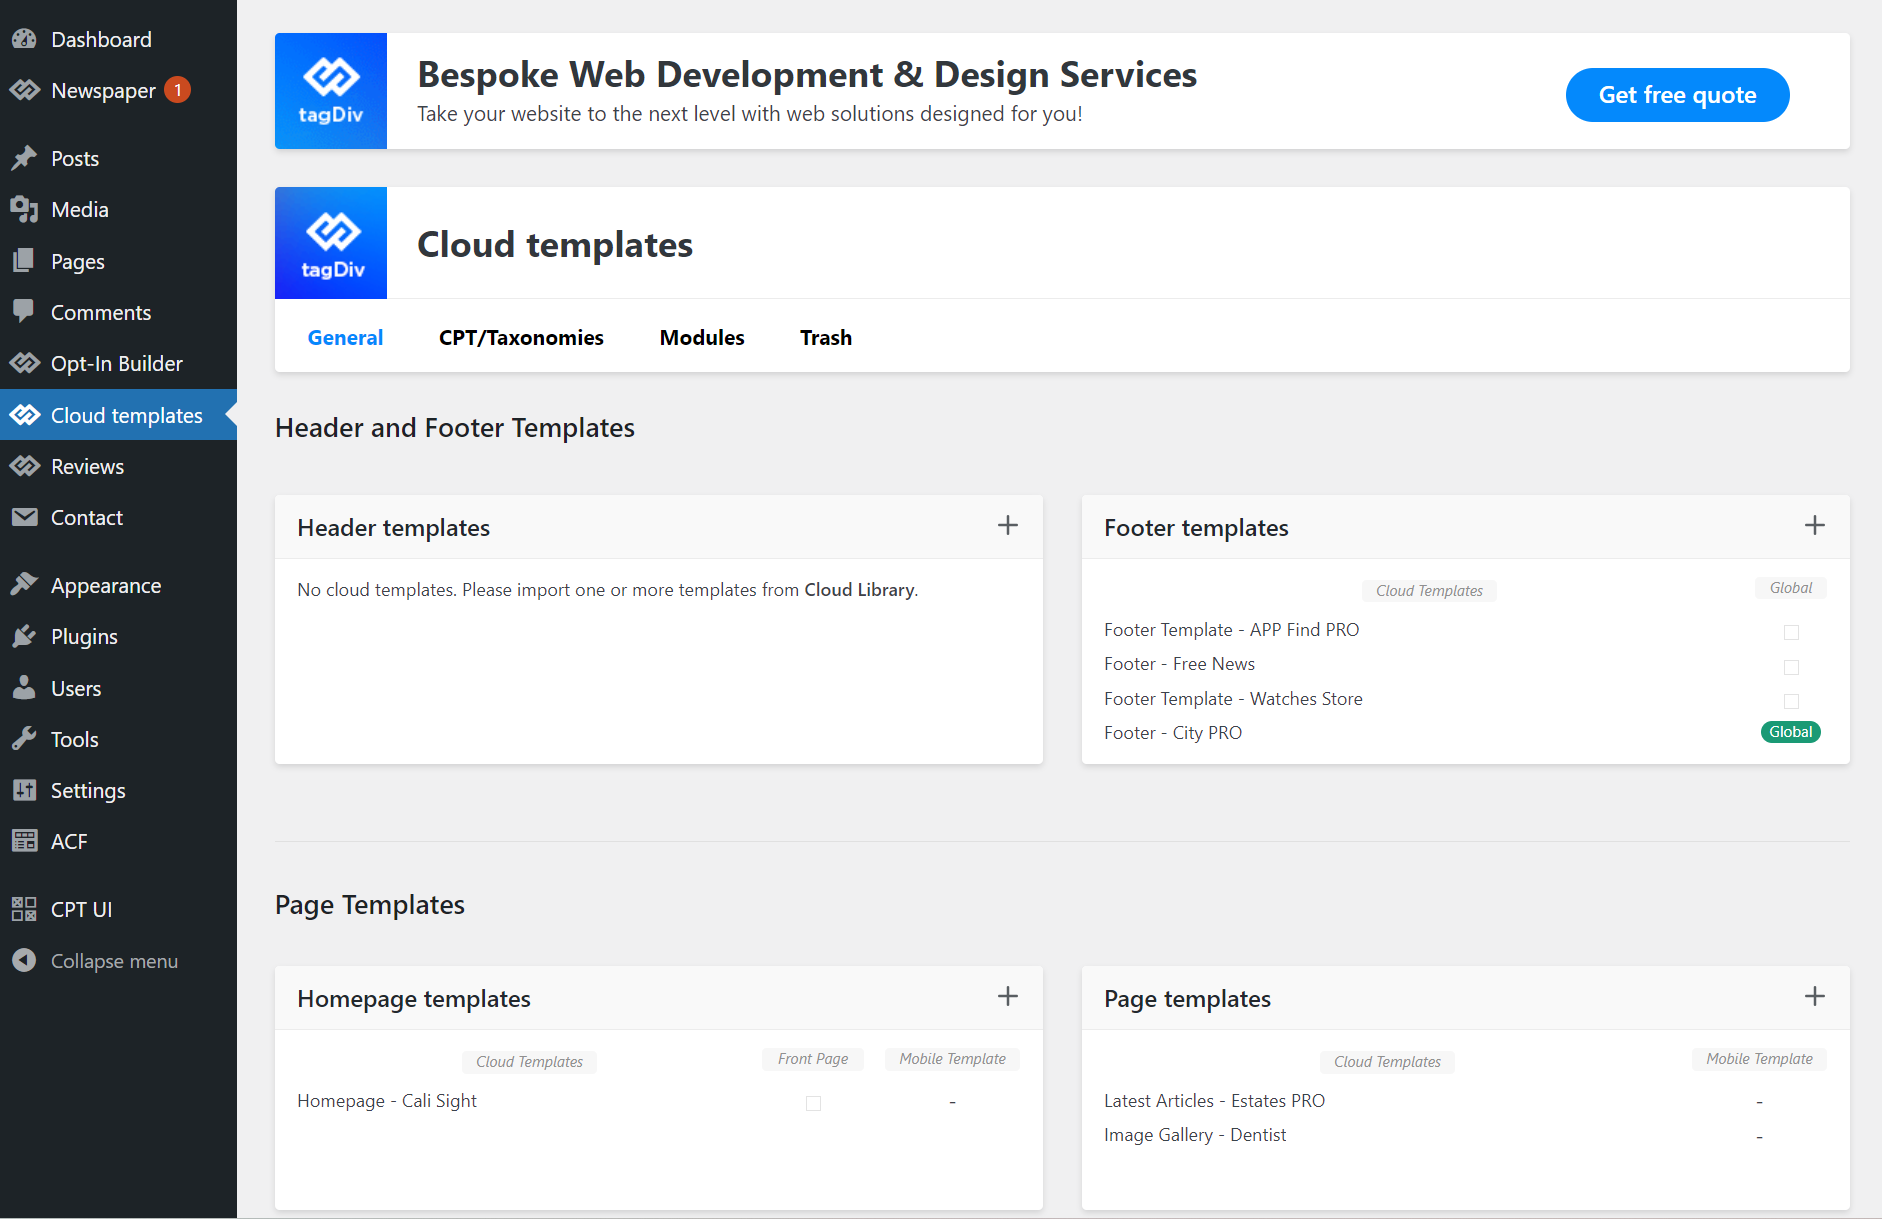
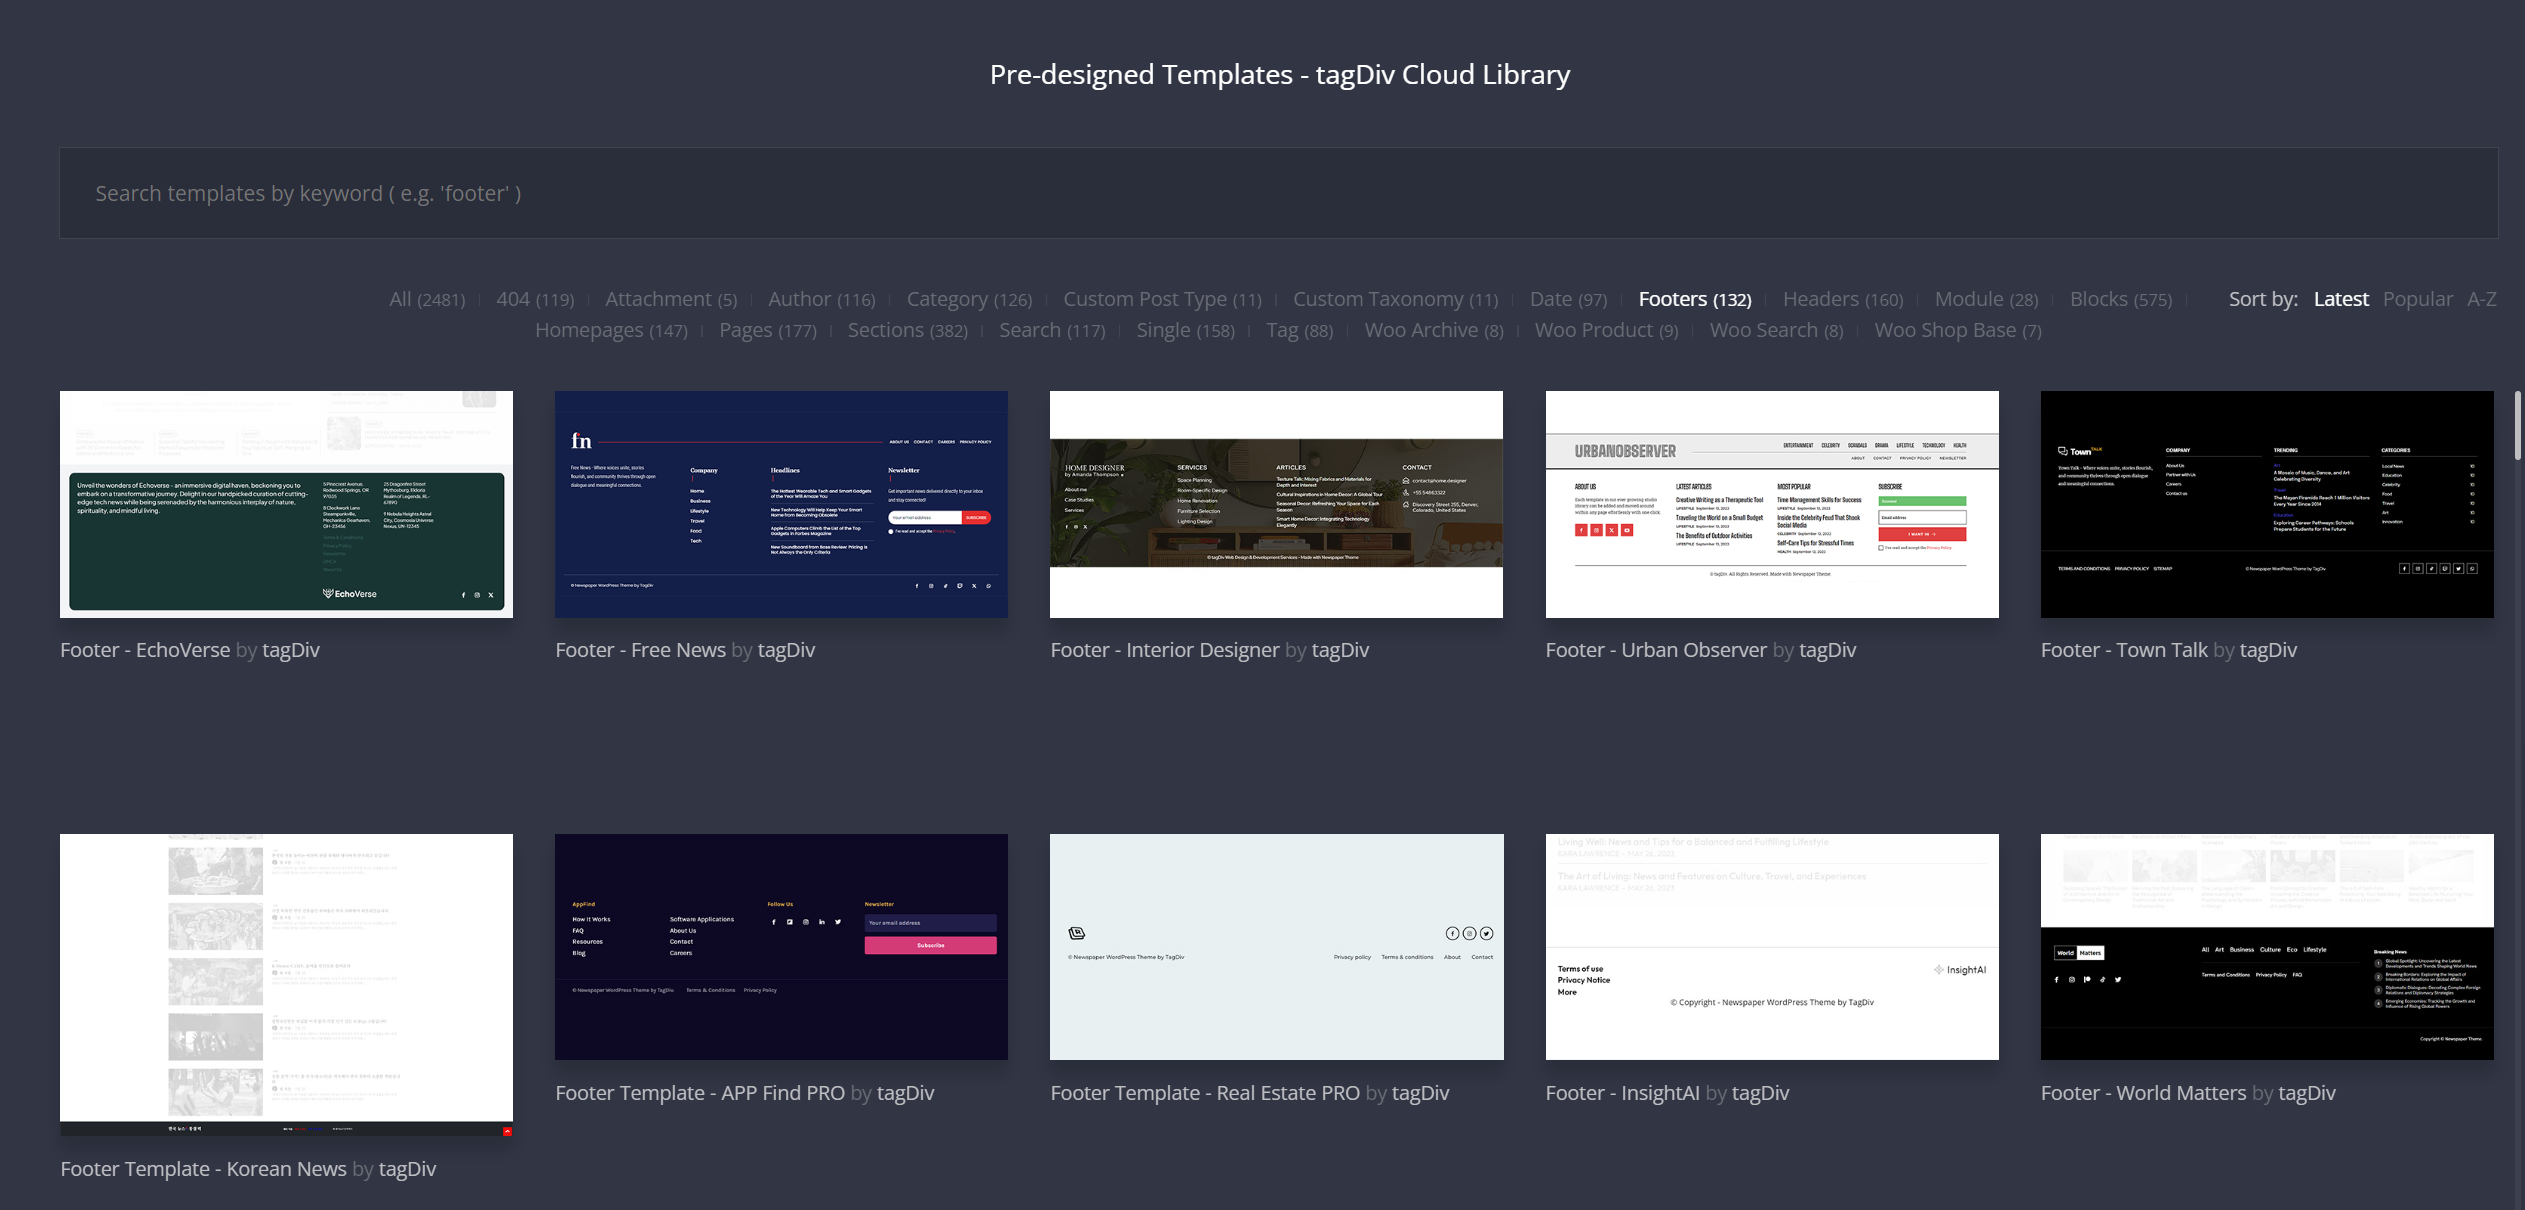
3. If you want to display it in the footer section of your page, click the + button. A new window with Pre-designed Templates will appear. You can choose from many pre-built footer templates with integrated newsletter forms there.
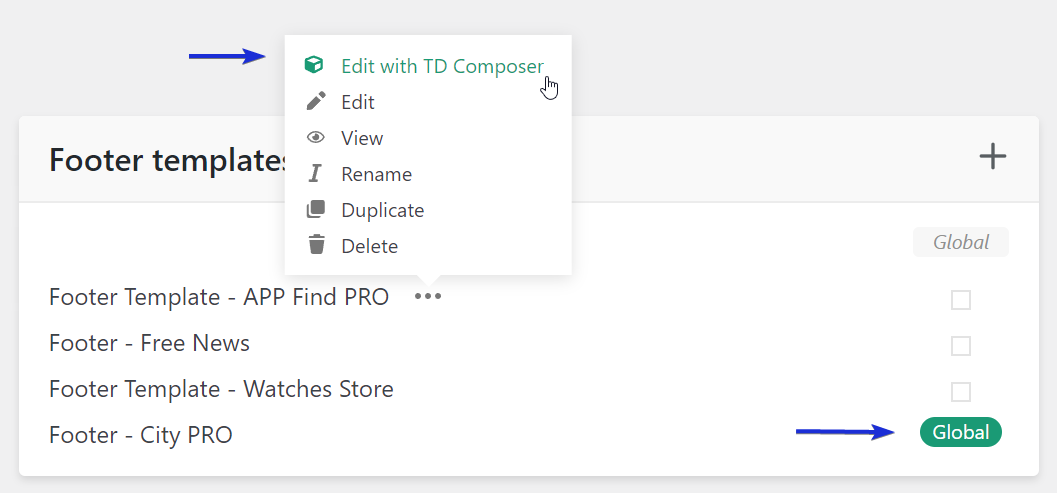
4. After choosing a pre-designed template, close the window and select the chosen template. Then click the three dots and “Edit with TD Composer”.
Set a title for your widget, a description, and a disclaimer, and choose a newsletter provider, Mailchimp or Mailer Lite.
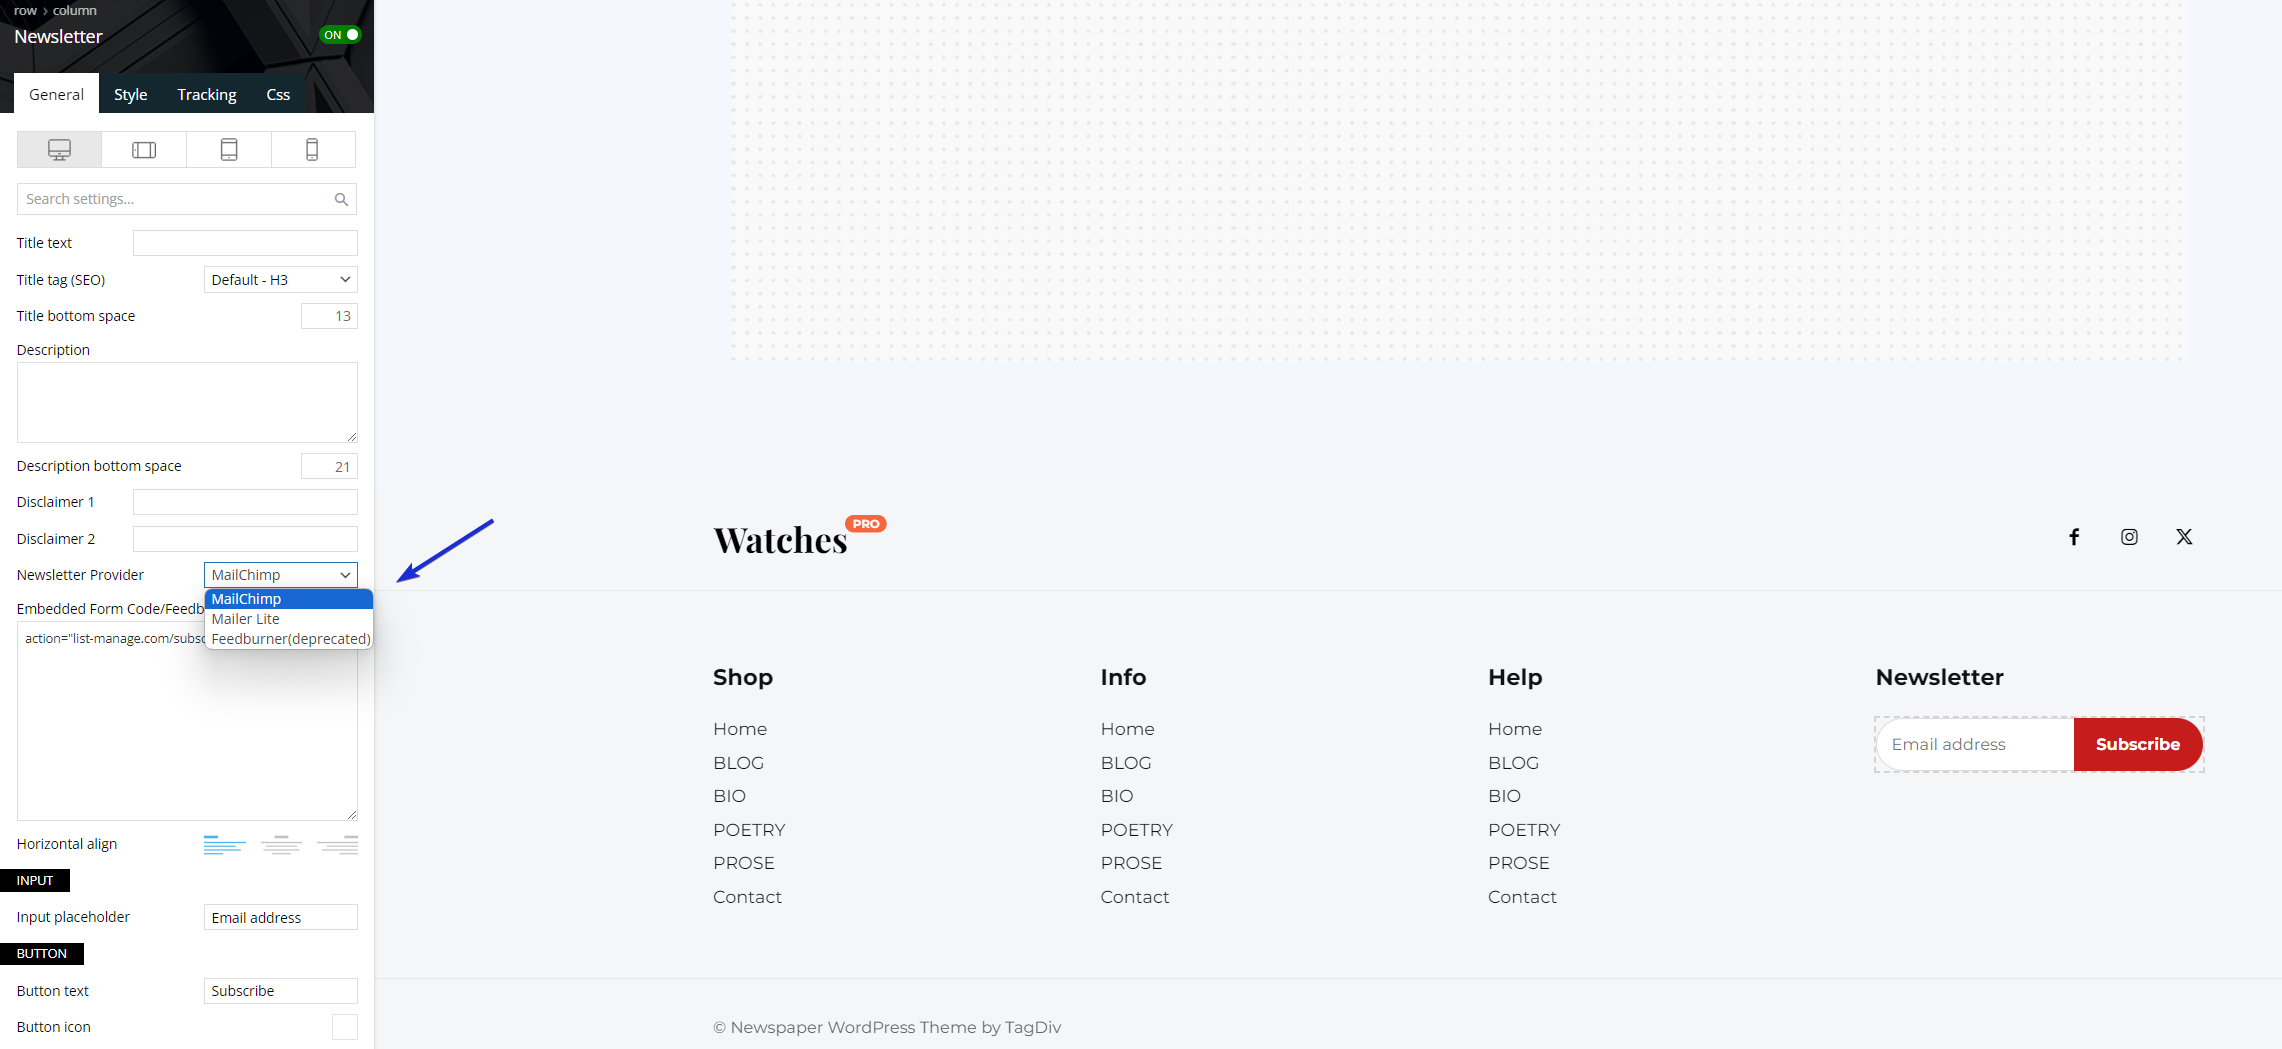
After setting the above elements, choose the newsletter provider you want from the two available options: MailChimp and Mailer Lite.
* Note: The vast majority of pre-designed templates work as mentioned above. However, some pre-designed cloud templates operate differently. For example, the newsletter element that comes with the Free News Pro pre-built template uses a mailing list system that enables website owners to create internal WordPress mailing lists. To learn more about how this mailing list system works, consult the tagDiv Opt-in Builder—Paywall/ Subscription Leads page.
In the following paragraphs, we’ll guide you through integrating Mailchimp and Mailer Lite with WordPress in Newspaper Theme.
How to Integrate Mailchimp with WordPress in Newspaper Theme
Create a new account or access your existing one.
- Go to Audience -> Signup Forms;
- Click “Create a new form”;
- Select “Create embedded form”;
- Give your form a name and the audience you want to work with;
- Customise your form Click Continue and Copy Code.
How to Integrate Mailer Lite with WordPress in Newspaper Theme
- Navigate to the Forms page;
- Click the Embedded Forms tab -> Overview -> Embed form to your website -> Click the HTML tab.
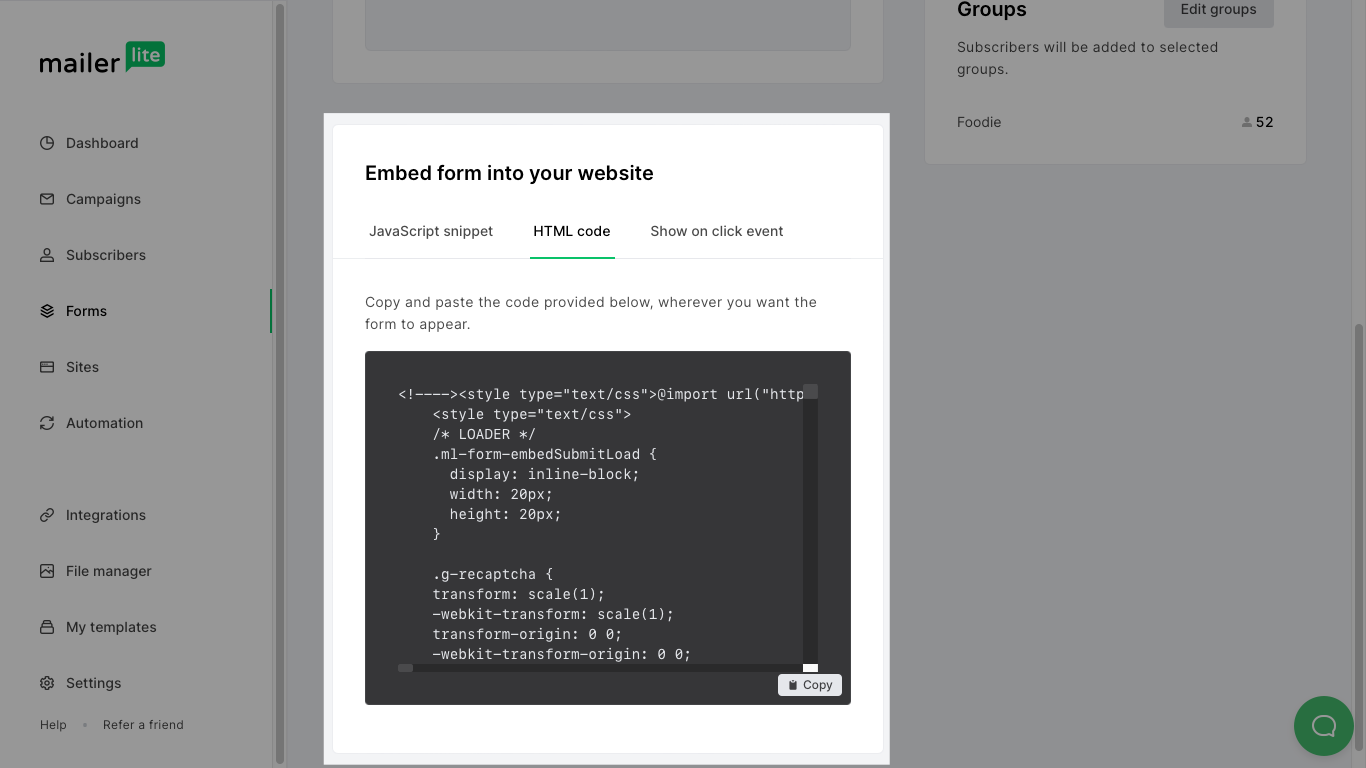
After generating the code, go back to the newsletter element and paste the code into the embedded form section. Once you’ve pasted the code, the form’s default appearance will be displayed. Below the embedded form code, you can adjust the alignment, input placeholder, and customize the button text and icon settings.
It’s time to style the newsletter form. The same styling process applies to the cloud templates as the build-from-scratch one. To get started, go to the Style tab on the left panel.
There are 8 different newsletter form styles to choose from, and you can customize them if needed. In the same tab, you have other style options. You can change the input border size, background color, border-radius, or edit the email button by setting a different text, icon color, and more. Additionally, in the CSS tab, you can adjust the margins of the newsletter element, border style, color, radius, and so on.
After you’ve styled your newsletter section, you can save it. This will give you a well-customized and functional newsletter that’s ready to help you build a community and send personalized email campaigns.
If you need help with implementing your newsletter or designing and developing your websites, our team is here to assist you. Simply submit a request and provide details about your project and how we can help.


