
WordPress sites are a prime target for spammers due to their widespread use.
Every day, thousands of websites are flooded with spam comments containing suspicious links, fake promotions, and irrelevant messages. These spam comments can cause problems like SEO penalties, performance issues, and security risks. If left unchecked, spam can clutter your comment section, make your site look unprofessional, and reduce user trust.
If search engines detect excessive spam, they may lower your site’s ranking or, in extreme cases, blacklist it.
Additionally, visitors who see spam-filled comment sections are less likely to trust your content.
Fortunately, with the right tools and strategies, you can eliminate comment spam and keep your WordPress site clean and secure.
In this guide, we’ll cover why spam happens, how to stop spam comments on WordPress, and the best tools—including Google reCAPTCHA and Akismet—to keep your site spam-free.
Why Does Spam Happen?
Spammers target high-traffic websites to promote their own agendas. Some try to increase traffic to low-quality sites, while others use comment sections to distribute phishing links or malware.
These tactics rely on volume. Spammers flood multiple websites with comments, hoping that even a small number of users will click on their links. In some cases, spammers use automated bots to test site vulnerabilities, looking for weaknesses they can exploit in future attacks.
Beyond security risks, spam also affects user experience and site credibility. A comment section filled with irrelevant or promotional content makes a website look unprofessional and unreliable.
Additionally, search engines may penalize sites that allow excessive spam, lowering their visibility in search results.
How to Stop Comment Spam on WordPress
Disable Comments Where You Don’t Need Them
Not every site needs a comment section. If your site is a business page, portfolio, or landing page, turning off comments completely can save you time and prevent spam.
To disable comments in WordPress:
- Go to Settings > Discussion
- Uncheck “Allow people to submit comments on new posts”
- Click Save Changes
No comments = No spam

However, if you’re running a blog, news website, or an online magazine where you consistently publish content, a comment section can be valuable for user engagement. In this case, it’s better to enable comment moderation instead of disabling comments entirely.
If you still prefer to allow users to leave comments, WordPress offers various moderation options to help you control spam and maintain a high-quality conversation, covered below. These options ensure that spam does not flood your site while keeping real discussions alive.
Enable Comment Moderation
If you still want comments, manual comment moderation ensures spam doesn’t go live.
To enable comment moderation follow these steps:
- Go to Settings > Discussion
- Under Before a comment appears, check “Comment must be manually approved”
- Save changes
Now, no comment will go live without your approval.
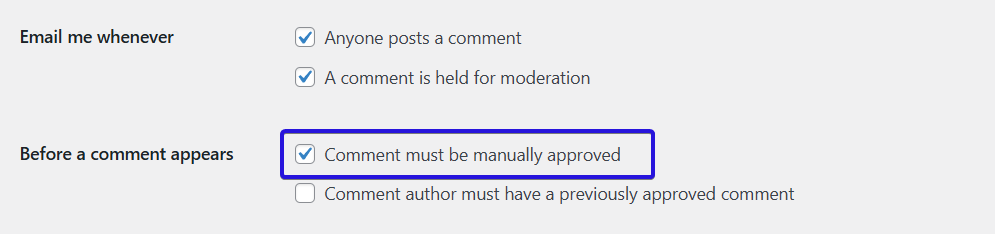
Another available option is to allow users who have previously had a comment approved to post new comments without requiring manual approval again. To enable this, select the “Comment author must have a previously approved comment” checkbox.
Don’t forget to save the changes.
Limit Links in Comments
Spam comments often contain multiple hyperlinks. You can automatically hold these comments for moderation.
How to limit links in comments:
- Go to Settings > Discussion > Comment Moderation
- Set “Hold a comment in the queue if it contains X or more links.” (Here, we recommend going with two or more)
- Click Save changes
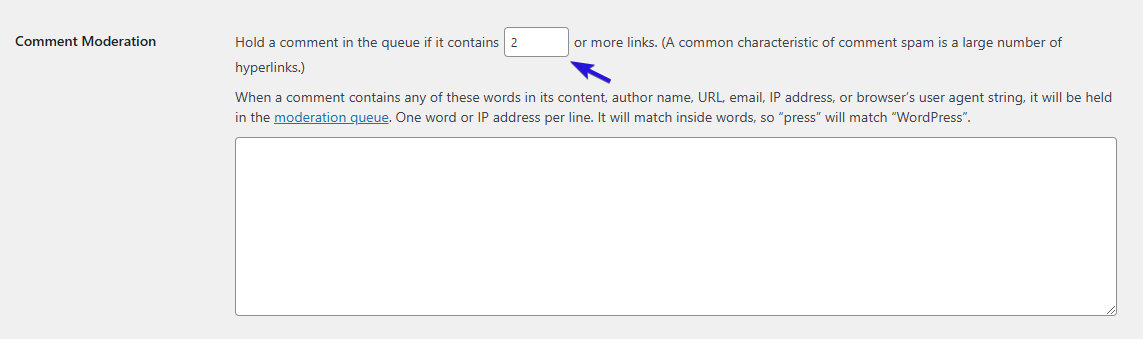
This will prevent spammy backlinks from appearing in your comments.
Block Spammy IP Addresses
If you notice repeated spam from the same IP addresses, you can block them permanently.
To block IPs in WordPress :
- Go to Settings > Discussion
- Scroll to Disallowed Comment Keys
- Add the spammy IP addresses (found under each spam comment)
- Save changes
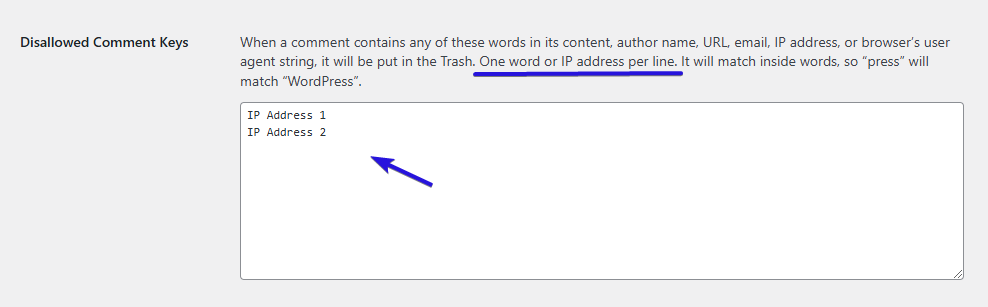
This method will prevent users with these IP addresses from leaving comments but will still allow them to visit your site.
To enhance your WordPress spam protection, you need automated tools that stop spam before it even reaches your moderation queue. This is where reCAPTCHA and Akismet come in—working together to keep your comment section clean and spam-free with minimal effort.
Use reCAPTCHA Plugin to Block Bots
Most spam comments come from automated bots rather than real users. To combat this, reCAPTCHA adds an extra verification step to ensure that only humans can submit comments on your WordPress site.
Unlike traditional CAPTCHA (which asks users to solve puzzles), Google reCAPTCHA is more user-friendly. It uses behavioral analysis to detect bots and usually only requires users to tick a box (“I’m not a robot”).
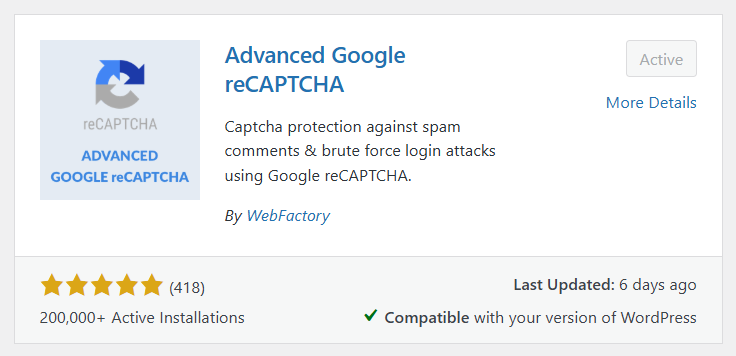
Step 1: Install the Advanced Google reCAPTCHA Plugin
- Log in to your WordPress dashboard
- Go to Plugins > Add New
- Search for Advanced Google reCAPTCHA
- Click Install Now, then Activate the plugin
Step 2: Get Google reCAPTCHA API Keys
To connect reCAPTCHA to your site, you need API keys from Google.
- Visit the Google reCAPTCHA Admin Console
- Sign in with your Google account
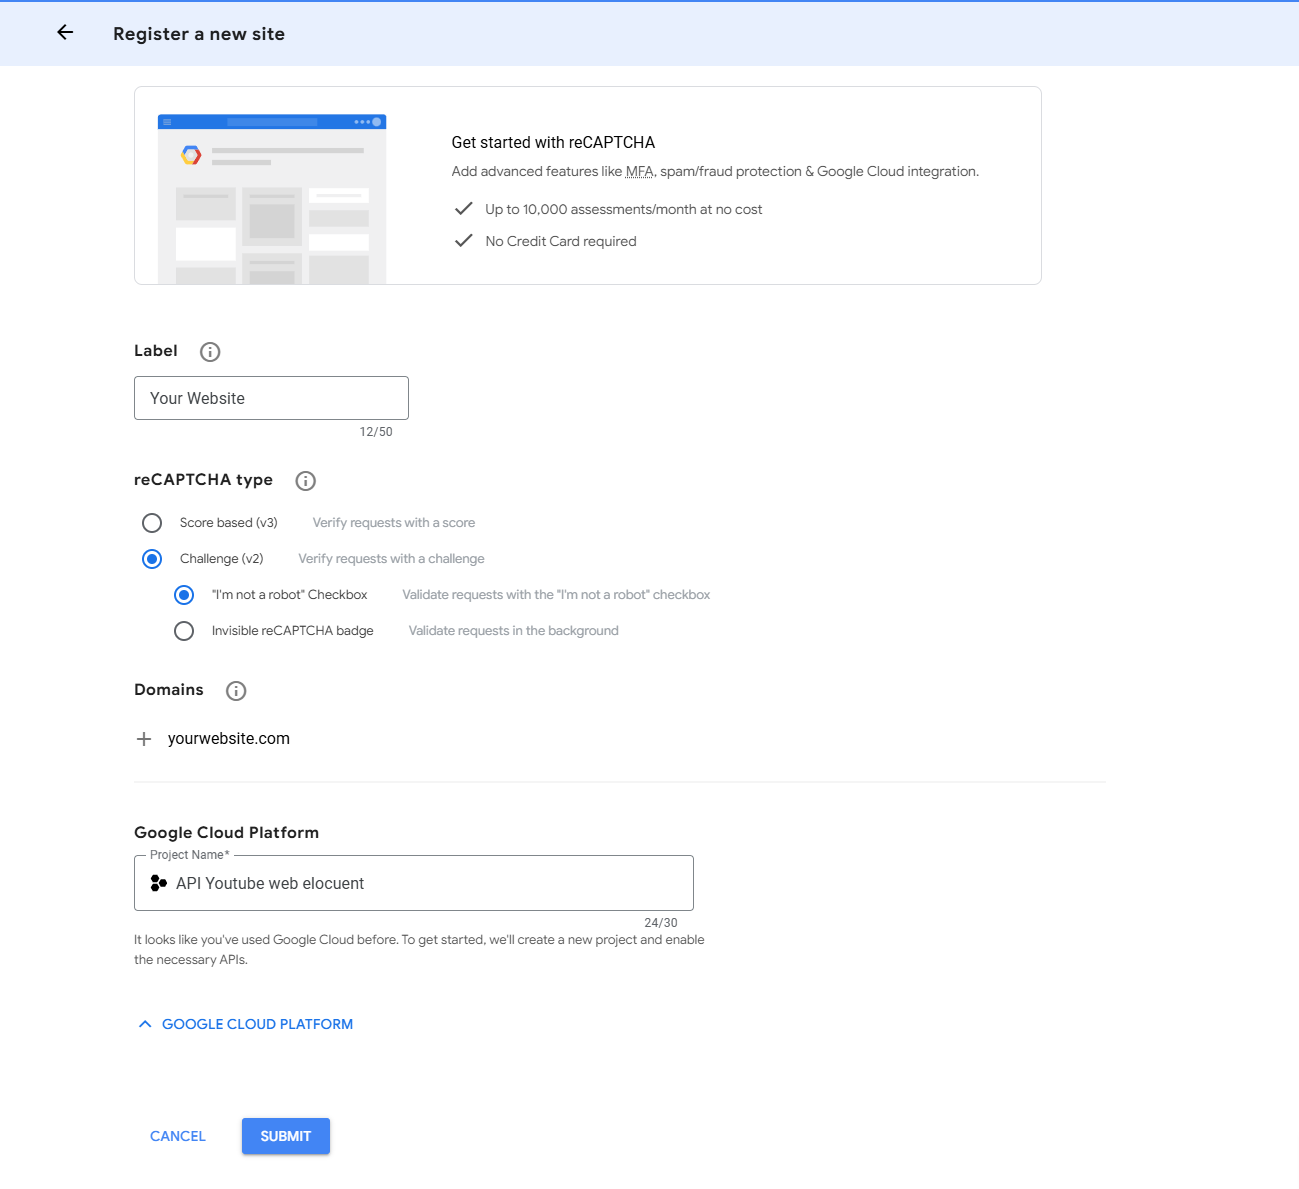
- Click “+ Create” to register a new site
- Fill in the details:
- Label: Enter your website name for easy reference;
- reCAPTCHA Type: For this example, we will choose reCAPTCHA v2 (“I’m not a robot” Checkbox) to demonstrate the setup process, but we highly recommend using reCAPTCHA v3. It operates silently in the background, providing better usability without disrupting visitors while still offering strong spam protection;
- Domains: Enter your website domain (e.g., example.com);
- Owners: Your Google email is auto-filled, but you can add others;
- Complete all the required information, then “Submit”
- Google will generate a Site Key and Secret Key. Copy these keys
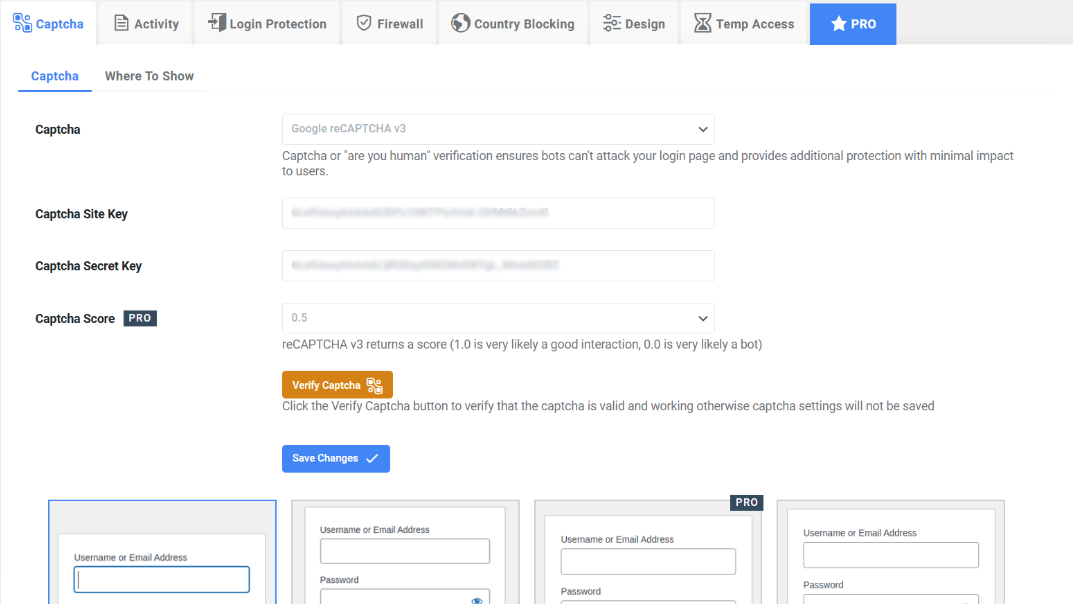
Step 3: Configure reCAPTCHA in WordPress
- Go back to your WordPress dashboard
- Navigate to Settings > Advanced Google reCAPTCHA
- Enter the Captcha type chosen at the previous step in the Captcha bar, then paste the Site Key and Secret Key into the respective dedicated fields
- Select the place where you want to display reCAPTCHA
- Under Enable reCAPTCHA for, check “Comment Form”
- Click on “Verify Captcha”
- Save changes
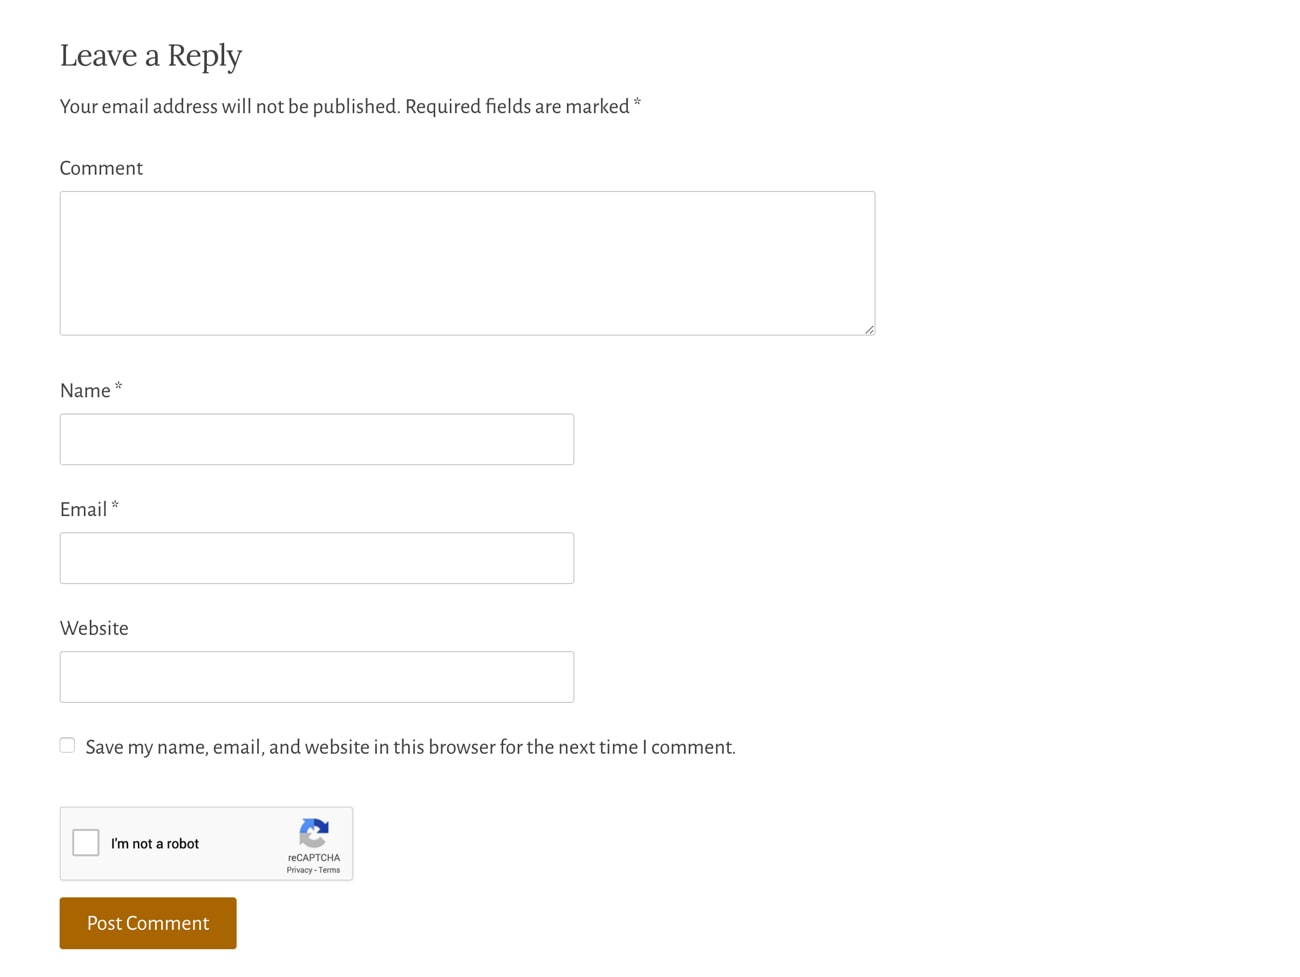
Step 4: Test reCAPTCHA on Your Comment Form
Open any blog post and scroll down to the comment section.
You should now see the “I’m not a robot” checkbox.
Try submitting a comment to confirm it works.
Once activated, bots will struggle to bypass your comment form, significantly reducing spam while keeping the process simple for genuine users.
If the reCAPTCHA is not showing, clear your website cache (if you’re using a caching plugin) and ensure your theme supports comment form modifications.
How To Set Up The Akismet Anti-Spam Plugin
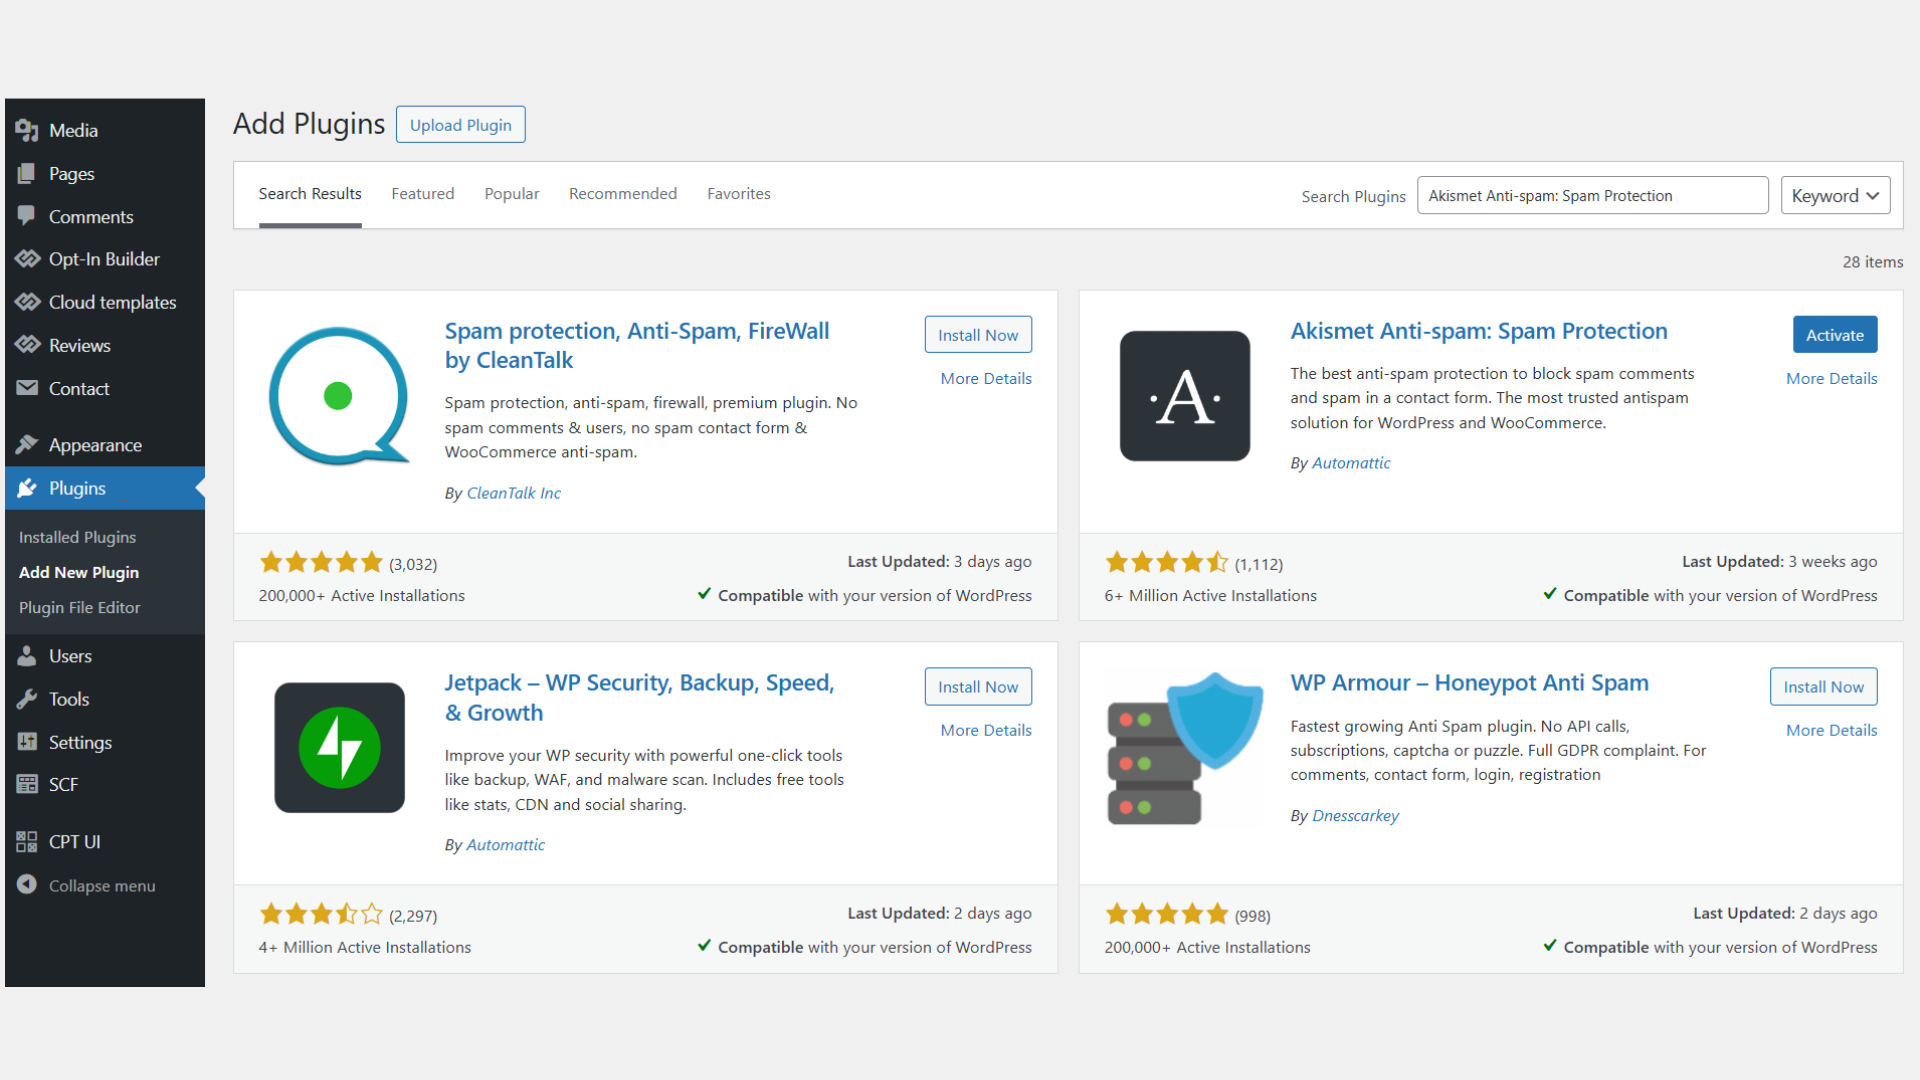
Step 1: Install and Activate the Akismet Anti-Spam Plugin
- Log in to your WordPress dashboard
- Go to Plugins > Add New
- In the search bar, type “Akismet Anti-Spam: Spam Protection”
- Click Install Now, then Activate
Once activated, you will see a welcome message asking you to enter your API key as below.

Keep this window open and follow the steps provided below.
Step 2: Get an Akismet API Key
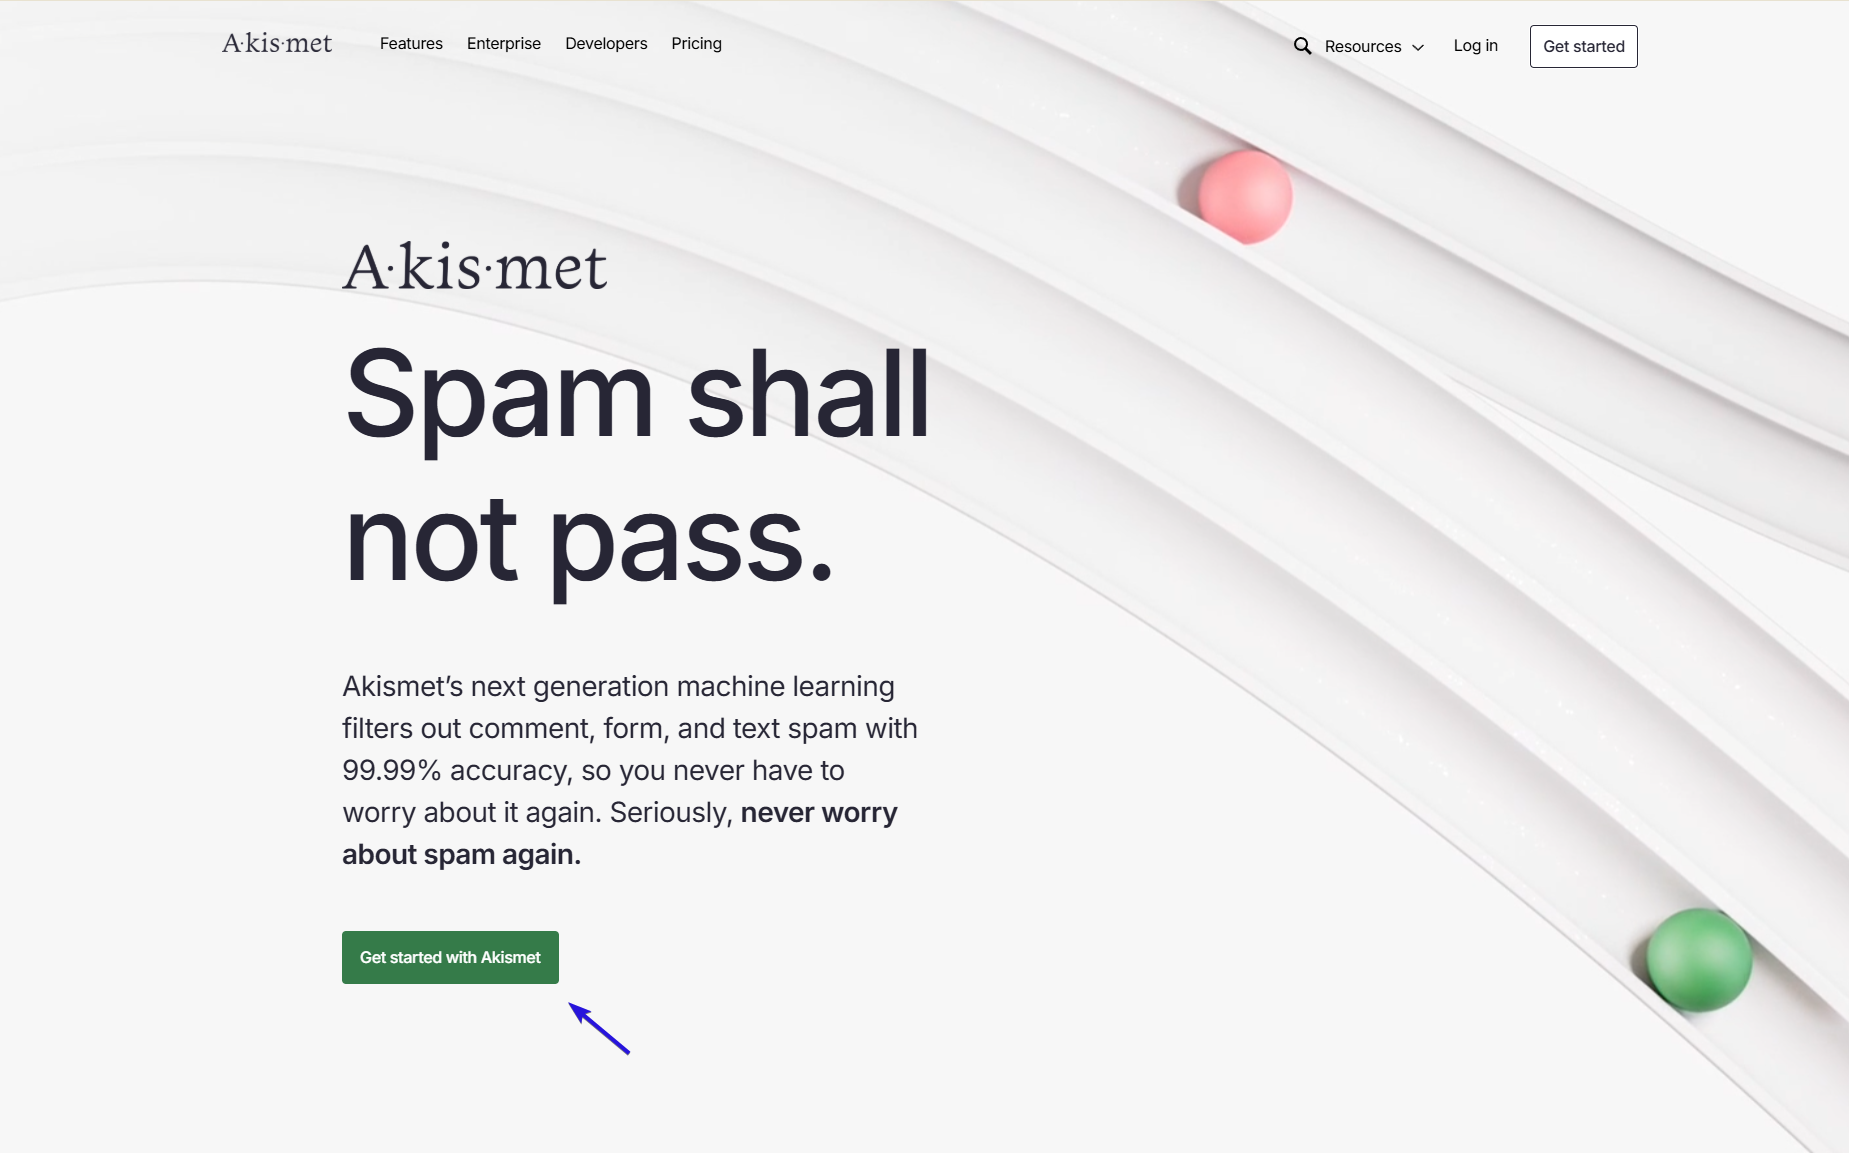
To get your API Key, head over to Akismet’s homepage.
Click on the “Get started with Akismet” button.
Choose a subscription plan.
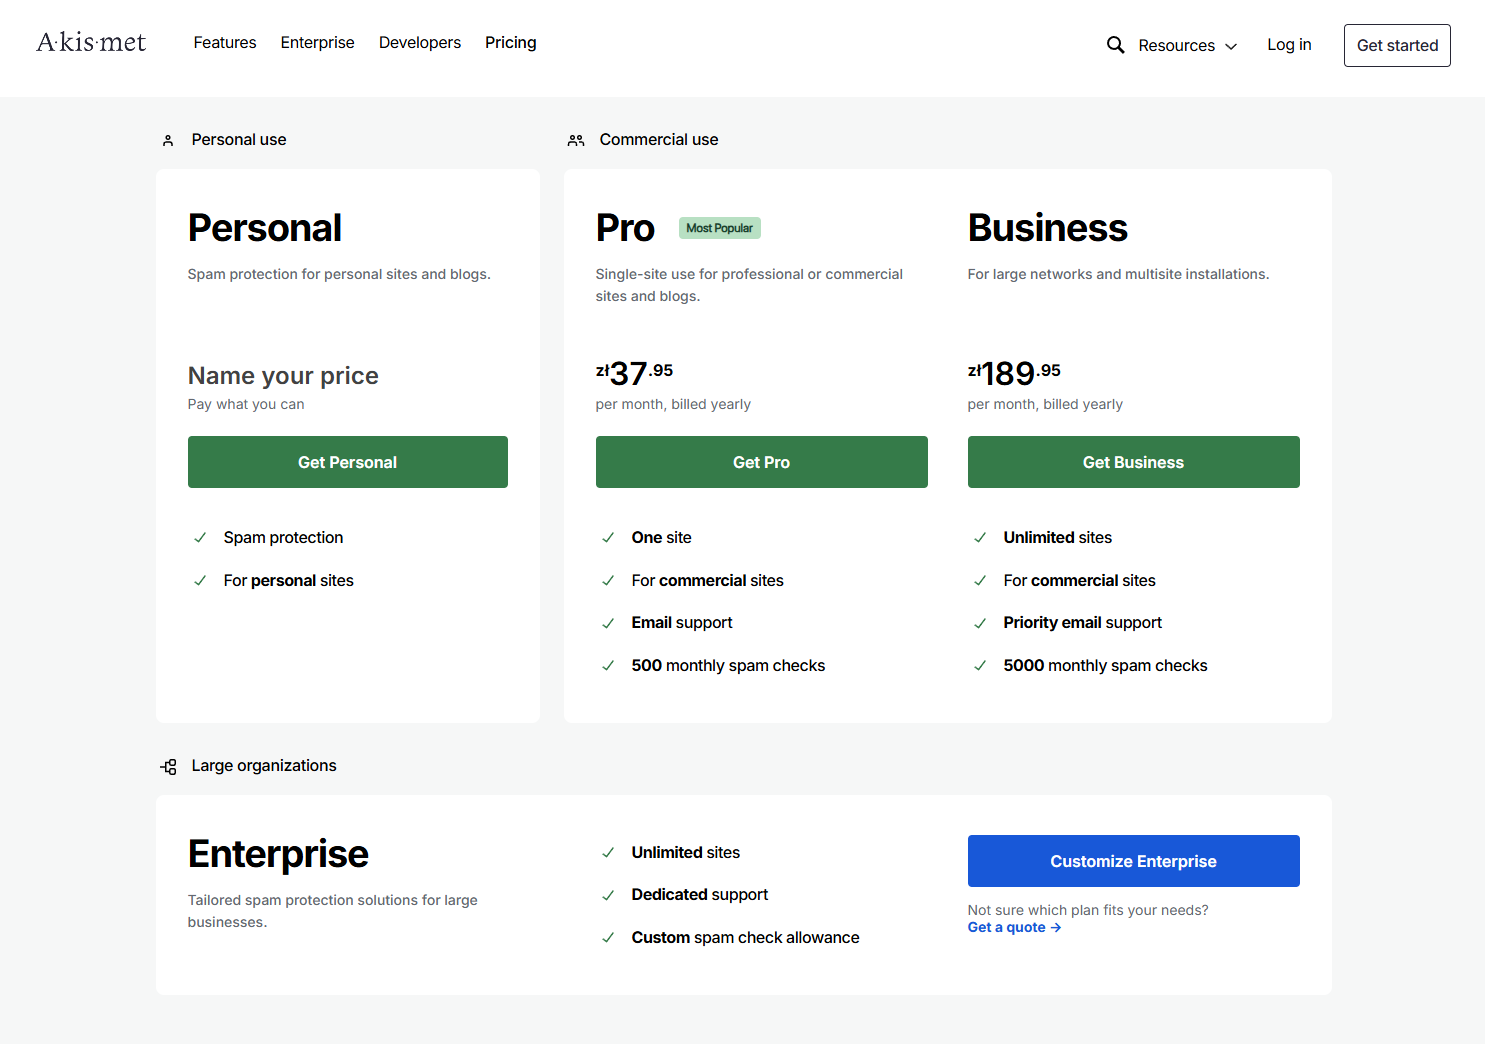
Depending on your needs, you can choose from 4 different pricing plans.
For a simple blog or any other small website with little traffic, the personal plan may be all you need. For businesses, professional sites, and multi-site setups with high traffic, consider the commercial plans.
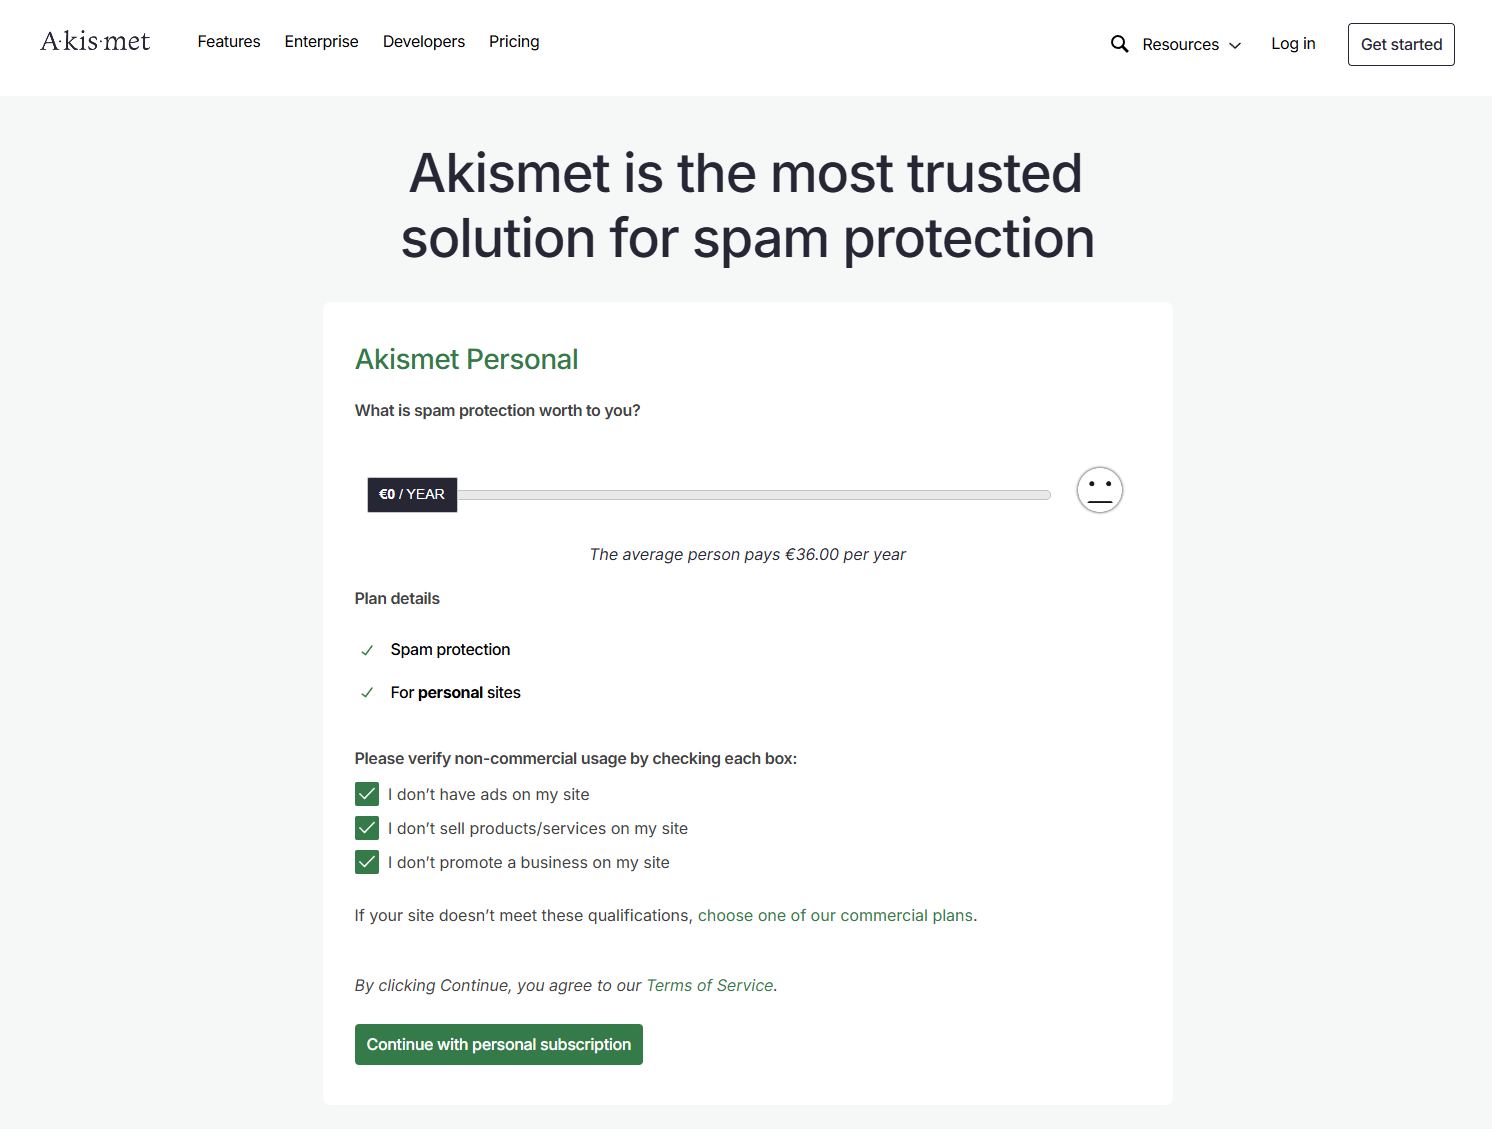
After completing the required information, click “Continue with personal use” and fill out the form to make the purchase. You will then receive a verification code via email. Input the code in the required field and select Continue.
After the email verification, you will receive another email containing your API key.
Step 3: Activate Akismet Anti-Spam Plugin With Your API Key
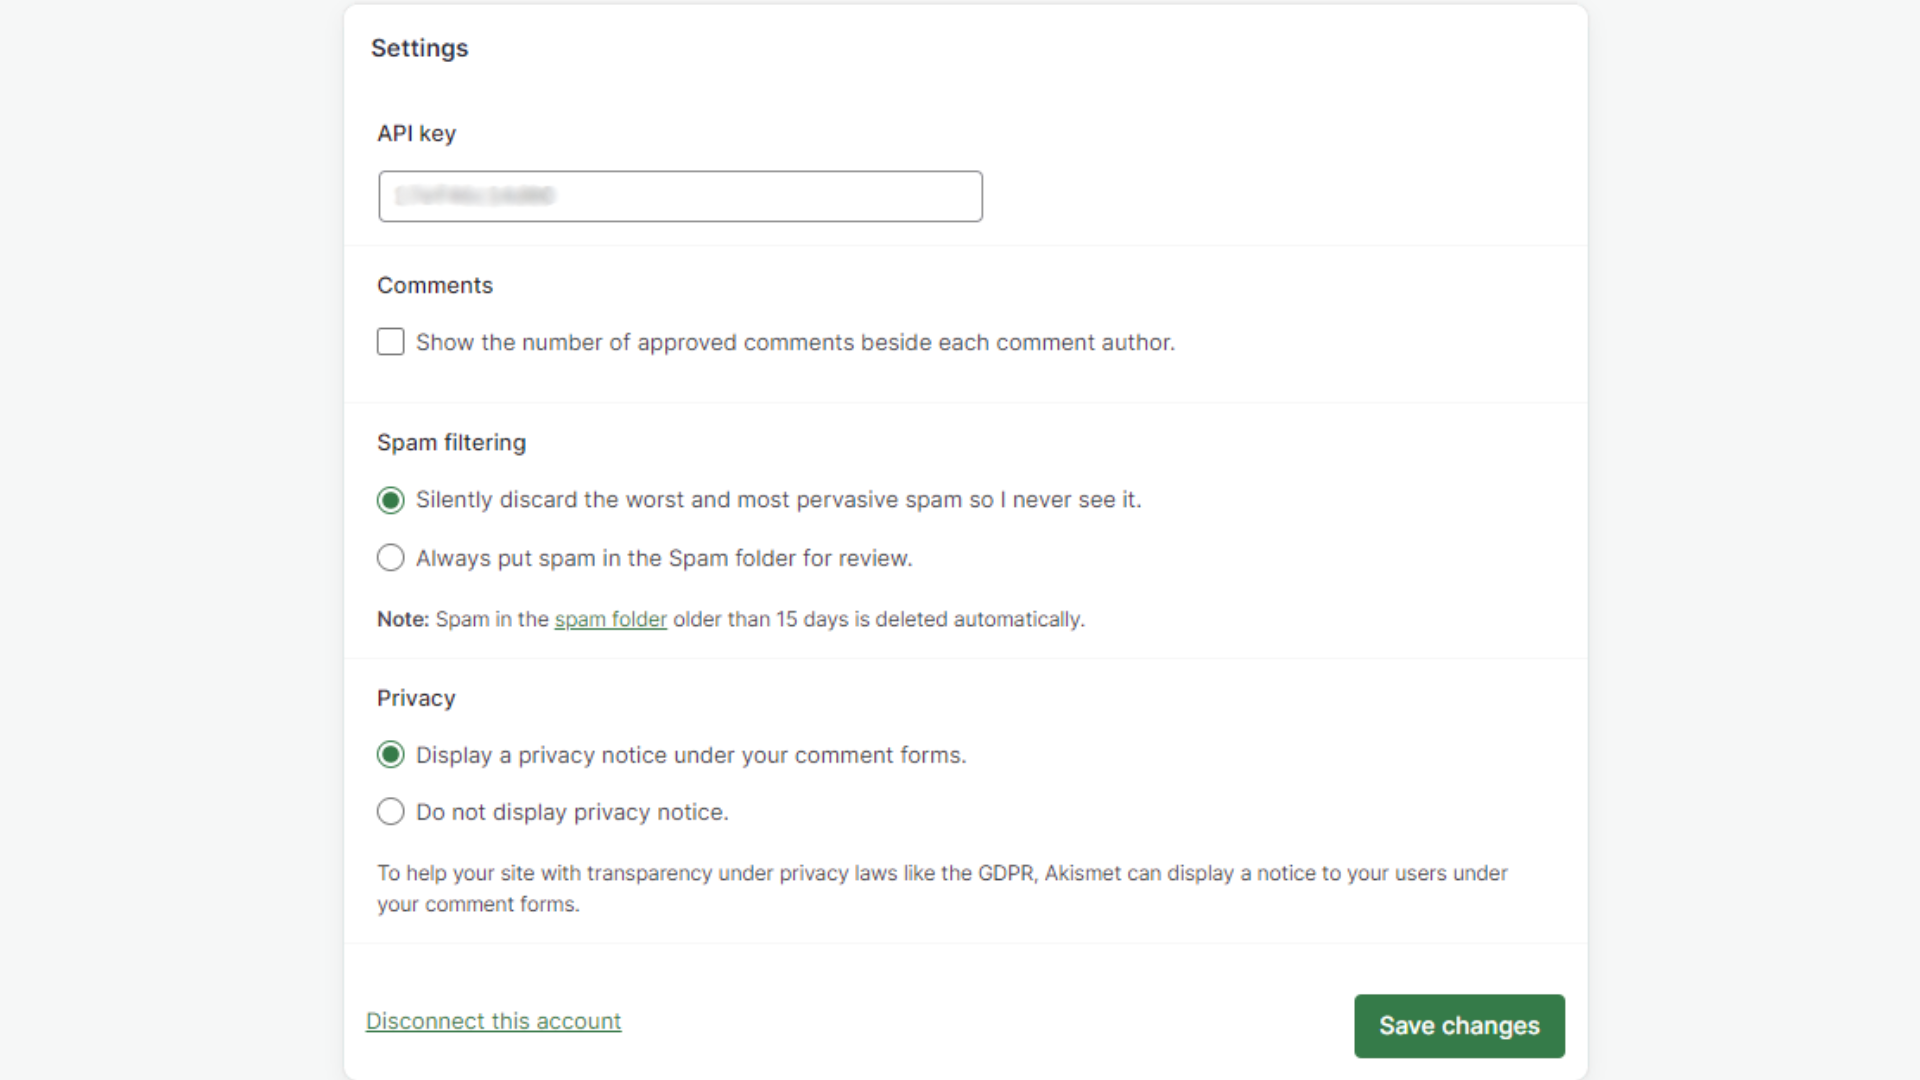
To connect your website with Akismet, return to your WordPress dashboard > Plugins > Akismet Anti-Spam > Settings

Paste your API Key into the designated field. Click “Connect with API Key”. Once verified, Akismet will start filtering spam automatically.
You can configure the plugin to automatically discard spam or move it to the Spam folder for your review.
Akismet Anti-Spam has been successfully integrated into your website and is now actively protecting it.
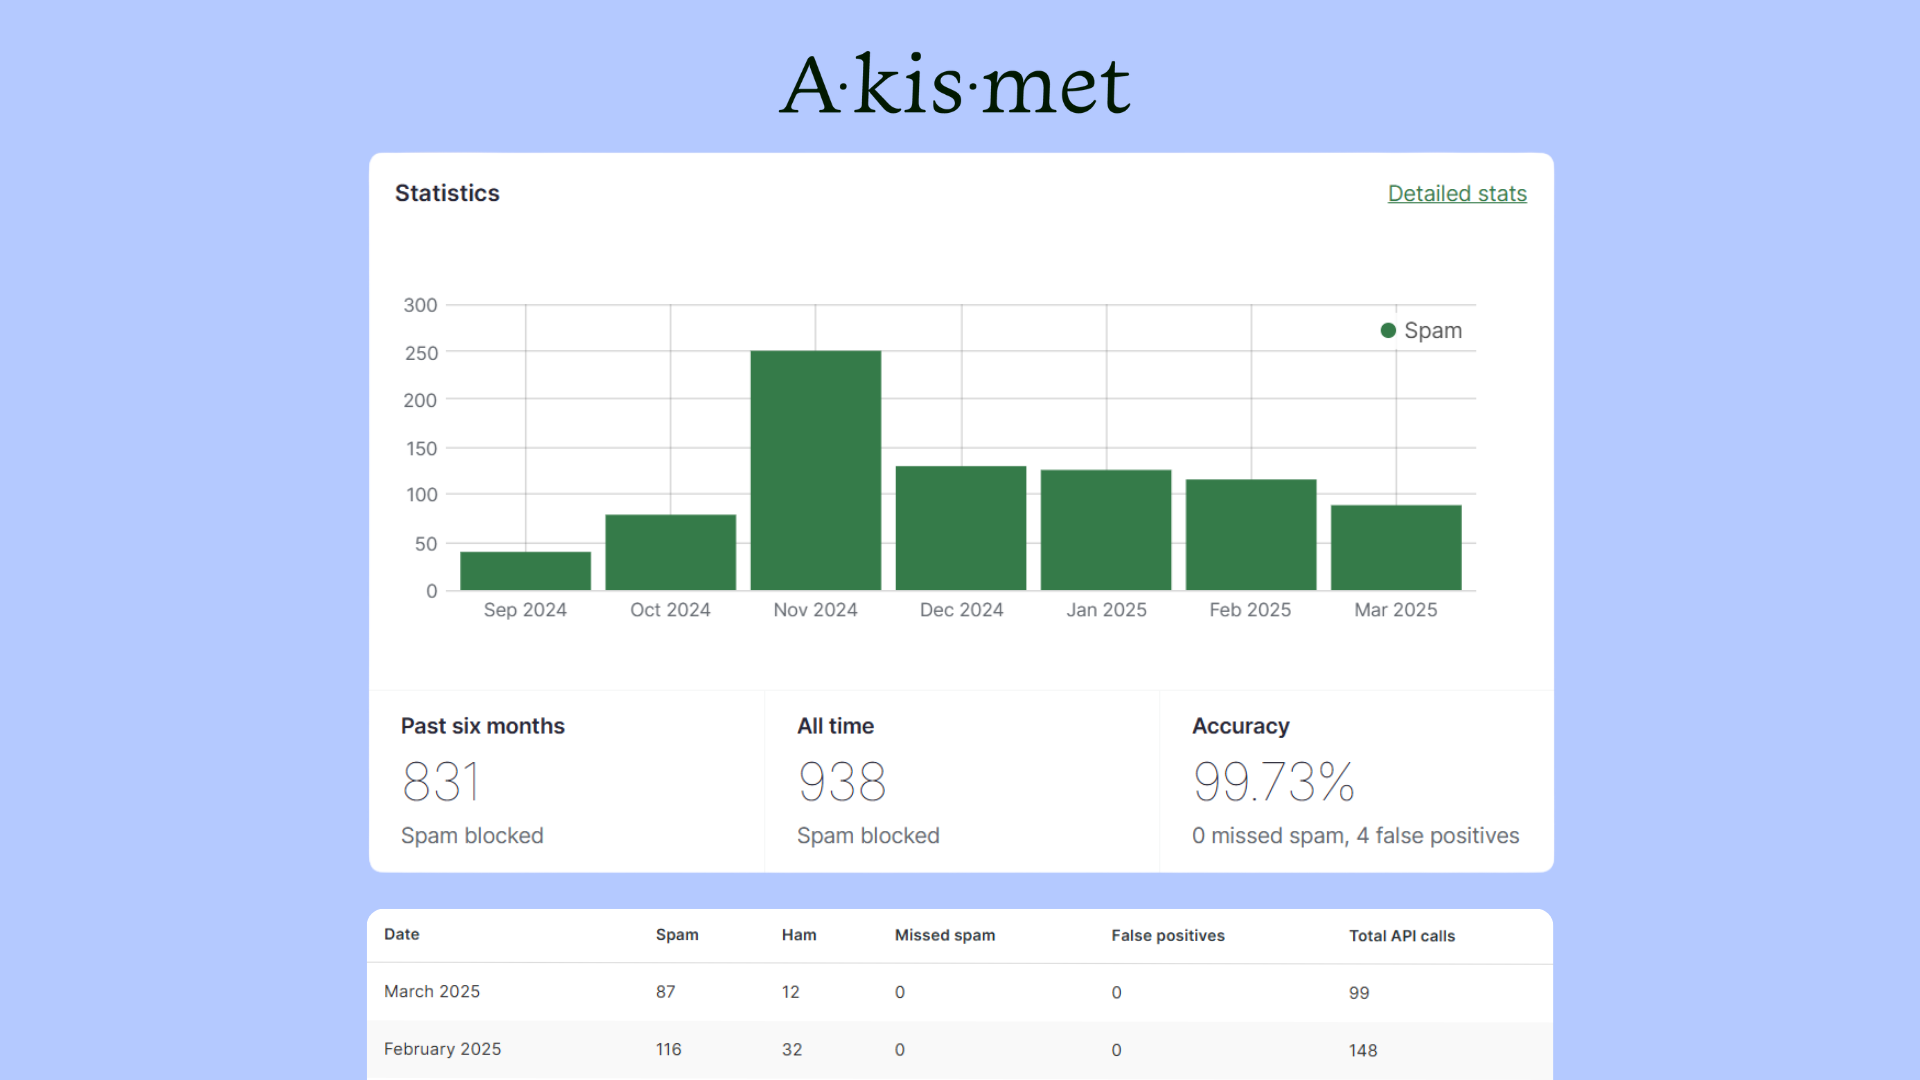
Viewing Your Akismet Stats Data
The Akismet dashboard shows users how many spam comments have been blocked, how many false positives and missed spam instances there have been, and the plugin’s overall accuracy. This information is displayed in visual graphs and tables that can be filtered by the last 6 months, 1 year, or all-time, and show monthly trends.
reCAPTCHA vs. Akismet: Which One Should You Use?
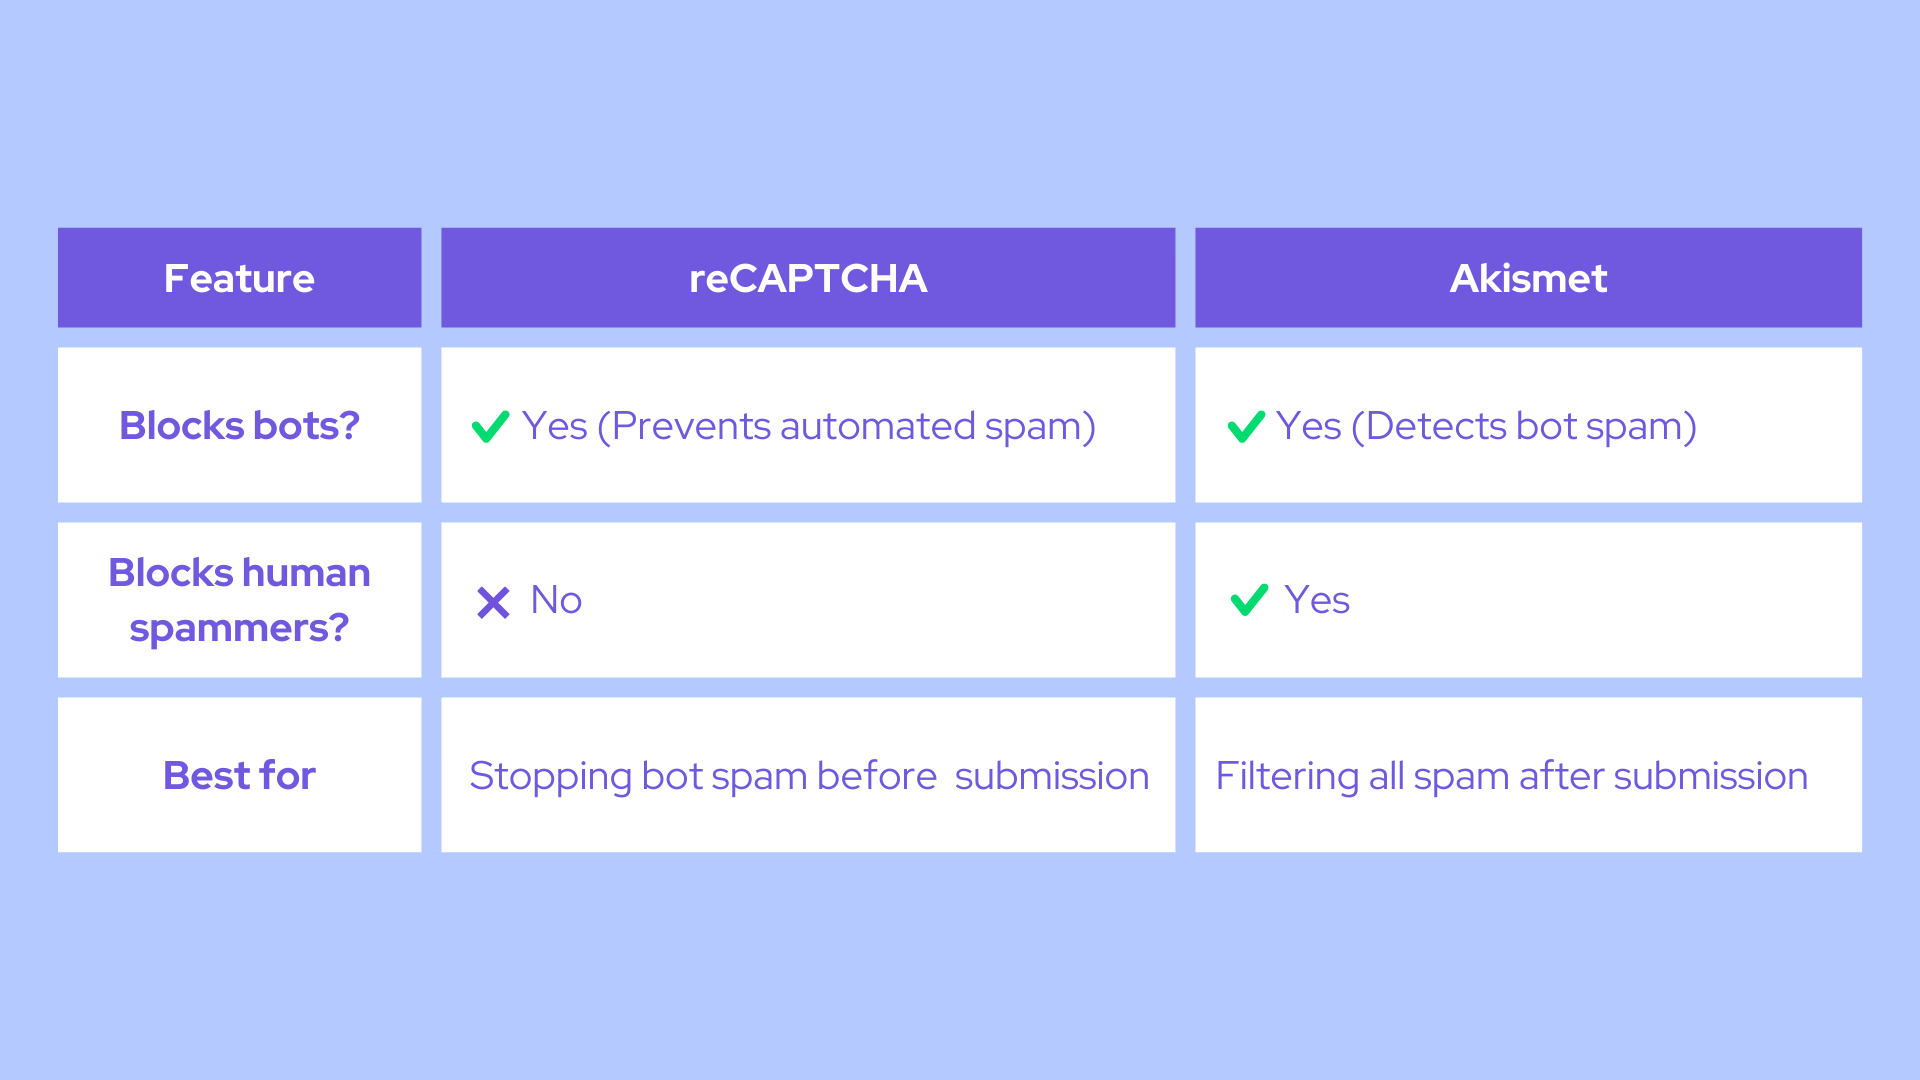
For maximum spam protection, use reCAPTCHA and Akismet together. reCAPTCHA acts as the first line of defense, blocking automated bots before they can submit spam.
Meanwhile, Akismet goes a step further by analyzing submitted comments and filtering out human-generated spam, such as promotional or phishing messages.
This two-layer approach ensures your WordPress site stays protected from bots and manual spammers, reducing moderation effort and keeping your comments section clean.
Final Thoughts
Keeping your WordPress site free from spam doesn’t have to be a headache. With the right mix of moderation settings, reCAPTCHA, and Akismet, you can stop spam before it even becomes a problem. Whether you disable comments altogether, limit links, or block spammy IPs, a few simple tweaks can make a huge difference.
No system is perfect, but by layering these defenses, you’ll keep your comment section clean and welcoming—without spending all your time deleting junk. So take a few minutes to set things up now, and enjoy a spam-free site for the long haul!
Key Takeaways:
- Disable comments where they aren’t needed to eliminate spam entirely
- Enable moderation to prevent spam from going live
- Limit links in comments to block spammy backlinks
- Block spammy IPs to stop repeated offenders
- Use reCAPTCHA to prevent bot spam before submission
- Set up Akismet Anti-Spam Plugin to filter both bot and human spam automatically
- Combine reCAPTCHA + Akismet Anti-Spam Plugin for the best protection


