In the last Opt-in Builder Update, we introduced a new exciting feature set to transform the way membership websites engage with their audience. Designed with website owners, bloggers, and writers in mind, this new functionality enriches the user experience by introducing a dynamic way to access exclusive content.
Introducing the Credit System
The Credit System feature is perfect for membership websites as it aims to offer subscribers more flexibility. It works on a simple basis: users acquire credits through membership plans. The credits can, therefore, be used to unlock articles or any content on the website.
Free News Demo from Newspaper Theme
Implementing the Credit System
Implementing the Credit System is straightforward, thanks to the tagDiv opt-in builder. Here’s a quick guide:
Credits Settings: Initiate by configuring the default consumption credit and managing the default credit for posts or CPTs through the Opt-in builder plugin’s settings.
Credit Plan Settings: Create new plans within the Opt-In Builder Plans section, specifying the number of credits associated with each plan. These plans, which are purchasable through a one-time payment, are crucial for defining how users acquire credits.
Credit Locker Settings: Establish credit lockers to control content access. These lockers are customizable, allowing for the display of credit-related messages and styled according to preference.
Credit Post Settings: When editing an article or CPT, select the credit locker created to lock content behind a credit paywall, thus regulating access based on the user’s credit balance.
Credit Management Settings: Finally, users can track their credit balances and content purchases through a dedicated dashboard, enhancing the subscription experience by providing transparency and control over credit usage.
Free News Demo from Newspaper Theme
Credit Management
We’ve designed the credit system to be user-friendly for both admins and subscribers. You are free to customize your dashboard, arrange it, style it, and set it up as you want.
Check out the documentation for a more detailed tutorial. If you need help or are looking for a specific feature, contact us, and we’ll get back to you with personalized solutions.
The reason why your news articles rank first on news websites is because of SEO. And the reason some articles, into which you poured all your hard work, patience, and journalism skills, have not been read by many people is still because of SEO.
Nowadays, it’s not enough that you can accurately and objectively craft a sound news report. To ensure that more people can discover and read your articles, you must stay updated on how algorithms work and how to employ effective SEO practices. This is how you thrive in these modern times.
Understanding How SEO Works
Are you aware how important it is to optimize the accompanying photos of your report? That VPNs can actually impact how your content is accessed? And that, on top of content quality, user experience, and website structure, SEO also shapes it?
These pieces of information might not always make the headline, but they can definitely help your news website reach more people. Now more than ever, it becomes essential for credible journalists to deliver the latest reports before unreliable sources distort information and fabricate stories, rage bait, and sensationalize issues to mislead the audience online.
This becomes even more critical given the growing security concerns surrounding the internet. People need to be consistently reminded of the importance of reliable news sources and how to go about things.
To expose diverse perspectives, news websites such as Google News, Yahoo News, and MSN use algorithms to identify and select stories that are:
relevant
prominent
fresh
newsworthy
tailored to location and language
And to protect people from malicious content, hacked websites or those that have been exposed to malware and data breaches are often penalized or lose ranking in search engines. Obviously, this is something you don’t want to happen to your news website, right?
That’s why, apart from optimizing keywords and securing backlinks, establishing cybersecurity measures on your news website is very important. With cases of cyberattacks continuing to escalate this 2025, journalists and media professionals need to prioritize digital security to protect themselves, their sources and references, and the work that they do. This includes having a strong and unique password, a good hosting provider, enabling MFA, and using the best VPN for Windows.
Because of its software compatibility, ease of use, and cost-effectiveness, around 72% of people around the world, including news reporters, use Windows. However, due to its widespread use, it has also become a favorite target for ransomware, data leaks, phishing, and various other malicious tactics.
VPNs can help news reporters encrypt online activities, protect confidential data, and secure access for browsing and research without the risk of censorship or tracking. If you’re interested in learning more, you may check the in-depth evaluation conducted by the Cybernews research team on the best VPN for Windows.
SEO for News Websites: How to Rank Higher in 2025
So, how can you help your news articles, journals, blogs, and other website content become more visible to people? Well, if you want to enhance the impact of your work, the research, the investigation, and the dedication poured into your report, here are the effective SEO practices to get your news distributed to a wider audience, help your website gain more traffic, and make a greater impact on society.
Perform Location-Specific Searches
What are the latest updates in your community? In your local? Are important local events being covered by your news channel? Are you aware of what people in your area are searching for?
Location-based SEO is very important in reaching out to local audiences, especially when delivering news. This helps narrow down the focus of the report, targeted to the people who find it useful and relevant. To improve your local SEO, you can focus on:
creating news based on local events
incorporating keywords related to the place
getting backlinks from local websites
using VPN to gain valuable insights into location-specific search trends
Write SEO-Friendly Headlines
The average attention span of people these days lasts only about 8.25 seconds. That’s the approximate amount of time you have to convince people to read your news article. That’s why headlines that can grab attention are so important.
Back then, headlines were concise and designed to fit limited spaces. But in the digital space, you have to optimize your content and use main keywords in your headlines to give a summary of the news, entice clicks, and improve search engine ranking. Some of the specific things to note when crafting an SEO-friendly headline include:
targeting a keyword relevant to the news topic
sticking to 50-60 characters or 6-10 words
adding CTAs, such as “Check Out,” “Find Out,” “Look at This,” to encourage engagement
understanding the audience and creating titles that evoke feelings or curiosity
using attention-grabbing words but not resorting to clickbait
Insert Internal Links
What do you expect people to do once they’re done reading the news report? Would you want them to leave the website, or would you rather guide and help them discover other related stories?
The answer is obvious. This is the reason why internal linking is so important. These links help convince readers to stay longer on your website, explore more content, and engage with additional news stories. By doing so, Google gets to better understand the structure of the news portal and improve its visibility in search results. Other benefits of internal linking include:
enhanced user experience
boosted engagement metrics and rankings
improved search engine crawling and indexing
increased conversion
Technical SEO
Aside from ensuring the quality of the news articles published, making sure that the website is easy to navigate can definitely help improve the reader experience and increase engagement.
For a worthwhile exploration of the news website, you can:
optimize images used in news articles for faster loading times
enhance loading speed to minimize delays (remember the attention span of your readers!)
implement SSL certificates to strengthen cybersecurity and protect user data
improve overall website structure for better navigation and search engine indexing
Final Thoughts
Timely and relevant news deserves to be told and reach a wider audience. It takes a lot of patience, time, and resources before a comprehensive news article gets published. Therefore, it is essential to apply the abovementioned practices to boost ranking on news websites and make it more visible to people.
At the end of the day, the goal is to raise awareness and keep the public informed about current events and relevant issues. The question is: What SEO strategies have you implemented so far to bring these stories directly to people?
WordPress sites are a prime target for spammers due to their widespread use.
Every day, thousands of websites are flooded with spam comments containing suspicious links, fake promotions, and irrelevant messages. These spam comments can cause problems like SEO penalties, performance issues, and security risks. If left unchecked, spam can clutter your comment section, make your site look unprofessional, and reduce user trust.
If search engines detect excessive spam, they may lower your site’s ranking or, in extreme cases, blacklist it.
Additionally, visitors who see spam-filled comment sections are less likely to trust your content.
Fortunately, with the right tools and strategies, you can eliminate comment spam and keep your WordPress site clean and secure.
In this guide, we’ll cover why spam happens, how to stop spam comments on WordPress, and the best tools—including GooglereCAPTCHA and Akismet—to keep your site spam-free.
Why Does Spam Happen?
Spammers target high-traffic websites to promote their own agendas. Some try to increase traffic to low-quality sites, while others use comment sections to distribute phishing links or malware.
These tactics rely on volume. Spammers flood multiple websites with comments, hoping that even a small number of users will click on their links. In some cases, spammers use automated bots to test site vulnerabilities, looking for weaknesses they can exploit in future attacks.
Beyond security risks, spam also affects user experience and site credibility. A comment section filled with irrelevant or promotional content makes a website look unprofessional and unreliable.
Additionally, search engines may penalize sites that allow excessive spam, lowering their visibility in search results.
How to Stop Comment Spam on WordPress
Disable Comments Where You Don’t Need Them
Not every site needs a comment section. If your site is a business page, portfolio, or landing page, turning off comments completely can save you time and prevent spam.
To disable comments in WordPress:
Go to Settings > Discussion
Uncheck “Allow people to submit comments on new posts”
Click Save Changes
No comments = No spam
However, if you’re running a blog, news website, or an online magazine where you consistently publish content, a comment section can be valuable for user engagement. In this case, it’s better to enable comment moderation instead of disabling comments entirely.
If you still prefer to allow users to leave comments, WordPress offers various moderation options to help you control spam and maintain a high-quality conversation, covered below. These options ensure that spam does not flood your site while keeping real discussions alive.
Enable Comment Moderation
If you still want comments, manual comment moderation ensures spam doesn’t go live.
To enable comment moderation follow these steps:
Go to Settings > Discussion
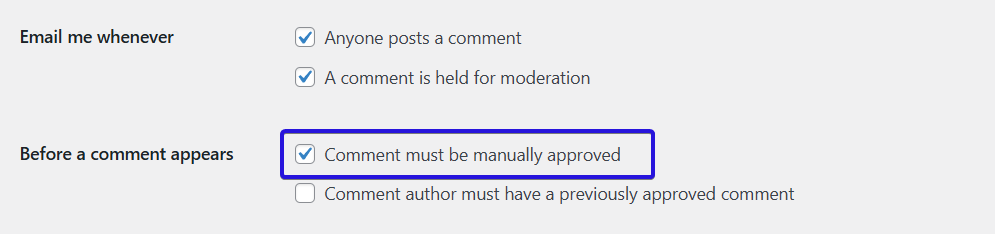
Under Before a comment appears, check “Comment must be manually approved”
Save changes
Now, no comment will go live without your approval.
Another available option is to allow users who have previously had a comment approved to post new comments without requiring manual approval again. To enable this, select the “Comment author must have a previously approved comment” checkbox.
Don’t forget to save the changes.
Limit Links in Comments
Spam comments often contain multiple hyperlinks. You can automatically hold these comments for moderation.
How to limit links in comments:
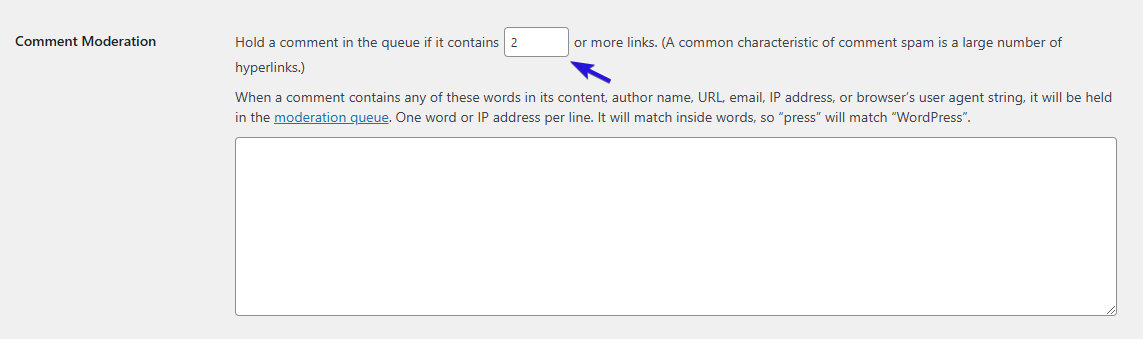
Go to Settings > Discussion > Comment Moderation
Set “Hold a comment in the queue if it contains X or more links.” (Here, we recommend going with two or more)
Click Save changes
This will prevent spammy backlinks from appearing in your comments.
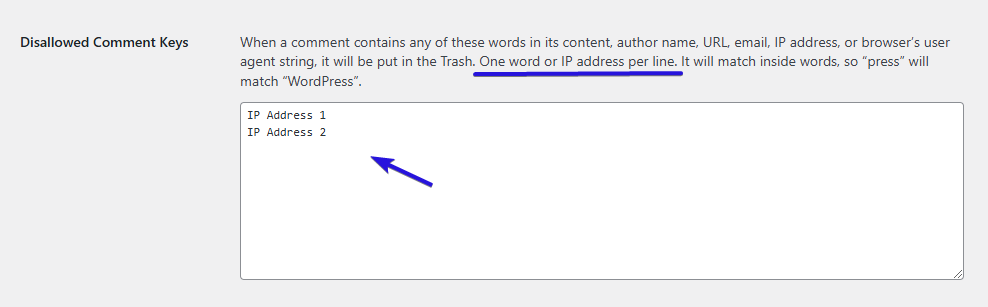
Block Spammy IP Addresses
If you notice repeated spam from the same IP addresses, you can block them permanently.
To block IPs in WordPress :
Go to Settings > Discussion
Scroll to Disallowed Comment Keys
Add the spammy IP addresses (found under each spam comment)
Save changes
This method will prevent users with these IP addresses from leaving comments but will still allow them to visit your site.
To enhance your WordPress spam protection, you need automated tools that stop spam before it even reaches your moderation queue. This is where reCAPTCHA and Akismet come in—working together to keep your comment section clean and spam-free with minimal effort.
Use reCAPTCHA Plugin to Block Bots
Most spam comments come from automated bots rather than real users. To combat this, reCAPTCHA adds an extra verification step to ensure that only humans can submit comments on your WordPress site.
Unlike traditional CAPTCHA (which asks users to solve puzzles), Google reCAPTCHA is more user-friendly. It uses behavioral analysis to detect bots and usually only requires users to tick a box (“I’m not a robot”).
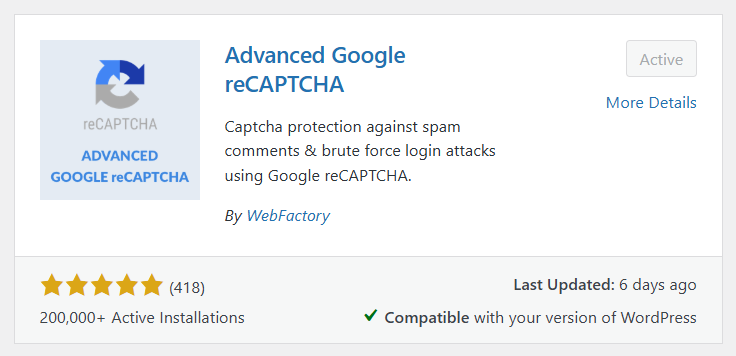
Step 1: Install the Advanced Google reCAPTCHA Plugin
Log in to your WordPress dashboard
Go to Plugins > Add New
Search for Advanced Google reCAPTCHA
Click Install Now, then Activate the plugin
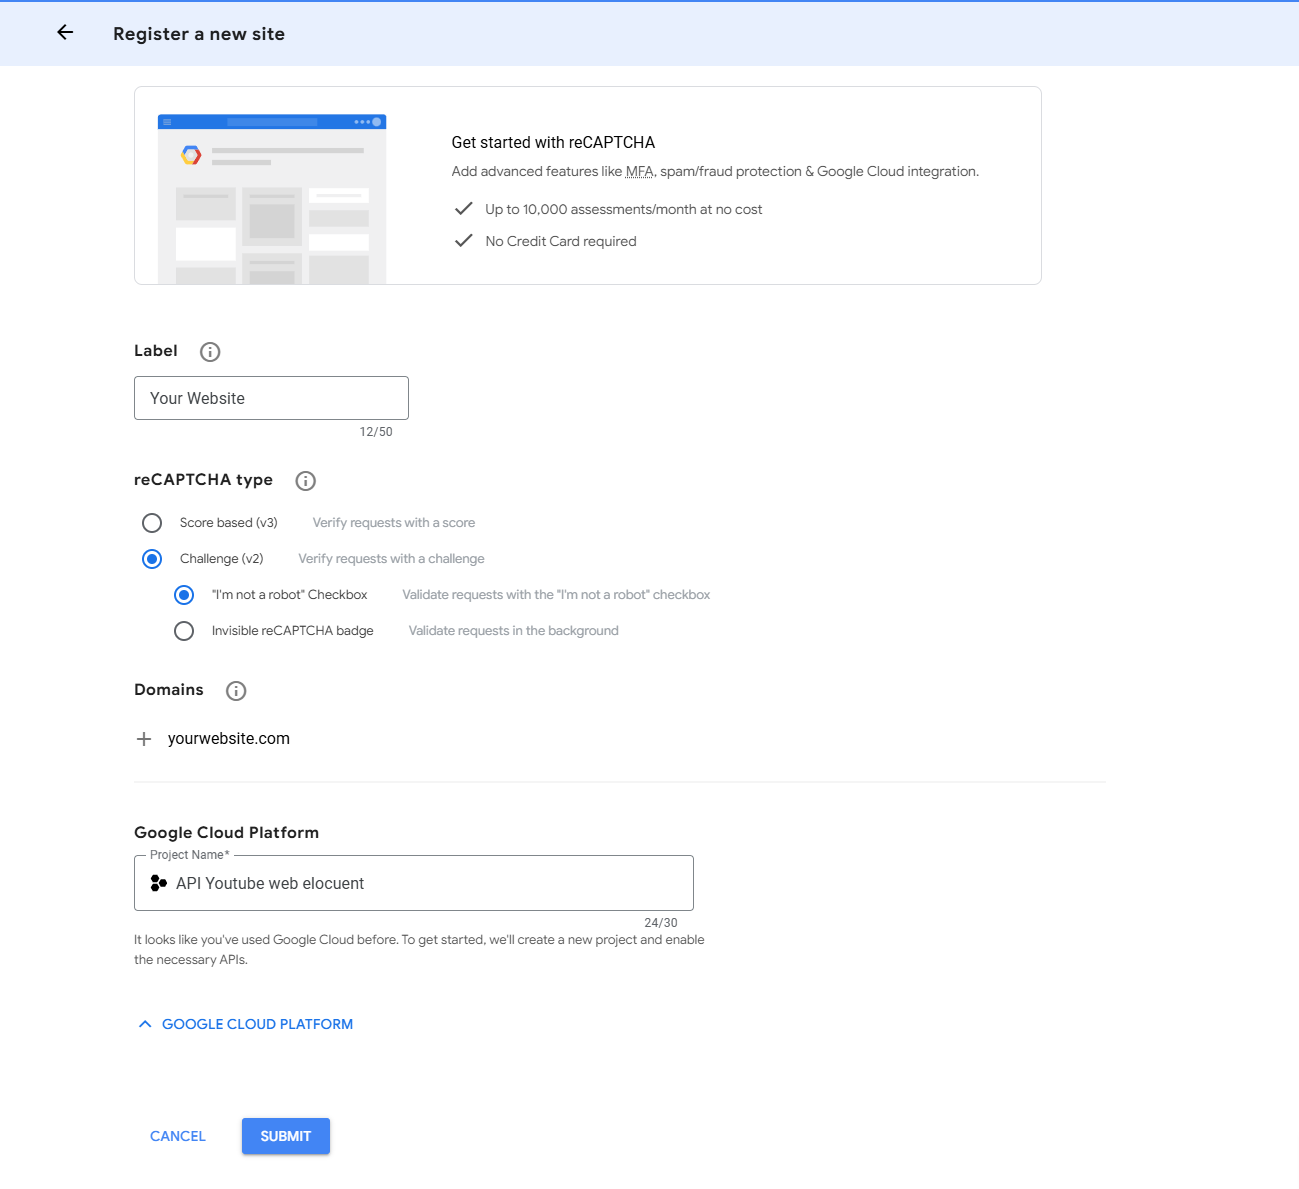
Step 2: Get Google reCAPTCHA API Keys
To connect reCAPTCHA to your site, you need API keys from Google.
Label: Enter your website name for easy reference;
reCAPTCHA Type: For this example, we will choose reCAPTCHA v2 (“I’m not a robot” Checkbox) to demonstrate the setup process, but we highly recommend using reCAPTCHA v3. It operates silently in the background, providing better usability without disrupting visitors while still offering strong spam protection;
Domains: Enter your website domain (e.g., example.com);
Owners: Your Google email is auto-filled, but you can add others;
Complete all the required information, then “Submit”
Google will generate a Site Key and Secret Key. Copy these keys
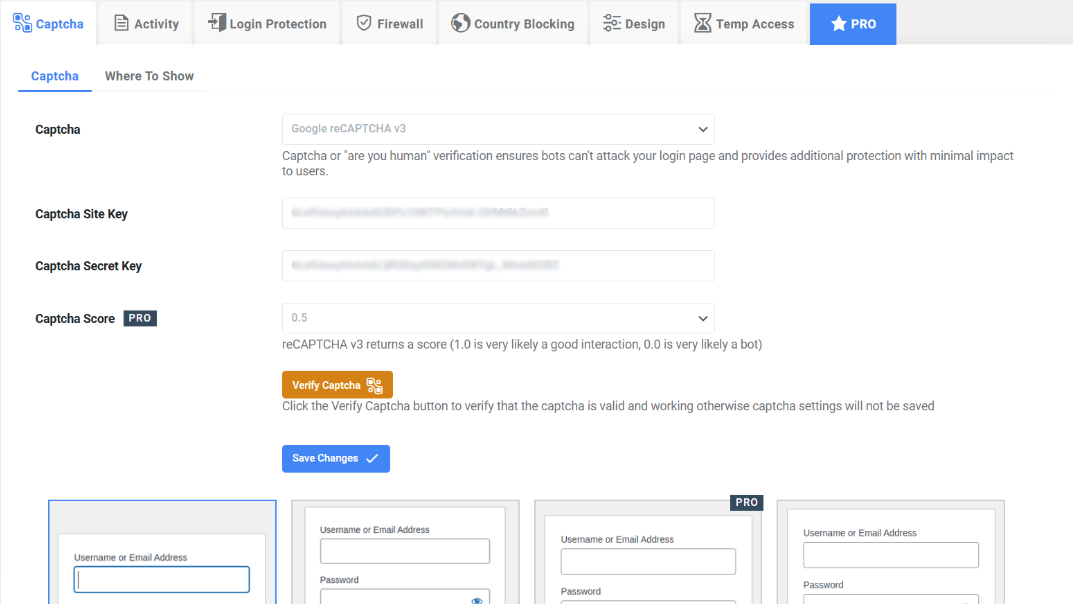
Step 3: Configure reCAPTCHA in WordPress
Go back to your WordPress dashboard
Navigate to Settings > Advanced Google reCAPTCHA
Enter the Captcha type chosen at the previous step in the Captcha bar, then paste the Site Key and Secret Key into the respective dedicated fields
Select the place where you want to display reCAPTCHA
Under Enable reCAPTCHA for, check “Comment Form”
Click on “Verify Captcha”
Save changes
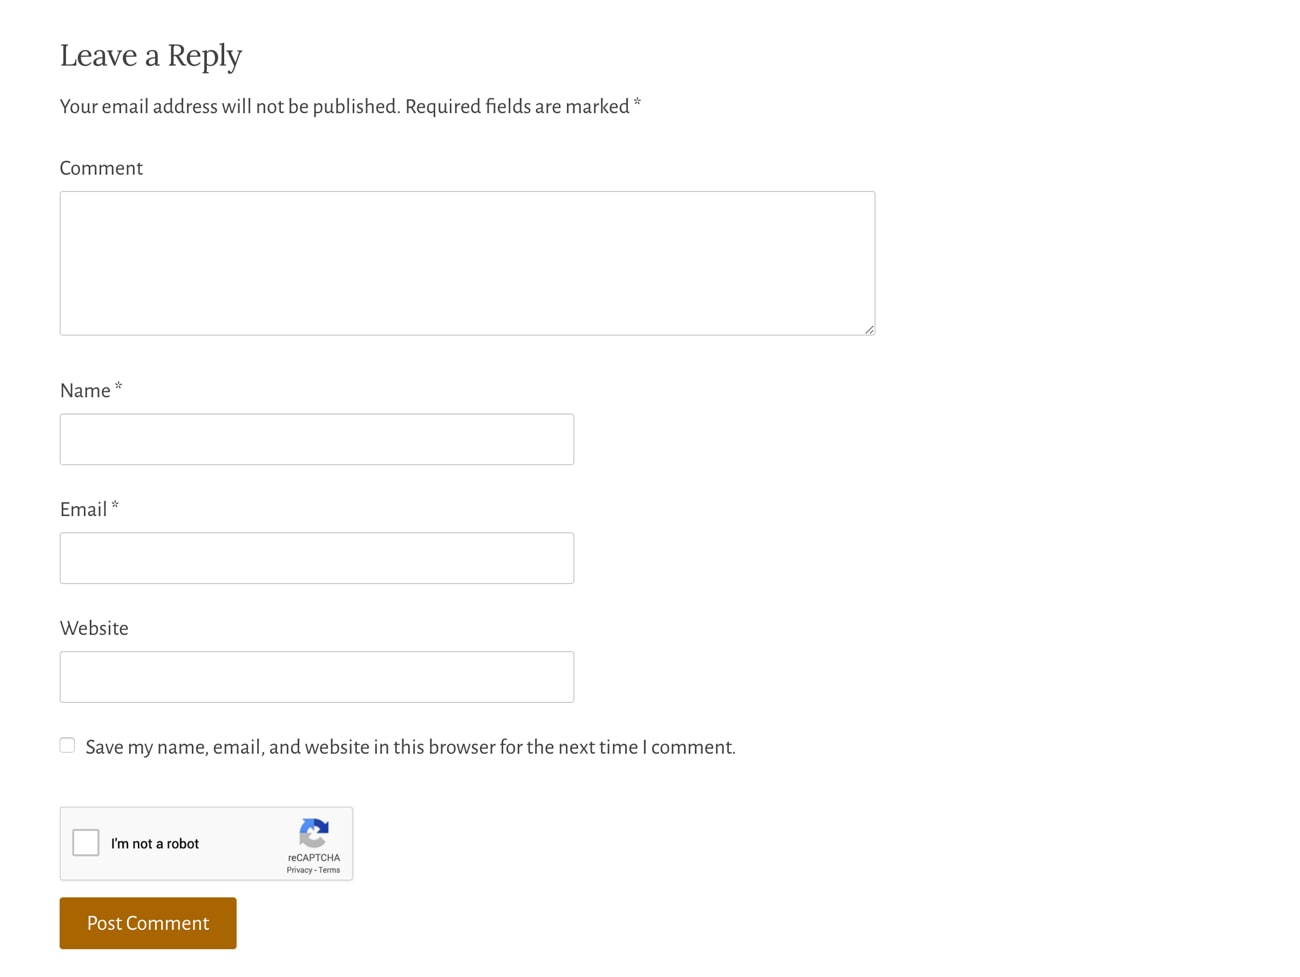
Step 4: Test reCAPTCHA on Your Comment Form
Open any blog post and scroll down to the comment section.
You should now see the “I’m not a robot” checkbox.
Try submitting a comment to confirm it works.
Once activated, bots will struggle to bypass your comment form, significantly reducing spam while keeping the process simple for genuine users.
If the reCAPTCHA is not showing, clear your website cache (if you’re using a caching plugin) and ensure your theme supports comment form modifications.
How To Set Up The Akismet Anti-Spam Plugin
Step 1: Install and Activate the Akismet Anti-Spam Plugin
Log in to your WordPress dashboard
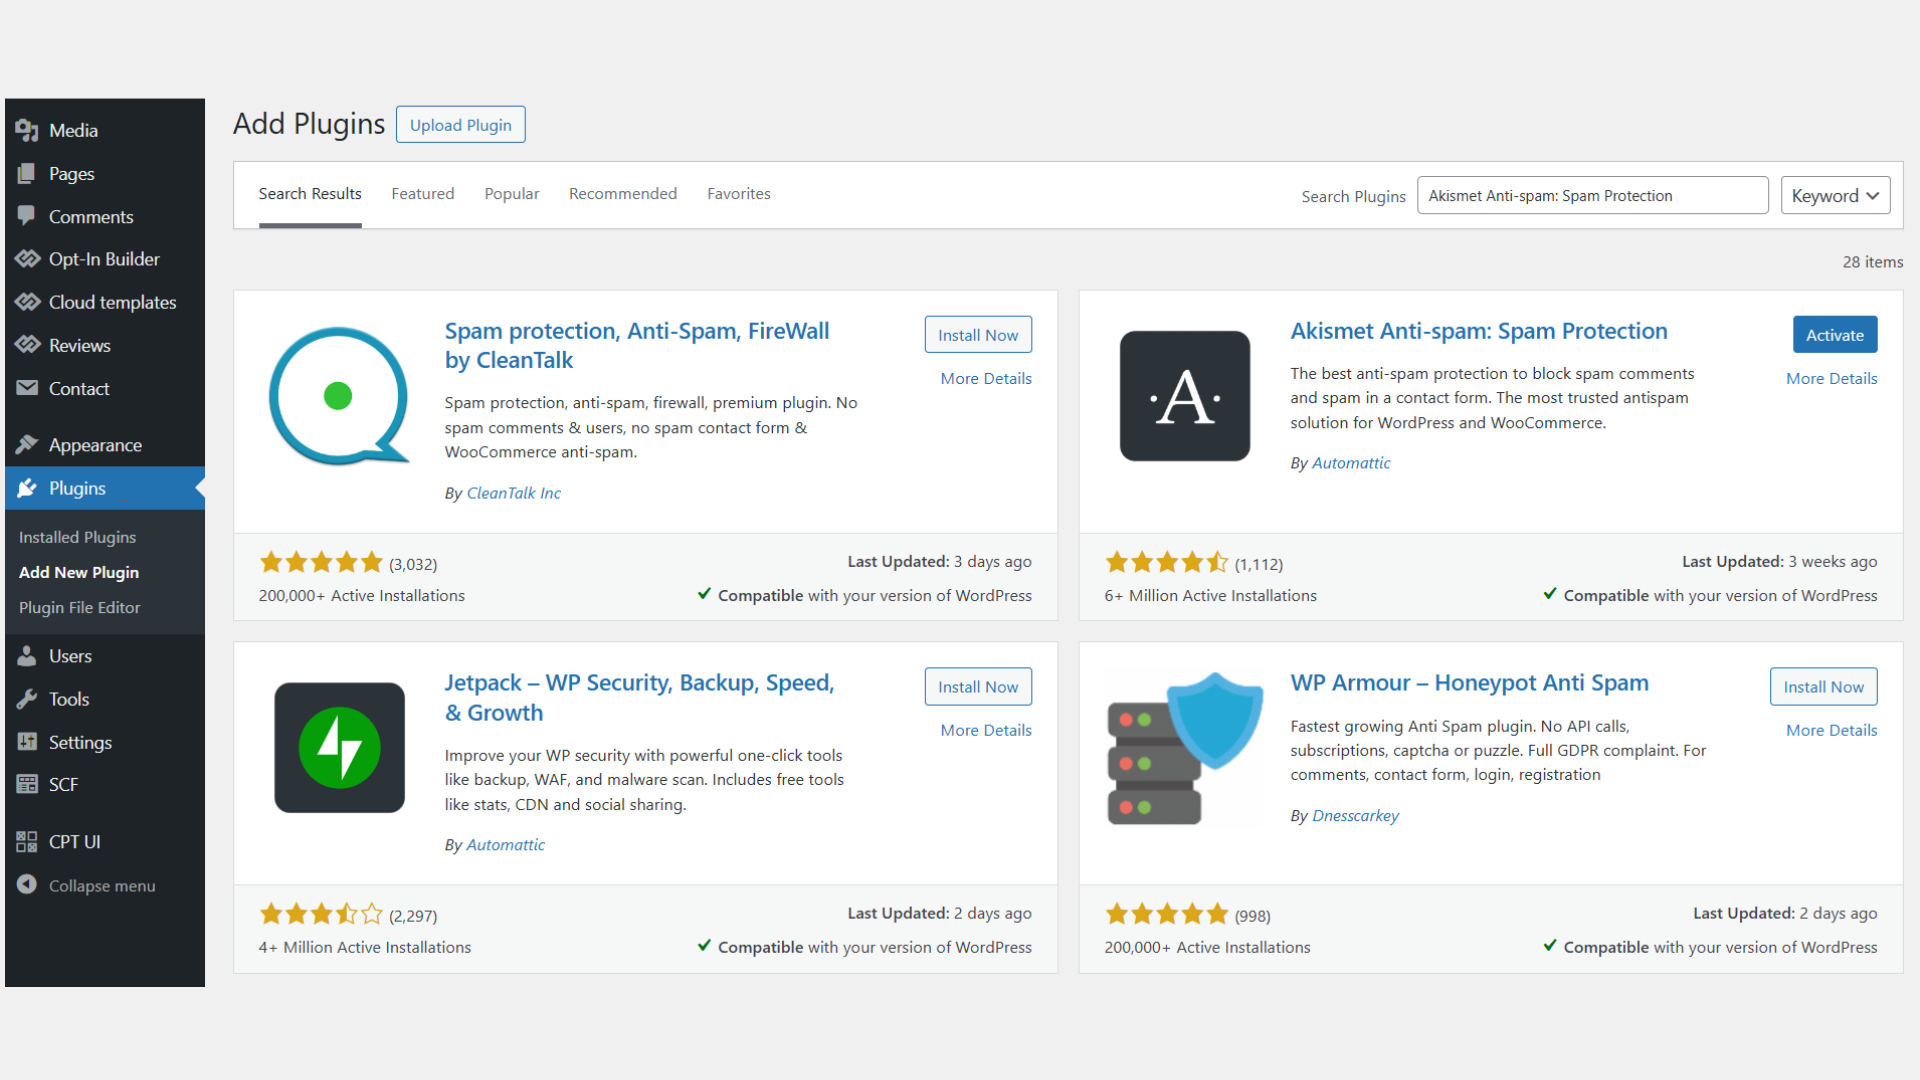
Go to Plugins > Add New
In the search bar, type “Akismet Anti-Spam: Spam Protection”
Click Install Now, then Activate
Once activated, you will see a welcome message asking you to enter your API key as below.
Keep this window open and follow the steps provided below.
Step 2: Get an Akismet API Key
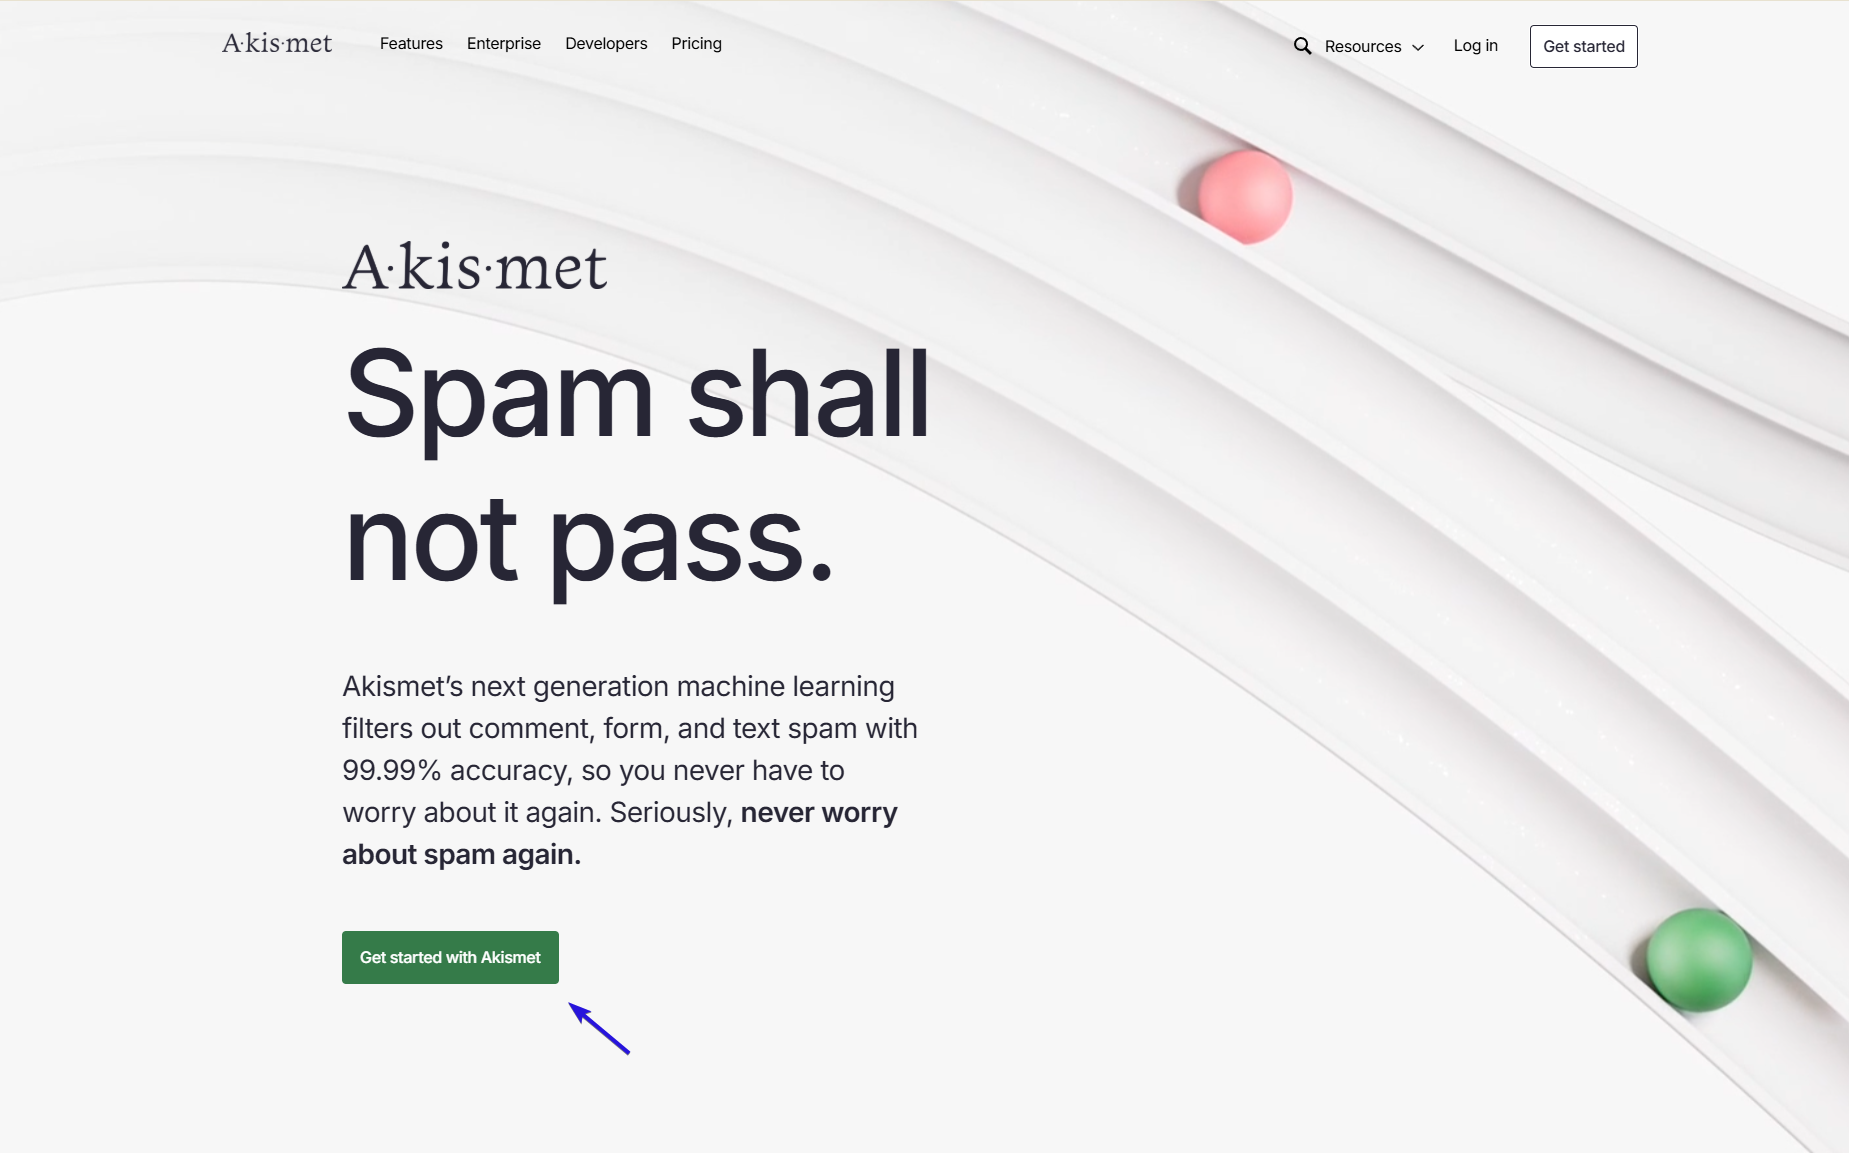
To get your API Key, head over to Akismet’s homepage.
Click on the “Get started with Akismet” button.
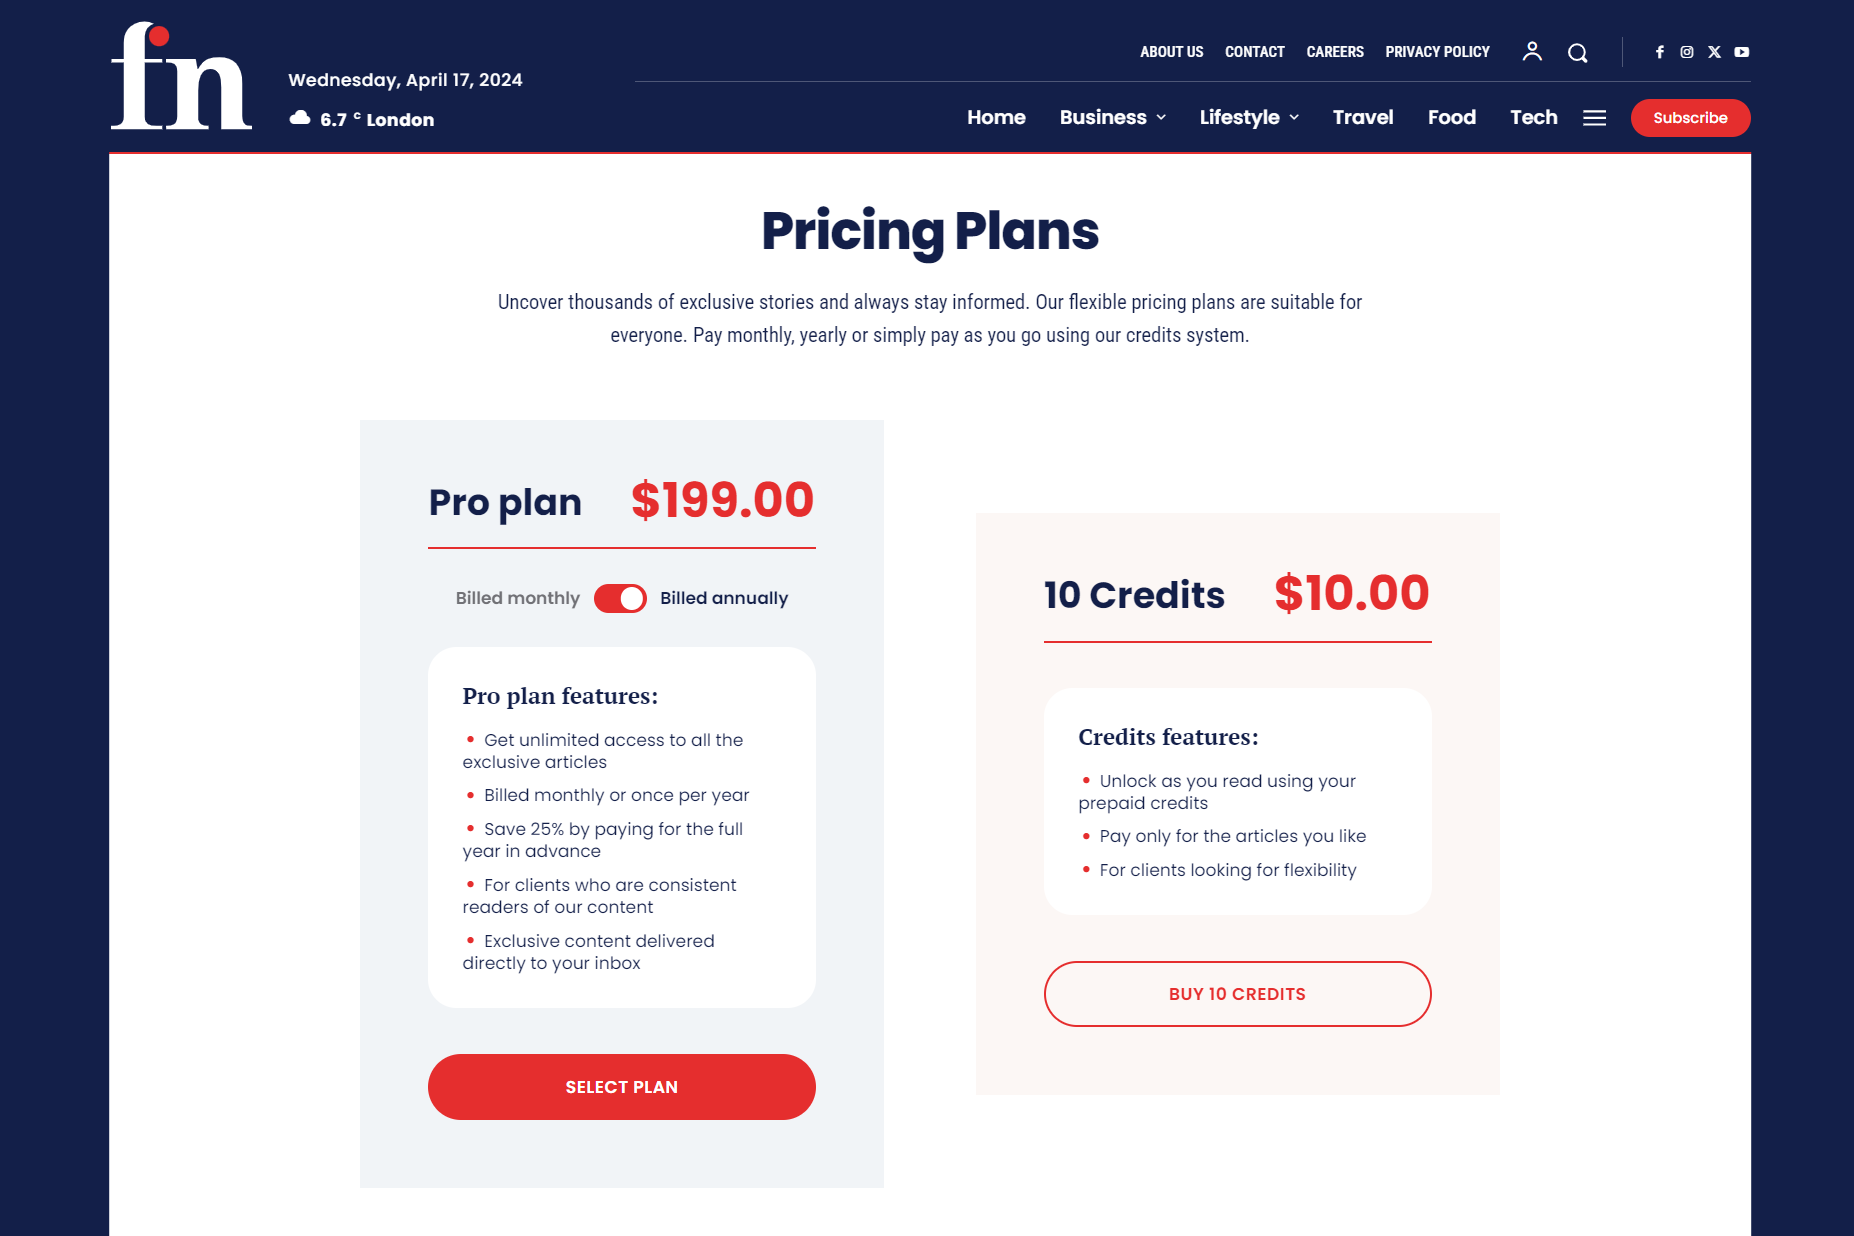
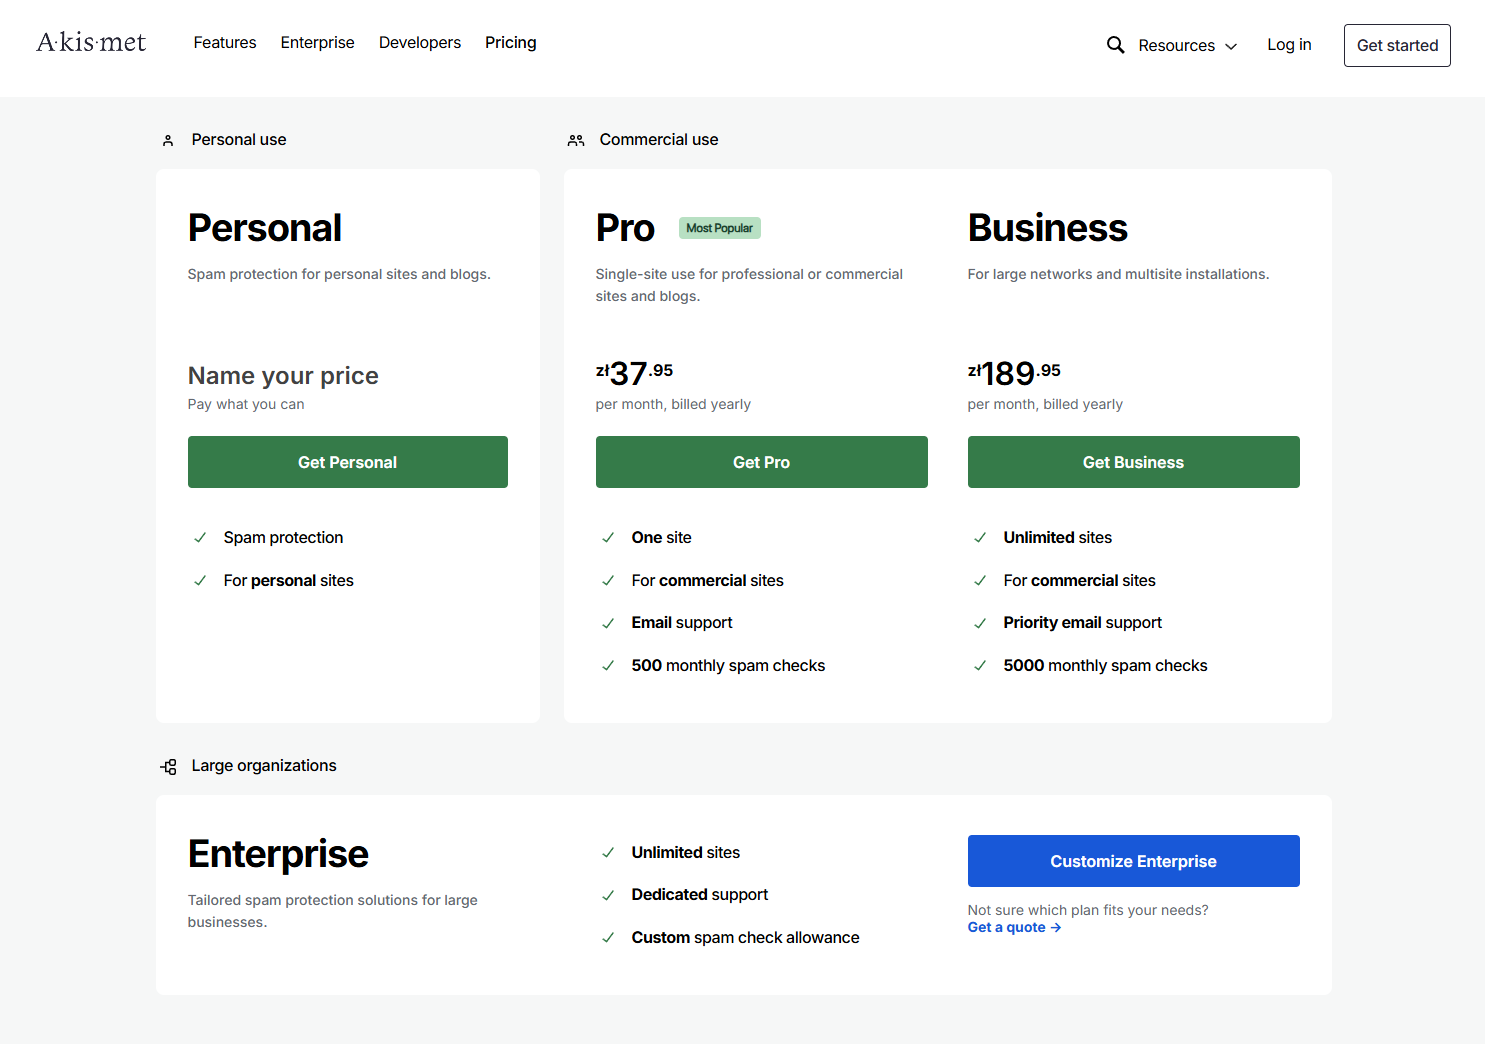
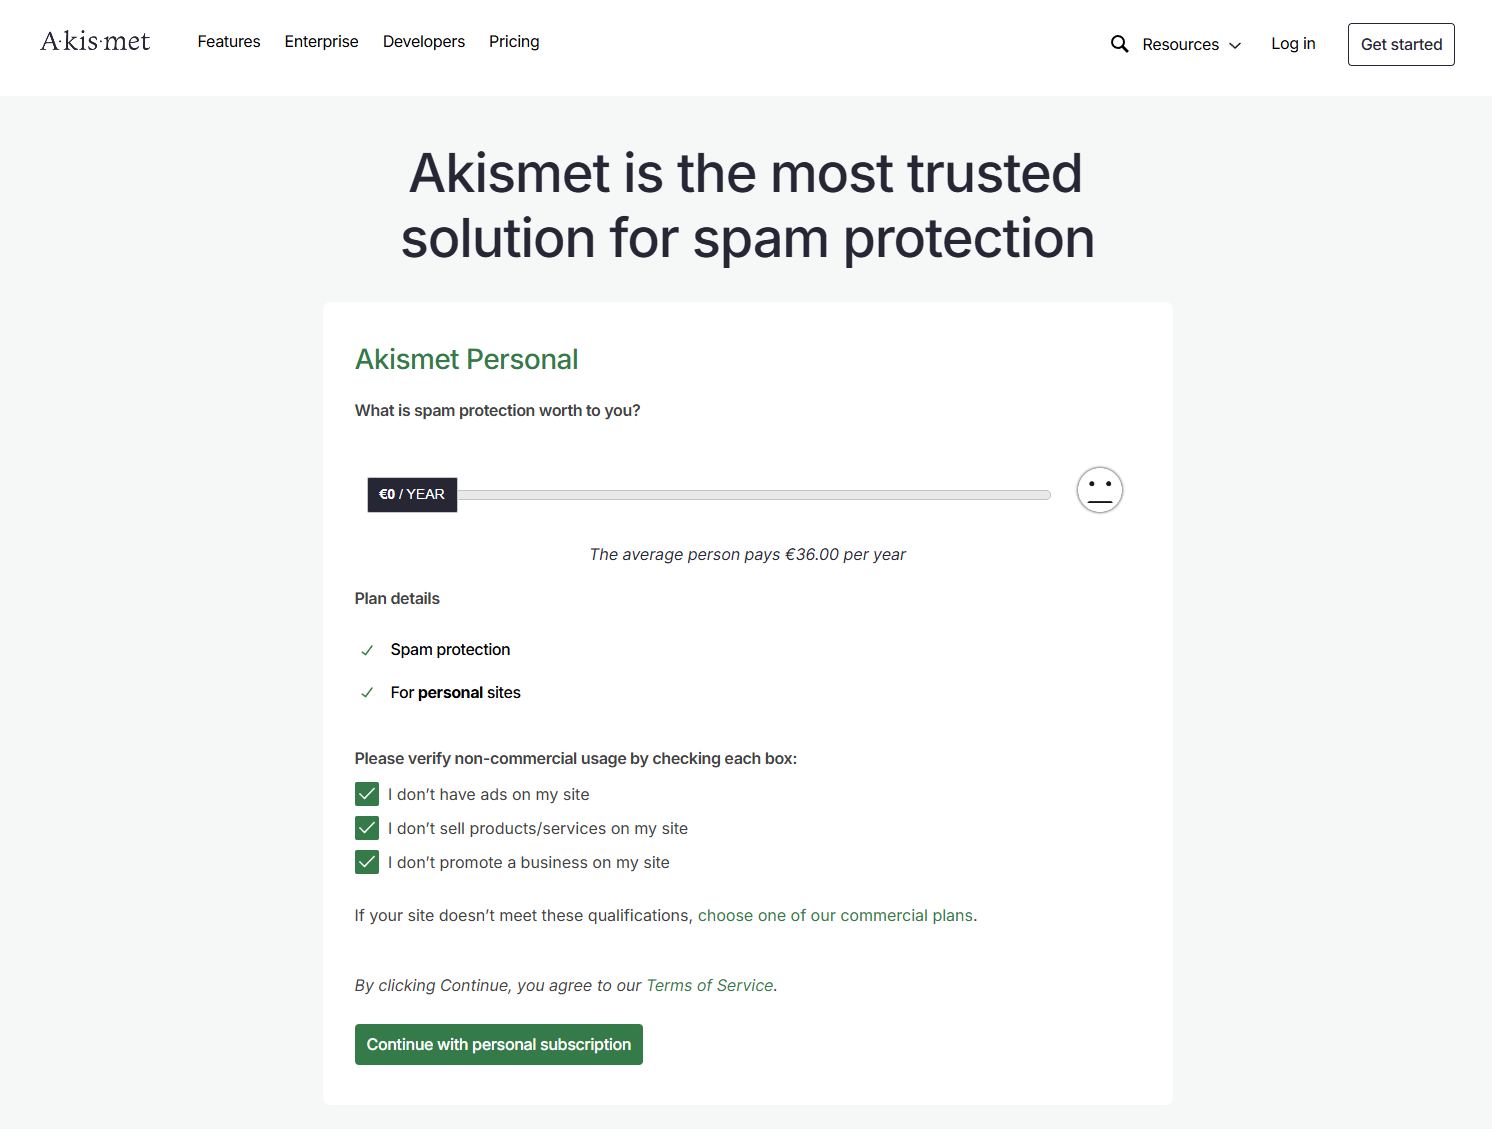
Choose a subscription plan.
Depending on your needs, you can choose from 4 different pricing plans.
For a simple blog or any other small website with little traffic, the personal plan may be all you need. For businesses, professional sites, and multi-site setups with high traffic, consider the commercial plans.
After completing the required information, click “Continue with personal use” and fill out the form to make the purchase. You will then receive a verification code via email. Input the code in the required field and select Continue.
After the email verification, you will receive another email containing your API key.
Step 3: Activate Akismet Anti-Spam Plugin With Your API Key
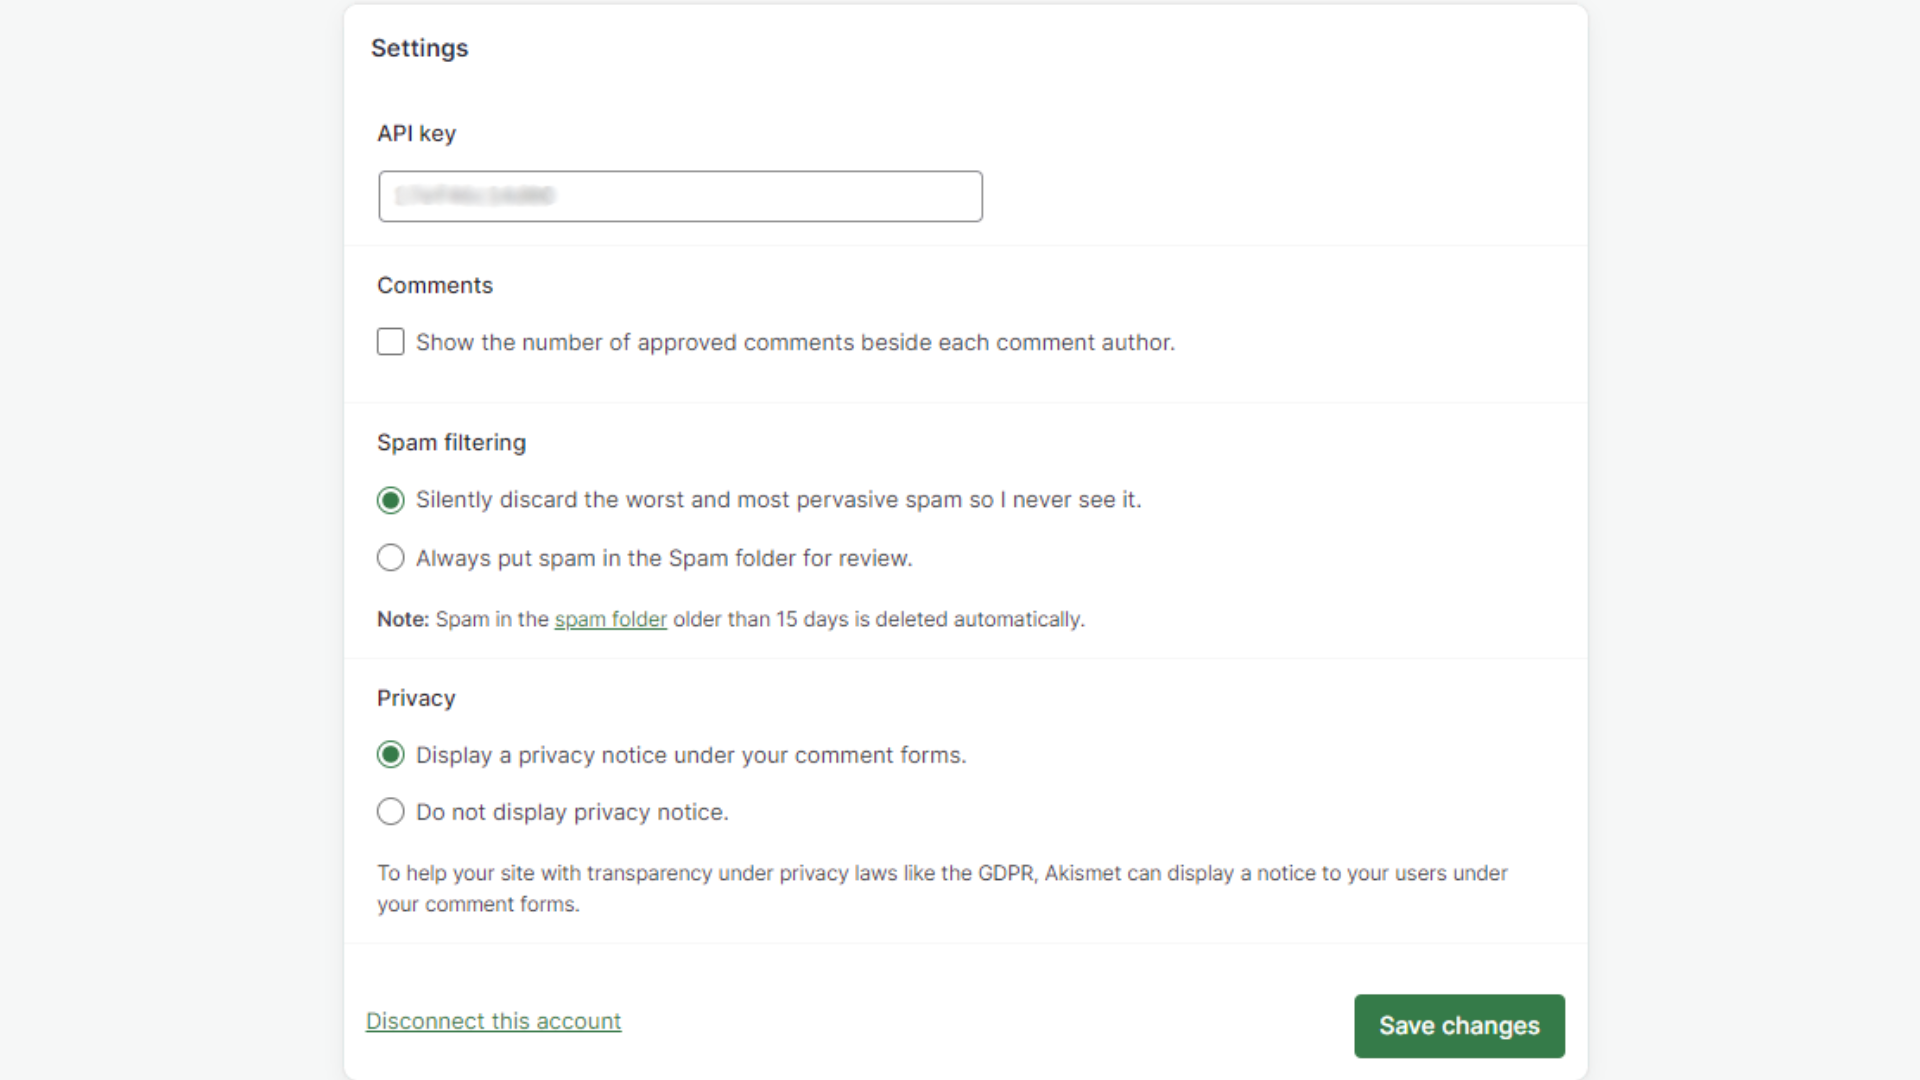
To connect your website with Akismet, return to your WordPress dashboard > Plugins > Akismet Anti-Spam > Settings
Paste your API Key into the designated field. Click “Connect with API Key”. Once verified, Akismet will start filtering spam automatically.
You can configure the plugin to automatically discard spam or move it to the Spam folder for your review.
Akismet Anti-Spam has been successfully integrated into your website and is now actively protecting it.
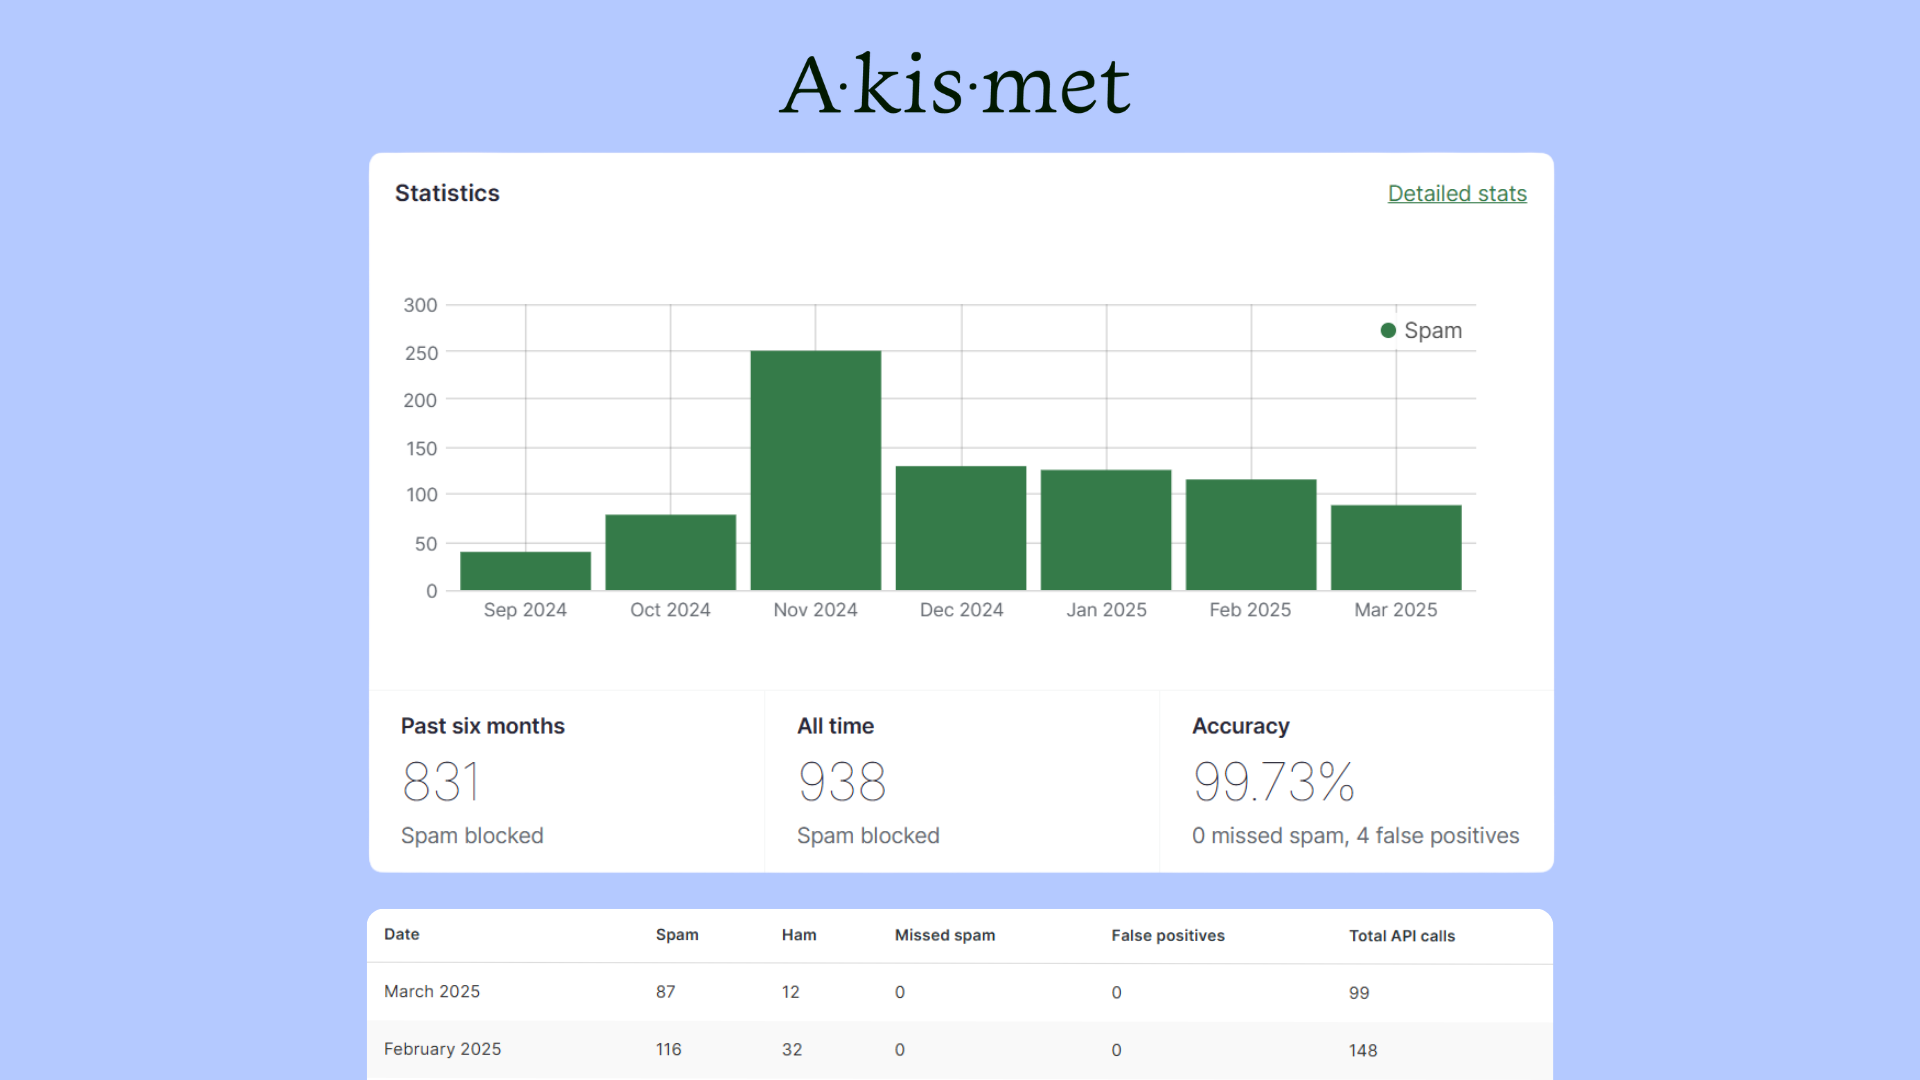
Viewing Your Akismet Stats Data
The Akismet dashboard shows users how many spam comments have been blocked, how many false positives and missed spam instances there have been, and the plugin’s overall accuracy. This information is displayed in visual graphs and tables that can be filtered by the last 6 months, 1 year, or all-time, and show monthly trends.
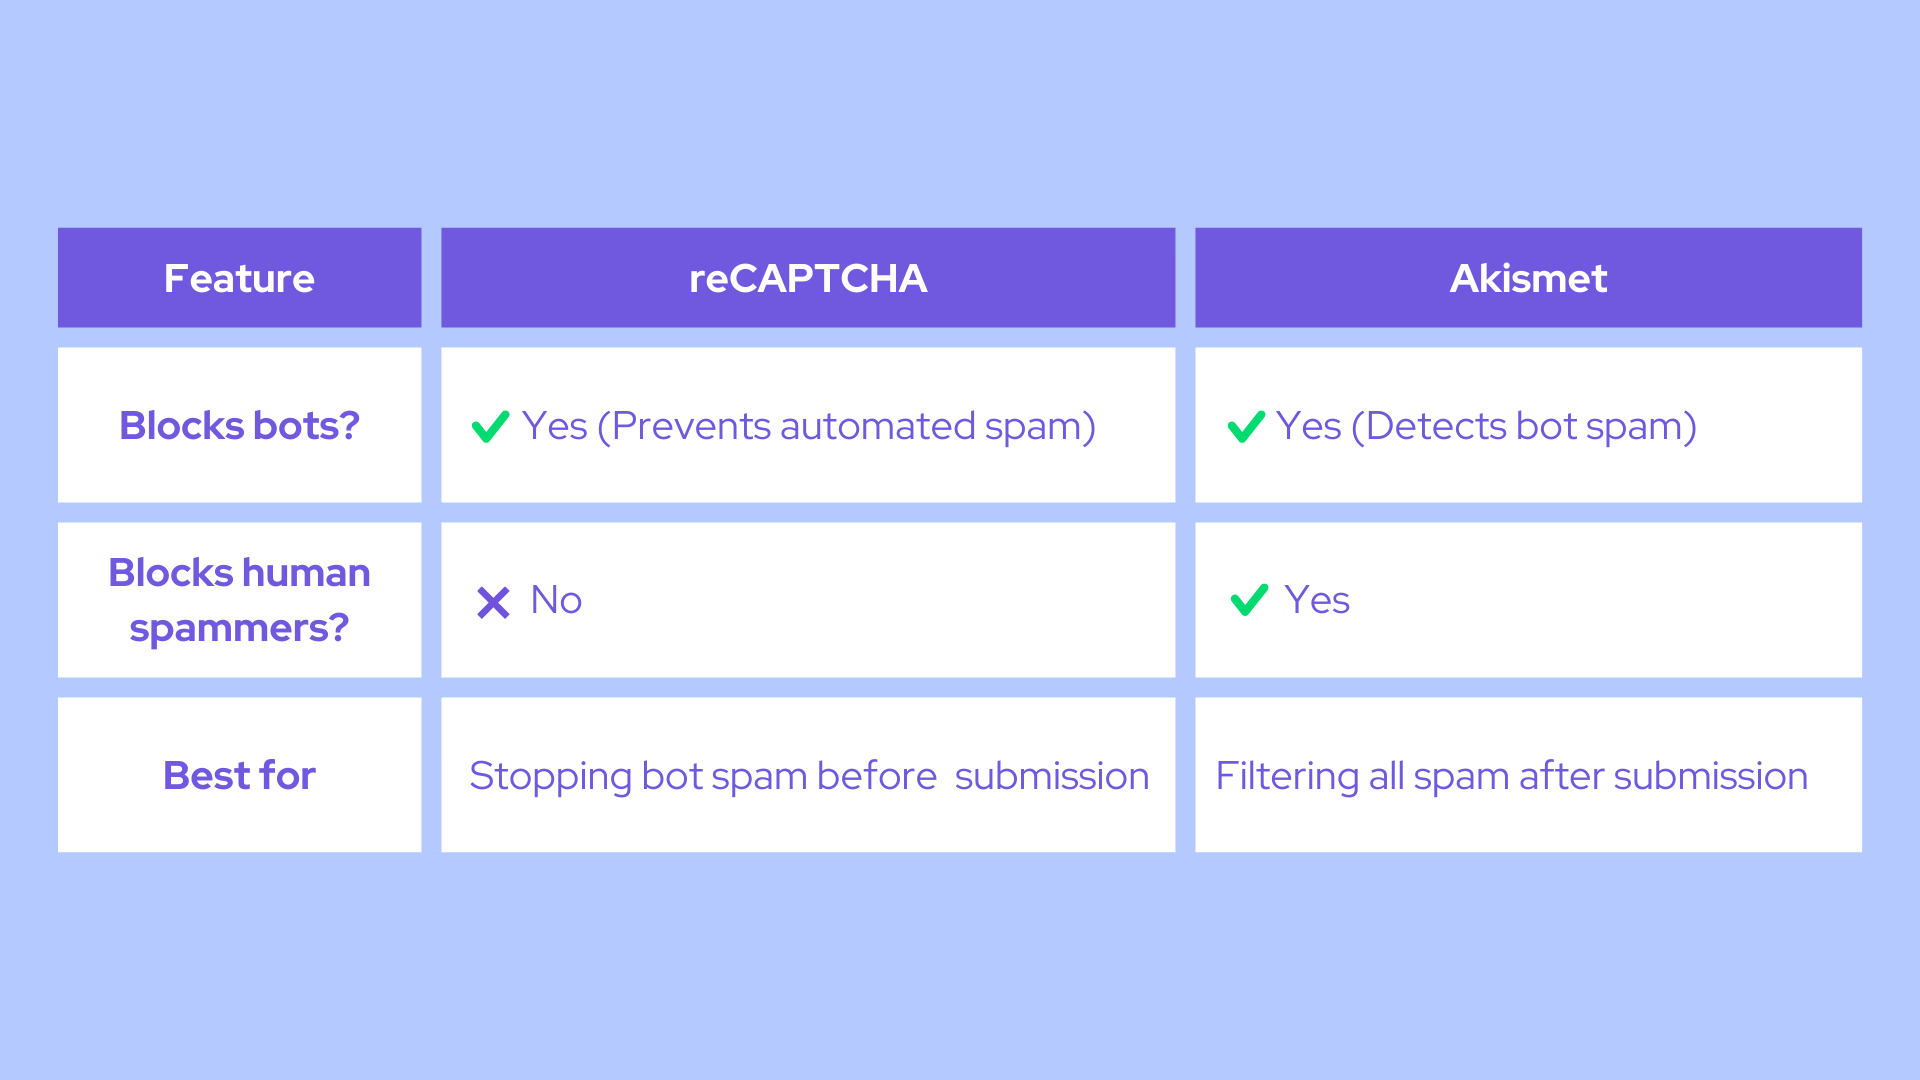
reCAPTCHA vs. Akismet: Which One Should You Use?
For maximum spam protection, use reCAPTCHA and Akismet together. reCAPTCHA acts as the first line of defense, blocking automated bots before they can submit spam.
Meanwhile, Akismet goes a step further by analyzing submitted comments and filtering out human-generated spam, such as promotional or phishing messages.
This two-layer approach ensures your WordPress site stays protected from bots and manual spammers, reducing moderation effort and keeping your comments section clean.
Final Thoughts
Keeping your WordPress site free from spam doesn’t have to be a headache. With the right mix of moderation settings, reCAPTCHA, and Akismet, you can stop spam before it even becomes a problem. Whether you disable comments altogether, limit links, or block spammy IPs, a few simple tweaks can make a huge difference.
No system is perfect, but by layering these defenses, you’ll keep your comment section clean and welcoming—without spending all your time deleting junk. So take a few minutes to set things up now, and enjoy a spam-free site for the long haul!
Key Takeaways:
Disable comments where they aren’t needed to eliminate spam entirely
Enable moderation to prevent spam from going live
Limit links in comments to block spammy backlinks
Block spammy IPs to stop repeated offenders
Use reCAPTCHA to prevent bot spam before submission
Set up Akismet Anti-Spam Plugin to filter both bot and human spam automatically
Combine reCAPTCHA + Akismet Anti-Spam Plugin for the best protection
In this article, you’ll learn how to use WP Rocket, an optimization plugin to improve your WordPress website’s performance. We’ll explain why speed matters, what WP Rocket does, and how it works. Additionally, you’ll discover how a tagDiv hosting plan with an included WP Rocket license can help you achieve the best possible results.
Why website speed matters
Website speed is an important factor in creating a positive online experience. With 83% of users expecting websites to load in three seconds or less and 40% abandoning a website if it takes longer, it’s clear that speed directly impacts user satisfaction. A fast-loading website keeps visitors engaged, encourages them to explore more pages, and increases the chances of them returning—helping you build a loyal audience and strengthen your brand reputation.
Beyond user experience, speed also plays a key role in SEO and business growth as Google considers page speed as a ranking factor, meaning that faster websites rank higher, attract more organic traffic, and ultimately lead to more conversions and sales.
What is WP Rocket?
WP Rocket is a premium WordPress performance optimization plugin that helps improve website speed and efficiency with easy-to-use caching and optimization tools.
While many WordPress themes come with built-in website performance features, WP Rocket goes further by adding extra optimization with minimal effort. Its features make it simple to speed up your WordPress website and ensure a smooth and seamless browsing experience for your visitors.
Key Features:
Page caching: Reduces server load by creating static HTML files of your pages;
Lazy loading: Loads images and videos only when they are visible on the user’s screen;
GZIP compression: Shrinks files for faster delivery to browsers;
Browser caching: Stores static files in the visitor’s browser for quicker repeat visits;
Minification: Compresses CSS, JavaScript, and HTML files to enhance website performance;
Database cleanup: Removes unnecessary data to keep your site lean and efficient;
Mobile optimization: Ensures fast loading times on smartphones and tablets;
eCommerce-friendly: Works seamlessly with WooCommerce and other platforms without affecting cart functionality.
WP Rocket Dashboard
How WP Rocket complements existing speed optimization
Many premium themes and hosting providers already offer performance optimization features, but WP Rocket takes it a step further. Here’s how:
Advanced caching: Instantly delivers pages with quickly configurable rules;
File optimization: Reduces file sizes and prevents JavaScript from blocking page rendering;
Database cleanup: Removes unnecessary data for a more efficient website;
Ease of use: Intuitive dashboard with pre-configured settings;
Enhanced lazy loading: Optimizes images and videos for all devices;
Premium support and updates: Guaranteed compatibility with the latest WordPress versions.
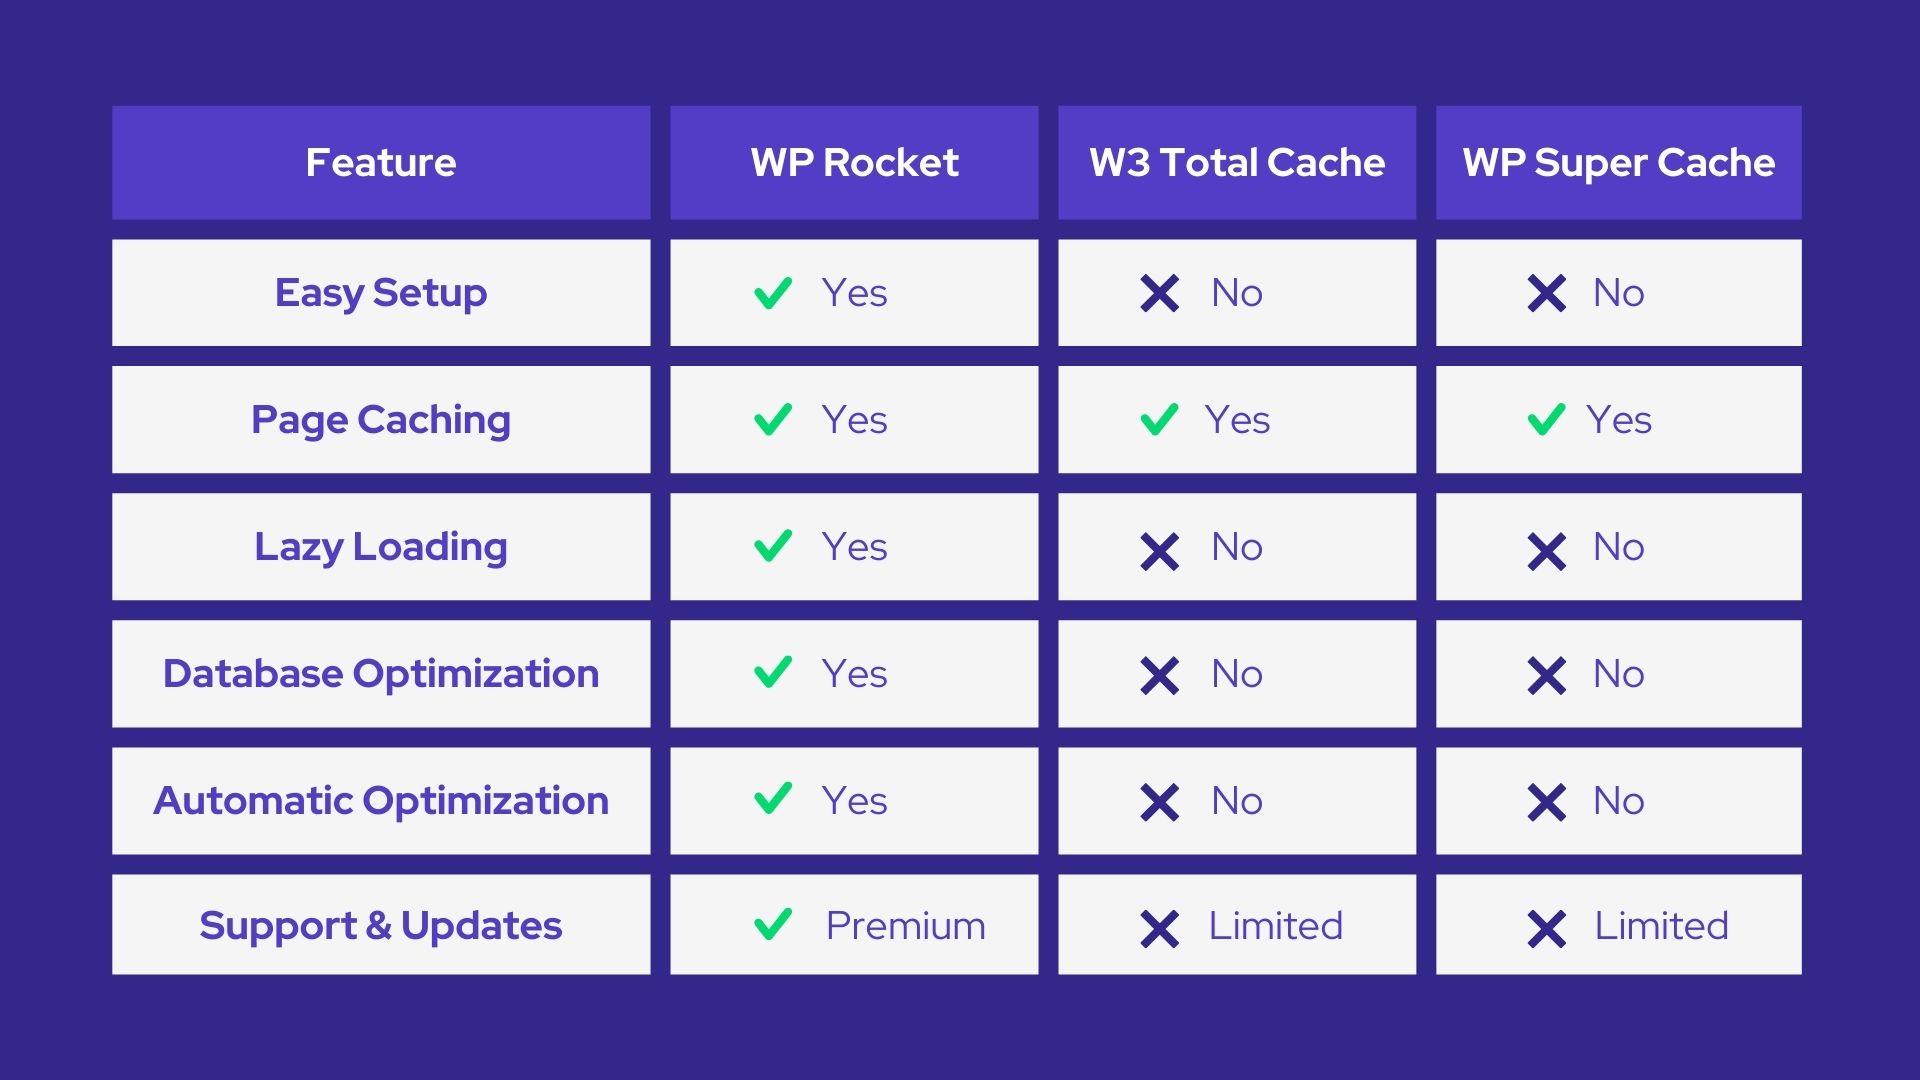
WP Rocket vs other optimization plugins
WP Rocket license included in tagDiv WordPress hosting plans
Our vision at tagDiv is to become your all-in-one solution company, providing everything you need to build, optimize, and grow your website effortlessly. To achieve this, we recently launched our tagDiv WordPress Hosting service, crafted to offer a robust, reliable, high-performance hosting solution tailored to website owners who value speed and dependability.
As part of this initiative, we’ve partnered with WP Rocketand become one of their authorized resellers. Having used WP Rocket for years to optimize client websites, we knew it was the perfect choice for delivering cutting-edge speed and optimization features. This partnership ensures your website will load faster, run smoother, and provide a flawless interaction—all without requiring extensive manual configurations.
Experience the ultimate combination of performance and convenience with WP Rocket included in every tagDiv WordPress Hosting plan, enabling you to optimize website performance with WP Rocket.
Top benefits of choosing a tagDiv WordPress Hosting plan
WP Rocket license included – Gain access to a premium WP Rocket license at no extra cost, saving you both time and money;
Expert support – Enjoy unparalleled assistance. tagDiv provides hosting-related support, while WP Rocket’s team handles plugin-specific inquiries, ensuring comprehensive care;
Blazing fast load times – tagDiv hosting plans are optimized with speed and reliability in mind, and WP Rocket adds an additional layer of caching and optimization for a genuinely high-performance experience;
Free website migration – Opt for an annual plan and let the experts migrate your website for free, ensuring a safe and seamless transition;
Risk-free guarantee – A 30-day money-back guarantee lets you confidently try the service. If you’re not satisfied, you’ll get a full refund.
TagDiv themes, such as Newspaper and NewsMag, are already designed with overall speed and efficiency in mind. When paired with WP Rocket, your website gains an extra layer of caching and optimization that ensures even faster load times and a smoother browsing experience. Together, they create a powerhouse solution for anyone serious about performance.
How to set up WP Rocket
If you select a tagDiv WordPress Hosting plan that includes a WP Rocket license, we will take care of the installation process. If you buy it separately from our WordPress hosting plans, please consult the official WP Rocket guide for comprehensive step-by-step instructions.
Minimum requirements for WP Rocket
Before choosing Wp Rocket as your catching and performance optimization plugin, make sure to review the plugin’s minimum requirements:
PHP version: WP Rocket requires PHP 7.3 or above. If necessary, you can ask your hosting provider to upgrade your PHP version;
WordPress version: The plugin is compatible with WordPress 5.8 or above;
WordPress action scheduler version: WP Rocket requires Action Scheduler version 3.0.0 or later;
Server requirements for file optimizations: Features like Preload and Remove Unused CSS need adequate server resources to function correctly. Resource demand depends on your site’s size and the other plugins or services you use.
We at tagDiv are thrilled to announce a significant milestone in our journey as a leading software development company. It is with immense pride and gratitude that we share the news of being included on Techreviewer’s list of the Top 100 Software Development Companies of 2025. This recognition reflects not only our dedication to delivering high-quality software solutions but also the collective effort of our passionate team, our innovative approach, and the valued partnerships we have built with clients around the globe.
For over a decade, tagDiv has been at the forefront of designing and developing cutting-edge software products and services that empower businesses to thrive in today’s digital landscape. Our inclusion in Techreviewer’s prestigious list sharpens our resolve to continue delivering excellence and innovation across every project we undertake.
A Journey of Excellence
tagDiv’s mission has always been to create intuitive, high-performance solutions that bridge the gap between creativity and functionality. As the creators of widely recognized products like Newspaper Theme and tagDiv Composer, we have become synonymous with user-focused design and advanced technology. Our offerings extend far beyond themes and plugins for WordPress users; we specialize in delivering end-to-end software solutions tailored to the unique needs of businesses of all sizes.
Our journey to this recognition has been fueled by a steadfast commitment to providing value through innovation. The software industry is ever-changing, demanding rapid adaptation, a customer-centric mindset, and a commitment to continuous learning. We’ve embraced this philosophy by keeping our processes agile, staying ahead of emerging trends, and building solutions that are not only scalable but also future-proof.
By focusing on understanding our clients’ challenges, we’ve enabled businesses to streamline workflows, enhance digital experiences, and achieve measurable growth. This commitment to problem-solving and delivering success is what truly sets us apart and solidifies our place among the best software development companies globally.
The Meaning of This Recognition
Being included in the Techreviewer.co list for 2025 represents more than just an achievement – it is a testament to the trust our clients place in us, the dedication of our employees, and the community of stakeholders who have supported us through the years.
This recognition underscores our expertise across a variety of software services, including:
Custom Software Development: Tailored solutions designed to meet the specific goals and challenges of diverse industries.
Web Development: Seamless, dynamic, and scalable web applications.
Mobile App Development: Building intuitive mobile experiences for iOS and Android platforms.
UX/UI Design: Crafting user-centered designs that enhance usability and engagement.
Integration and Optimization: Streamlining workflows, implementing cutting-edge technologies, and optimizing performance for our clients.
We consider this milestone a reflection of our commitment to quality, reliability, and client satisfaction. Our ability to deliver exceptional results stems from a strong foundation built on transparency, collaboration, and a shared vision with our clients.
A Team Behind Every Success
This recognition would not have been possible without the unwavering dedication of the incredible people at tagDiv who bring their skills, passion, and creativity to every project. Our team members push the boundaries of what’s possible, consistently find innovative ways to address complex challenges, and bring ideas to life for our clients. Every line of code, every design element, and every project strategy is driven by their expertise and passion for excellence.
Our clients are equally an essential part of this milestone. Their trust in our ability to deliver solutions that align with their vision and business goals drives us to raise the bar with every project. We are grateful for the partnerships we have cultivated over the years, and we view this recognition as motivation to further deepen those relationships.
Looking Ahead
While 2025 has already started on a high note with this recognition, we remain focused on what lies ahead. The software industry continues to evolve, and so must we. At tagDiv, we are committed to expanding our capabilities, exploring emerging technologies, and strengthening our position as a reliable partner for businesses in an increasingly digital world.
We view this recognition as a stepping stone to even greater achievements. Our goal is not just to be listed among the best but to set new standards of excellence in software development. With a continued focus on innovation, collaboration, and client success, we are confident that the coming years will be filled with opportunities to make an even greater impact.
Gratitude and Commitment
We thank Techreviewer.co for recognizing our efforts and including us in this esteemed list. It is an honor to be celebrated among the top 100 software development companies. This acknowledgment serves as inspiration for us to continue striving for greatness, delivering unparalleled solutions, and contributing to the success of our clients and partners.
As tagDiv grows, our promise remains steadfast: to empower businesses to achieve their goals through innovative, reliable, and scalable software solutions. This recognition is not the culmination of our efforts but a reminder that the best is yet to come.
Plugin conflicts are a common issue for WordPress users, causing websites to malfunction or display incorrectly. Knowing how to check plugin conflict in WordPress is essential for users of the Newspaper theme by tagDiv, but not limited to them, to maintain a smooth user experience. This guide will show you how to use the Health Check & Troubleshooting plugin to pinpoint, check, and fix plugin conflicts effectively and safely.
In this article, you’ll learn:
What plugin conflicts are and why they happen
The difference between general and option-specific plugin conflicts
How to check for plugin conflict in WordPress
How to identify conflicts step by step using the Health Check plugin
Proactive tips to prevent conflicts from happening in the future
Ready to explore? Let’s jump right in!
What are plugin conflicts?
A plugin conflict is a type of error that occurs when two or more plugins, or a plugin and a theme, interfere with one another, causing problems on your website.
These conflicts can cause broken layouts, inaccessible features, or slow site performance, to name a few.
Understanding plugin conflicts
Before identifying the signs, it’s important to know that plugin conflicts come in two main types:
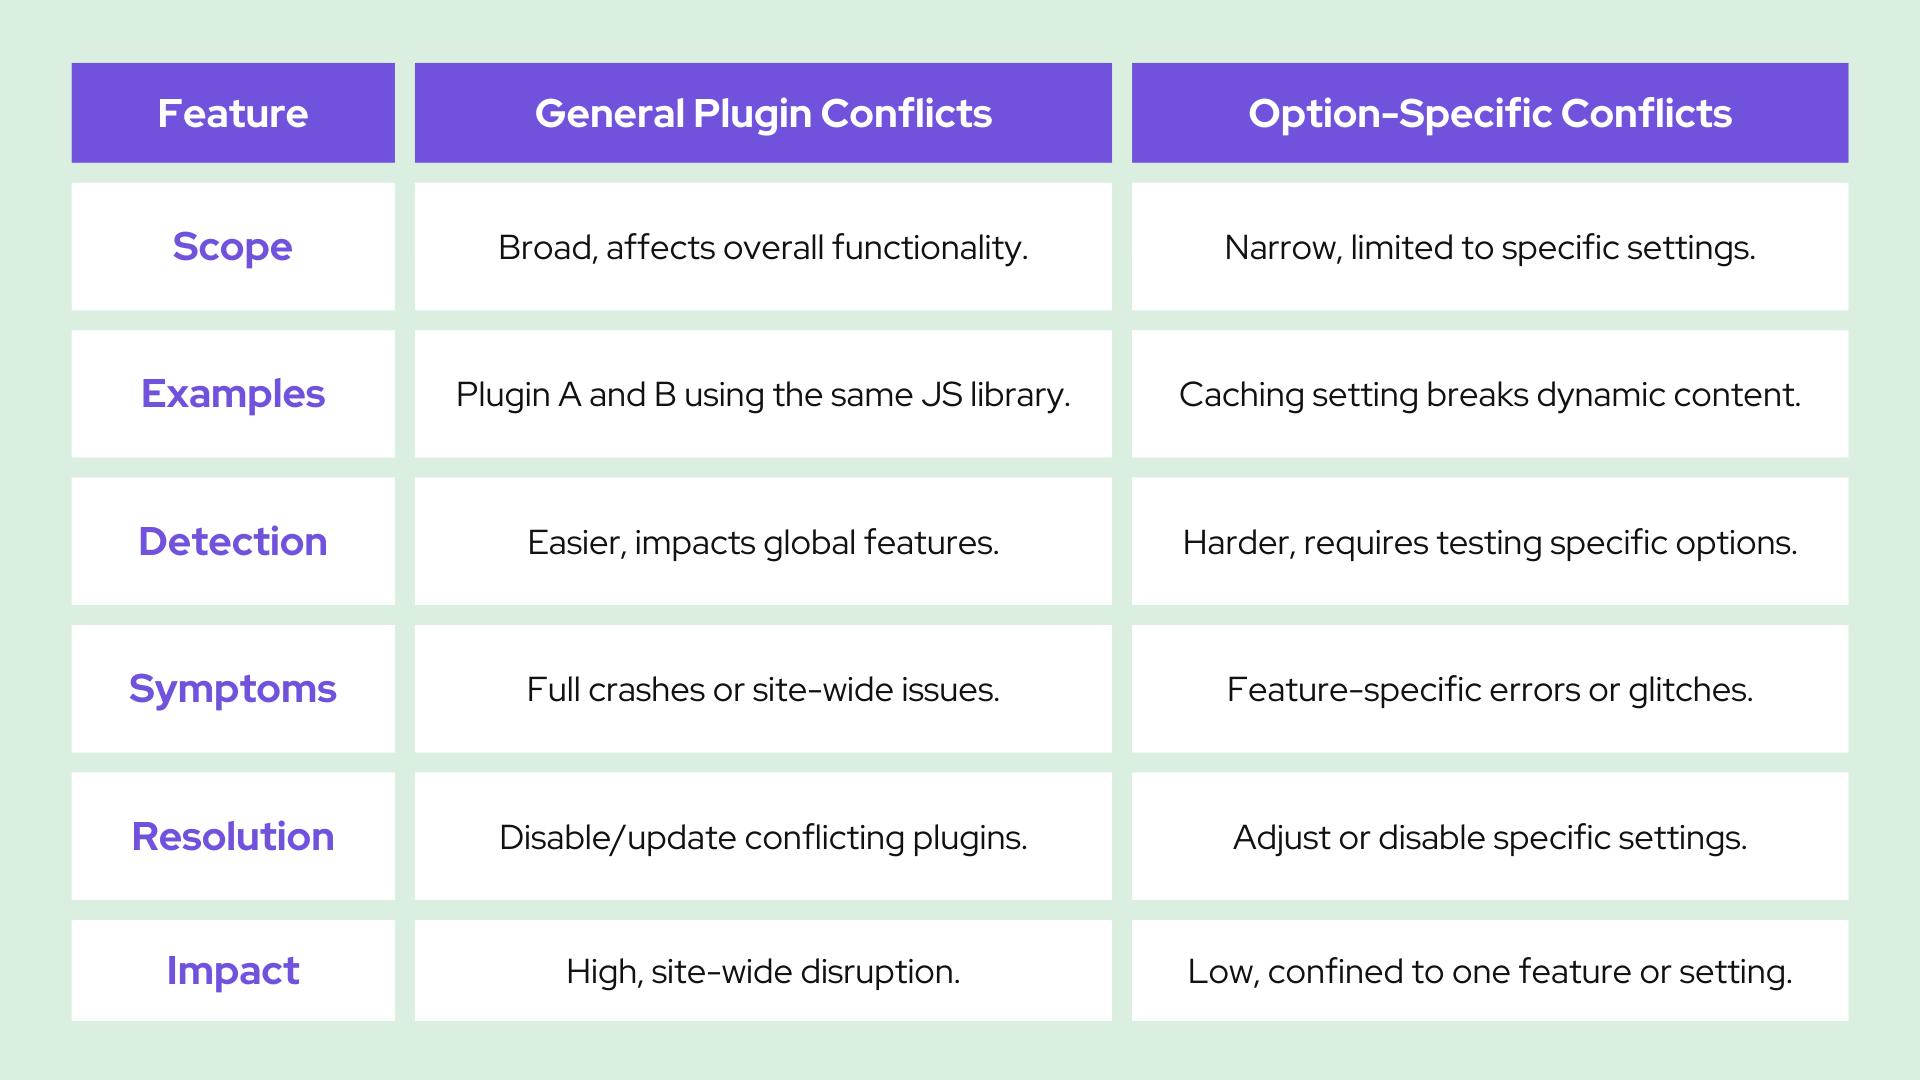
General plugin conflicts: These cause widespread issues like crashes, layout problems, or slow performance when plugins or themes clash.
Option-specific conflicts: These occur only when certain settings or features are enabled, leading to specific malfunctions. For example, some settings in tagDiv themes might not work due to plugin interactions. Learn more about general options and potential conflicts.
If you believe you’re facing a specific conflict not mentioned in the article, please let us know. We’ll do our best to include it in the list and provide a solution to the problem.
General plugin conflicts vs. Option-specific conflicts
Signs of plugin conflicts
Site crashes: After activating a plugin, your website becomes unreachable or displays an error page
Unexpected theme behavior: In the Newspaper theme, this could include layouts breaking, widgets disappearing, or menus not displaying correctly
Features not working: Custom elements in tagDiv Composer fail to load or display incomplete content
Admin area errors: When editing content or settings, you see error messages or a white screen
Checking for plugin conflicts using a plugin (Health Check & Troubleshooting plugin)
Steps
Step 1: Log in to your WordPress website account
Before starting the checking, ensure you have the latest WordPress version, theme, and plugins installed.
Step 2: Install and activate the “Health Check & Troubleshooting” plugin
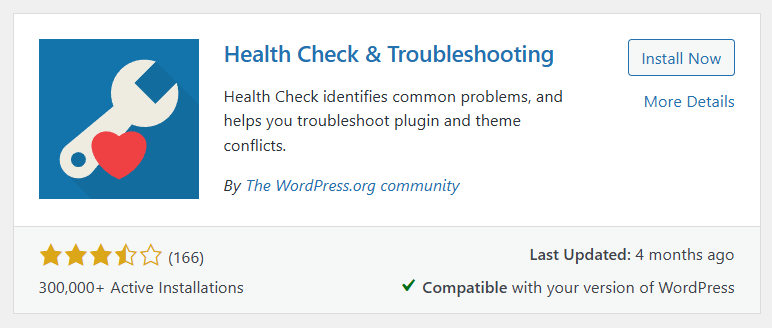
Go to “Plugins” -> Add new. In the search bar, type “Health Check & Troubleshooting.” The plugin should appear on your screen, as shown below.
Install the Health Check & Troubleshooting Plugin
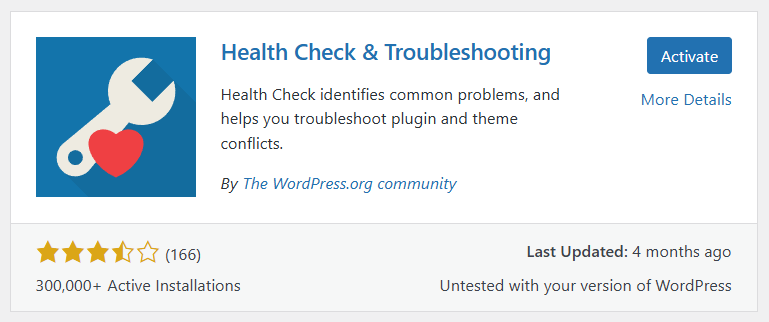
When the activation is completed, click the “Activate button” displayed where the “Install Now” button is located.
Activate the Health Check & Troubleshooting Plugin
Step 3: Use its troubleshooting mode to temporarily disable all plugins while retaining the Newspaper theme.
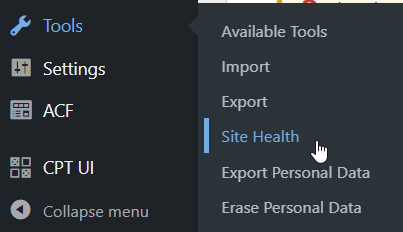
Go to “Tools” → “Site Health”
Site Health Tool
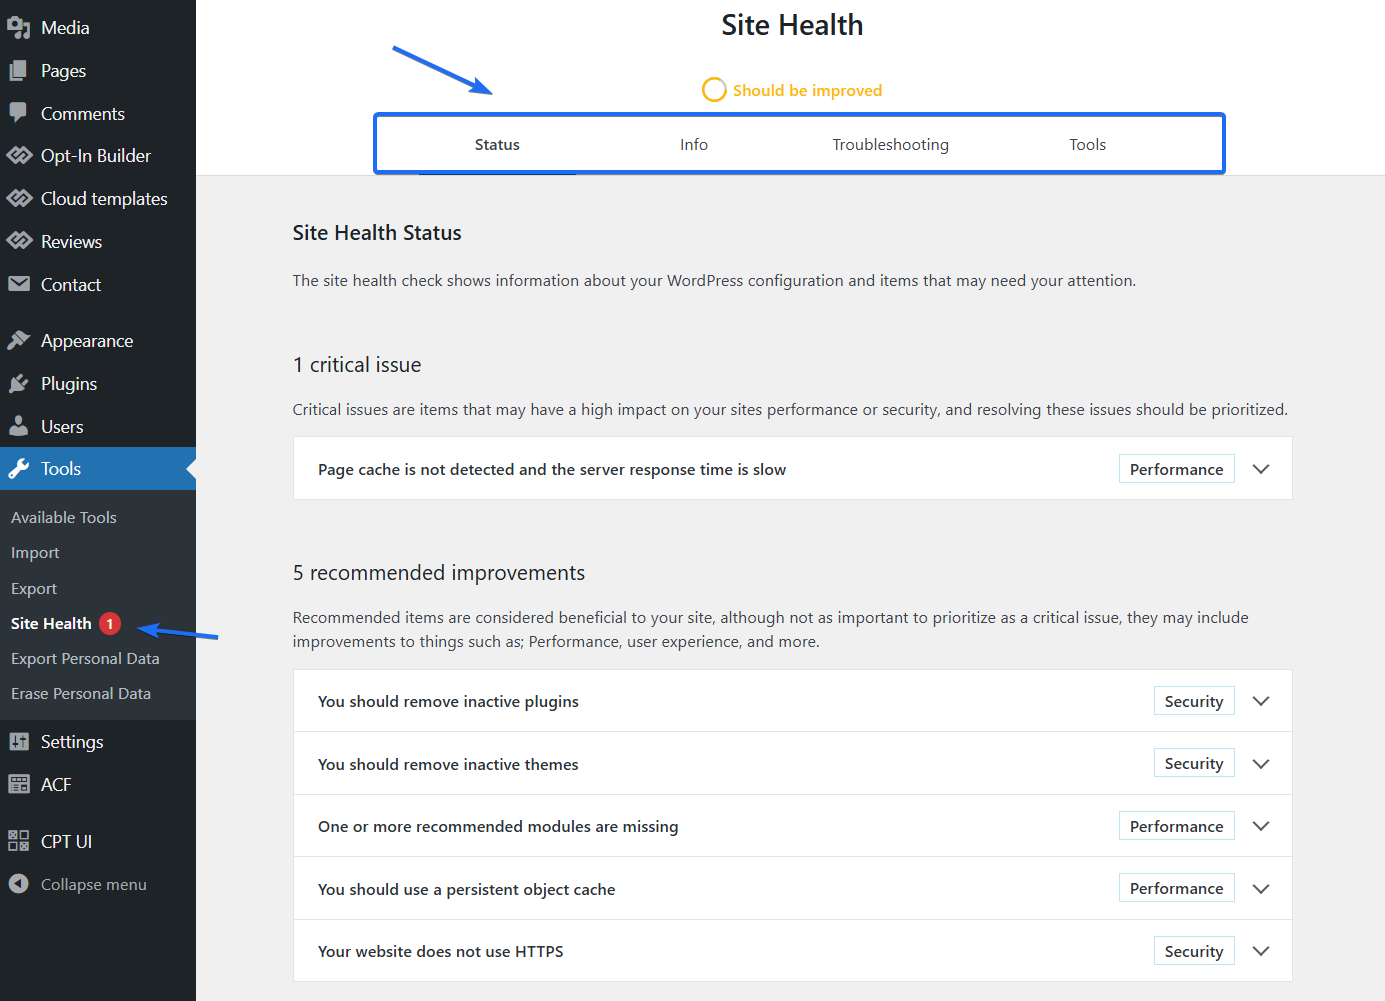
When you click on “Site Health,” a new window opens, displaying information about your website and server.
Make sure to resolve any critical issues that you see on your Status or info tabs.
Site Health Status Page
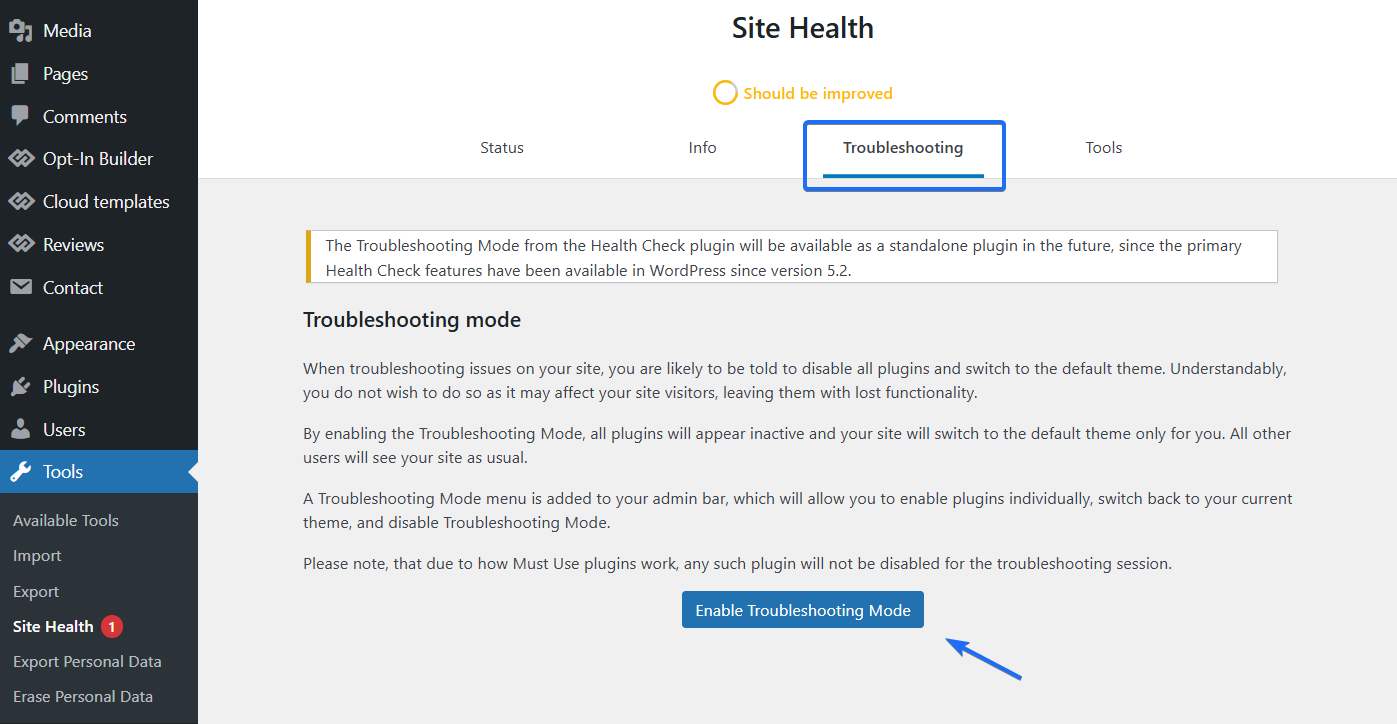
Once the issues are resolved, Click on the “Troubleshooting” tab. After reading the warning information, you can “Enable Troubleshooting Mode.”
Enable Troubleshooting Mode
Your website is currently in Troubleshooting Mode. This won’t affect your visitors; they will see your site as normal. However, you’ll notice that it appears as if you’ve just installed WordPress for the very first time.
Step 4: Test the Newspaper theme and tagDiv plugins using Health Check Troubleshooting Mode
Search if the issue still persists in troubleshooting mode.
Now you have to go and test the problem you were experiencing in this new environment.
At this step, we want to see if there’s a problem with one of our tagdiv plugins.
Activate only the Newspaper theme and the tagDiv plugins that come with it
Go to your WordPress admin dashboard.
Navigate to Appearance > Themes and ensure the Newspaper theme is active. If it’s already active, proceed to the next step.
Disable all the other plugins
Go to Plugins > Installed Plugins and deactivate all plugins except the core tagDiv plugins (e.g., tagDiv Composer, tagDiv Cloud Library, tagDiv Newsletter, tagDiv Opt-In Builder, tagDiv Standard Pack).
This ensures that only the Newspaper theme and its essential components are running.
Check your website
Visit your website and test its functionality.
Look at the frontend design, menus, widgets, and any tagDiv Composer elements you used.
Ensure no errors appear in the admin area or while editing with tagDiv Composer.
Analyze the results
If the issue is resolved, this confirms that the conflict lies with one of the disabled plugins. Proceed to the next step (testing plugins one by one).
If the issue persists: This could indicate a problem with the Newspaper theme, WordPress core files, or your hosting environment.
Gather debug information
Check for error messages or broken features and note them down.
Use tools like Query Monitor or your browser’s developer console to detect any JavaScript or PHP errors.
Optional: Test with a default WordPress Theme
If you suspect the issue is deeper, temporarily switch to a default WordPress theme like Twenty Twenty-Three.
If the issue disappears when using a default theme, the problem might be specific to the Newspaper theme or its settings.
Next steps
If the Newspaper theme works fine with only the tagDiv plugins, move on to reactivating plugins one by one.
If the problem lies with the theme, contact tagDiv support and provide the notes or error logs you gathered.
By isolating the Newspaper theme, you ensure that the problem is not related to external plugins, narrowing down the potential causes significantly.
Step 5: Test plugins one by one using Health Check Troubleshooting Mode
Disable all plugins
Go to your WordPress admin dashboard.
Navigate to Plugins -> Installed Plugins and deactivate all plugins at once. If you’re using the Health Check plugin’s troubleshooting mode, this is done automatically without affecting visitors.
Enable the core theme and plugins
Activate the Newspaper theme and tagDiv plugins only.
Test your website to confirm that the issue isn’t caused by these core components. If the problem persists, it may not be a plugin conflict but a theme or WordPress core issue.
Reactivate plugins one by one
Start with the most essential plugins (e.g., security or SEO plugins). Activate one plugin at a time, then revisit your website to check if the problem reappears.
Look for issues like broken layouts, missing features, or errors in the admin panel after enabling each plugin.
Take notes
Keep a list of each plugin you activate and how your site behaves after activation. This will help you identify patterns or narrow down potential culprits.
Identify the conflicting plugin
When the problem reappears after activating a specific plugin, you’ve likely found the conflicting plugin.
Disable it again to confirm that the issue is resolved.
What to do next? Once the conflicting plugin is identified, you can:
Look for an alternative plugin with similar functionality.
Check the plugin’s settings to see if disabling specific features resolves the conflict.
Contact the plugin developer or tagDiv support for help.
This methodical approach ensures you can isolate the issue without making permanent changes to your website.
Advantages of using a plugin to check for plugin conflicts
Beginner-friendly: Using a troubleshooting plugin like Health Check makes conflict resolution easier for everyone, including beginners, by offering a user-friendly interface within WordPress. This eliminates the need for technical skills or backend access.
Non-intrusive for live sites: Troubleshooting mode allows safe conflict testing without impacting your live website, ensuring visitors experience no downtime or disruptions.
Quick and efficient for most conflicts: This method isolates and identifies conflicting plugins quickly by allowing you to reactivate them one at a time, streamlining the troubleshooting process without needing complex setups or staging environments.
Tailored for tagDiv users: For tagDiv users, this method is particularly useful for identifying conflicts between third-party plugins and the Newspaper theme or tagDiv Composer, simplifying the maintenance of custom designs and functionalities.
The advantages of using a plugin to check for plugin conflicts
Checking for plugin conflicts manually
Manually checking for plugin conflicts gives you better control over the troubleshooting process and can reveal deeper issues. Carefully follow these steps to diagnose and resolve conflicts:
Steps:
Step 1: Backup your site
Before making any changes, back up your website using a plugin like UpdraftPlus or the backup tools provided by your hosting provider.
This will ensure that you can restore your site if anything goes wrong during troubleshooting.
Step 2: Deactivate all plugins
Log into your WordPress admin dashboard and go to Plugins -> Installed Plugins. Deactivate all of your plugins.
Alternatively, use FTP access to rename the /plugins/ folder to deactivate all plugins simultaneously if you cannot access the admin panel.
Step 3: Activate the Newspaper theme and test
Ensure the Newspaper theme is active and working properly without any plugins.
Check for proper loading of theme elements like layouts, tagDiv Composer blocks, and widgets. If issues persist, the problem may lie with the theme or WordPress core.
Step 4: Reactivate plugins one by one
Begin reactivating plugins one at a time. After activating each plugin, test your website to check if the issue reappears.
This step requires patience, as conflicts may only arise when specific plugins are active simultaneously.
Step 5: Use browser developer tools
Open your browser’s developer tools (usually by pressing F12 or Ctrl+Shift+I) and check the console for JavaScript errors.
Look for red warnings or errors indicating conflicts caused by plugins or scripts.
Step 6: Document the conflicts
Note which plugin reactivation caused the issue and whether it affects a specific Newspaper feature, such as tagDiv Composer, widgets, or custom blocks.
This information helps you decide whether to disable the conflicting plugin, modify its settings, or find an alternative.
Advantages of Manual Conflict Checking:
Deeper insight: Unlike automated tools, manual checks allow you to observe exactly how your website behaves during each step, providing more detailed information about the root cause of the issue.
Essential for complex issues: For advanced or stubborn conflicts, this method is invaluable. It can uncover problems that plugin-based troubleshooting tools may overlook, such as custom JavaScript or CSS clashes.
What results can you expect?
Identifying specific conflicts: You’ll know exactly which plugin or combination of plugins causes the issue and how it affects your website.
Clear error logs: Developer tools may reveal JavaScript or other technical errors pointing directly to the source of the conflict.
Resolution path: Based on your findings, you can choose to turn off the plugin, adjust its settings, replace it, or seek support from the developer or tagDiv.
Challenge
Manual conflict checking requires more time and effort, and it can disrupt your live site if not performed in a safe environment. However, it is highly effective for resolving complex issues and ensuring your site operates smoothly.
Advantages of using a plugin vs. manual checking
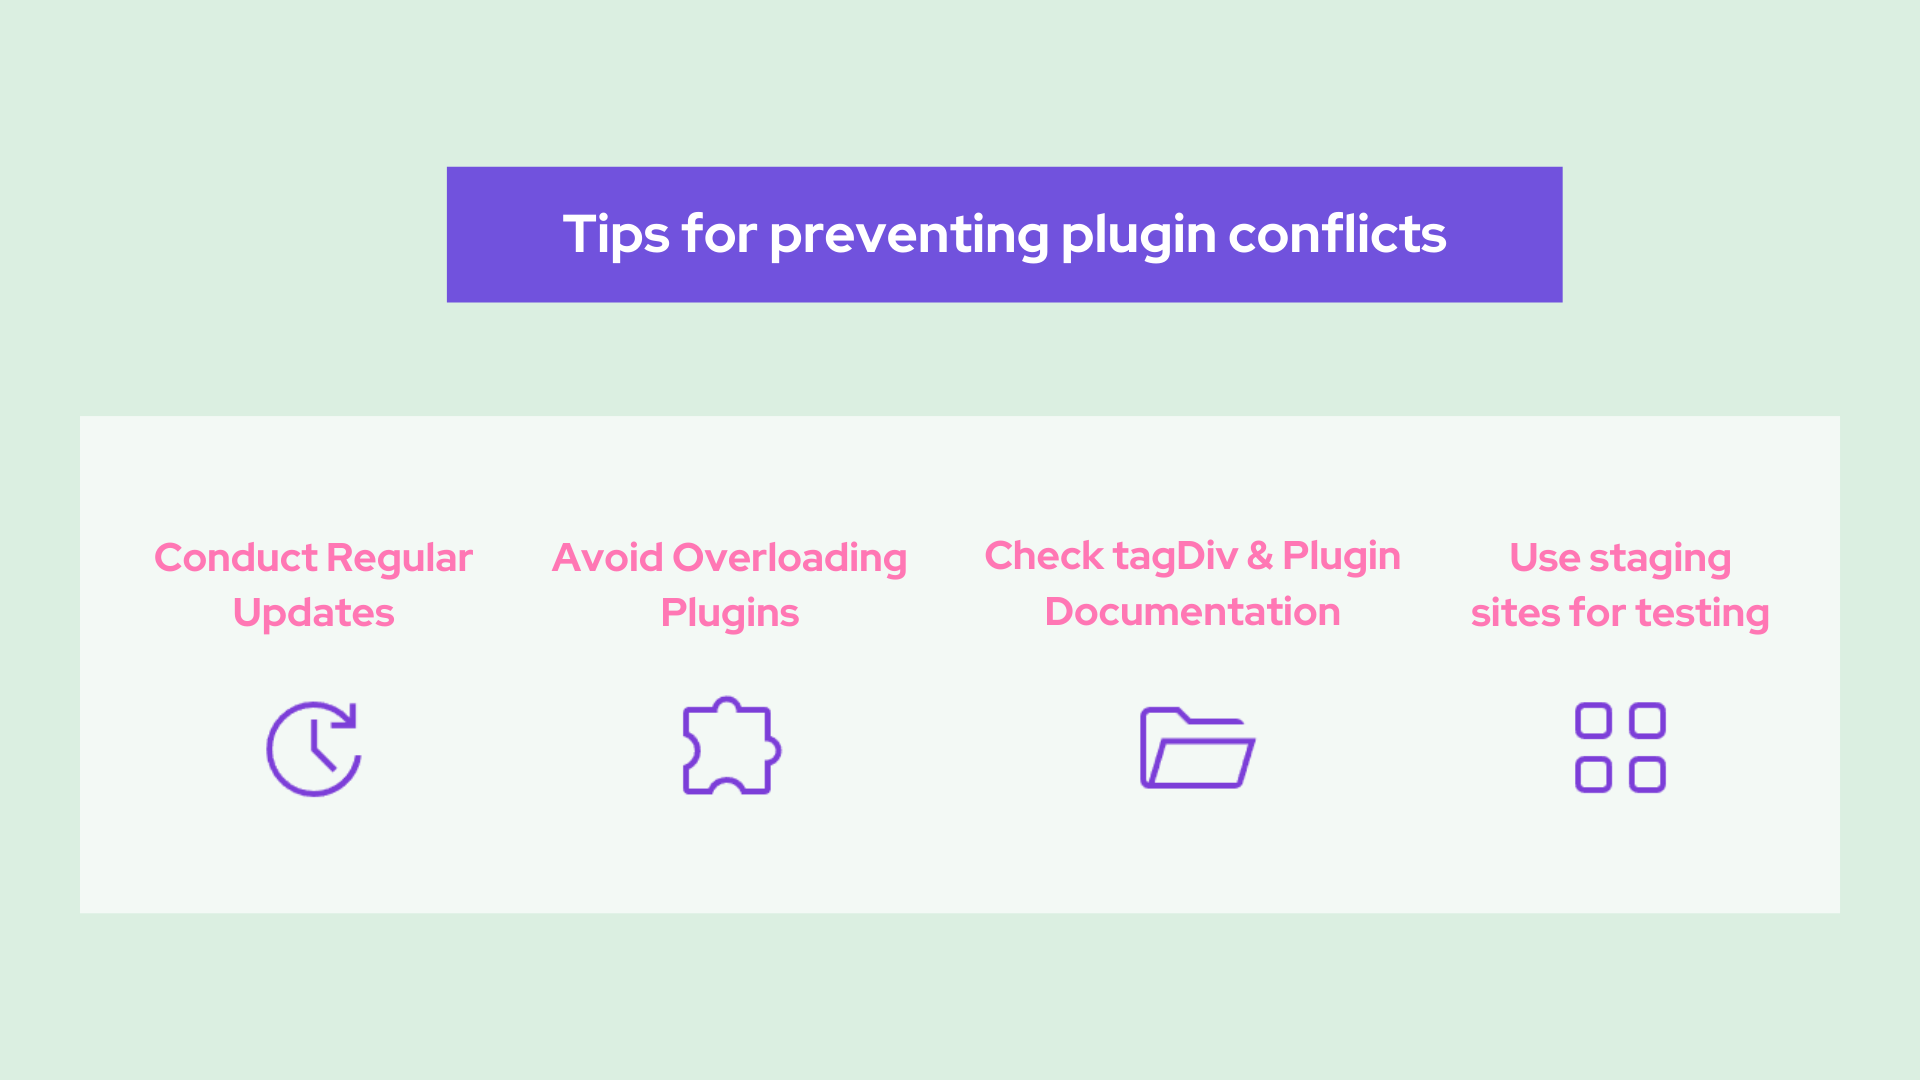
Tips for preventing plugin conflicts
Preventing plugin conflicts is easier than fixing them. Follow these best practices to maintain a smooth, conflict-free website:
Regular updates
Why it’s important: Keeping your theme, plugins, and WordPress core updated ensures they work with the latest features and fixes. Outdated versions are more prone to bugs and compatibility issues.
What to do:
Enable automatic updates for plugins and themes if supported, or set a schedule to update manually.
Regularly check the changelogs for your plugins and the Newspaper theme to see what’s new or improved.
Avoid overloading plugins
Why it’s important: Too many plugins increase the chances of conflicts, slow down your site, and can cause resource issues.
What to do:
Only install plugins you truly need and avoid plugins with overlapping functionalities.
Periodically review your plugins and deactivate or delete any unused ones.
For example, if using tagDiv Composer for design, you may not need additional layout or page builder plugins.
Check tagDiv and plugin documentation
Why it’s important: Compatibility issues often arise from known conflicts, which developers sometimes document.
What to do:
Visit the tagDiv support forum or documentation pages to find solutions for common issues.
Before installing a new plugin, check its reviews, changelog, or compatibility information to see if others have reported conflicts with the Newspaper theme or tagDiv plugins.
Use staging sites for testing
Why it’s important: Testing plugins on your live site can disrupt functionality for your visitors. A staging site provides a safe environment to experiment.
What to do:
Set up a staging site through your hosting provider or use a plugin like WP Staging to clone your site.
Test new plugins, theme updates, or customizations on the staging site before applying them to your live site. To avoid unexpected issues, never install or activate a new plugin directly on your live site without prior testing.
Tips for preventing plugin conflicts
Need reliable website maintenance? Our website maintenance plans include services like prompt plugin updates, secure backups, error fixing, and proactive security monitoring to keep your site running smoothly and safe from threats. Trust us to protect and optimize your online presence!
Conclusion
This article offers a step-by-step guide on plugin conflicts and how to check plugin conflicts in WordPress. Moreover, we saw that plugin conflicts can disrupt the functionality and design of your WordPress website, but with the right tools and steps, they’re manageable. Using the Health Check & Troubleshooting plugin, you can safely identify and resolve these conflicts without affecting your live site. Whether it’s testing plugins one by one or addressing option-specific issues, this method ensures your Newspaper theme and tagDiv plugins run smoothly.
Preventing conflicts is just as important — keep your plugins updated, use staging sites for testing, and minimize unnecessary plugins to maintain a stable, efficient website.
If you experience specific plugin conflicts or require additional help, please contact us. Our team is here to resolve any issues and ensure your website operates at its best.
As 2024 comes to a close, we at tagDiv are taking a moment to reflect on an incredible year that wouldn’t have been possible without YOU, our amazing clients, and our community. This year was packed with exciting milestones, new features, and countless websites brought to life using our Newspaper and NewsMag themes.
Let’s explore the key moments and celebrate the journey we have experienced together!
Milestones that defined 2024
This year was all about pushing boundaries and achieving new heights. Here’s what we accomplished:
8300+ New users joined the tagDiv family Creators, bloggers, and businesses around the globe trusted Newspaper and NewsMag themes to bring their ideas to life.
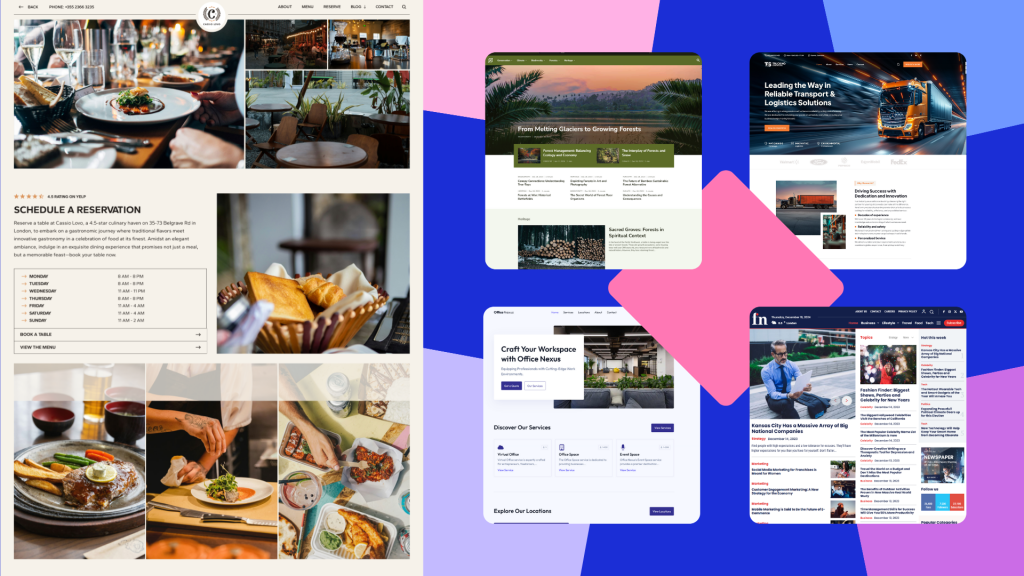
5 New demos released Our talented team introduced stunning, fully customizable demos, with Free News Pro being the most downloaded one released this year. The other demos released this year were Forest Beat, Trucking Services, Office Nexus, and Cassio Lovo.
The five new demos released in 2024
142+ Custom web design and development projects completed From unique web designs to tailored functionalities, our custom web design and development services helped bring personalized visions to life.
167,000+ websites powered by tagDiv themes That’s over 167,000 stories, brands, and dreams realized—all powered by the Newspaper and NewsMag themes.
Awards and recognitions
In 2024, we were honored to receive the TechBehemoths Awards for WordPress, Web Design and Web Development. This recognition is a testament to our dedication to empowering creators and businesses with cutting-edge tools.
But our most significant award? The trust and love of our clients.
Facts and memorable moments
2024 was full of surprises! Here are a few fun facts from this year:
Most popular demo: NewsWeek Pro – a favorite for its sleek, modern look;
Unique design trend: Minimalist layouts paired with bold, vibrant colors dominated this year’s design requests;
Coolest custom project: We created a modern and dynamic talent discovery platform featuring advanced search filters, striking visuals, and a layout that embodies the vibrancy of the industry it serves.
Looking ahead to 2025
The future is bright, and we’re gearing up for another year of innovation and growth. Here’s a sneak peek at what’s coming:
Even more demos: Expect new and exciting demos designed to inspire and elevate your creative projects;
Major theme updates: We’re working on new features to make customization and performance even more seamless;
AI tools: We’re preparing to incorporate some cool AI tools into our Newspaper Theme to improve and personalize your website creation process;
Hosting services expansion: Expect tailored hosting packages and strategic partnerships to make us your go-to hosting provider;
Expanding custom services: Our web design and development team will expand to serve you better and faster than ever.
Your voice matters
We are designing the future of our themes with you in mind. What features or functionalities would you like to see? Please share your ideas in the comments below or send us a message—your input could influence our next big update!
Thank you for an incredible 2024
Every milestone we reached this year was made possible by you, our lovely community. Your creativity, trust, and passion inspire us to keep innovating and pushing boundaries.
What was your highlight from 2024? Share your story in the comments below—we’d love to celebrate your success, too. Here’s to another year of creating, innovating, and growing together in 2025!
Are you an eCommerce business owner gearing up for a successful Black Friday campaign but unsure where to begin? Or maybe you want to audit your website to ensure everything runs smoothly when the rush hits? We’ve got you covered!
Black Friday is one of the biggest shopping days of the year, and a poorly prepared website can cost you valuable sales and customers. To help you avoid any mishaps, we’ve created an ecommerce checklist of the most important things to check before Black Friday. And because some tasks can feel overwhelming, we’ve also recommended easy-to-use tools to make the process faster and more manageable.
Let’s get your website ready to handle the Black Friday traffic and boost your sales with our Black Friday eCommerce Checklist!
Website Performance and Speed
When it comes to eCommerce, speed equals revenue. In today’s fast-paced online world, every second counts. A faster website not only improves user experience but directly impacts your bottom line.
Did you know that a site loading in just 1 second has a conversion rate five times higher than a site that takes 10 seconds to load? That difference can make or break your sales, especially on a high-traffic day like Black Friday.
According to the same report, not all pages are created equal when it comes to speed. Checkout, login, and home pages are critical to keeping consumers engaged and moving through the buying process. Product category pages also play a big role, as they attract high-intent traffic. If these pages are slow, you risk losing customers right when they’re ready to buy.
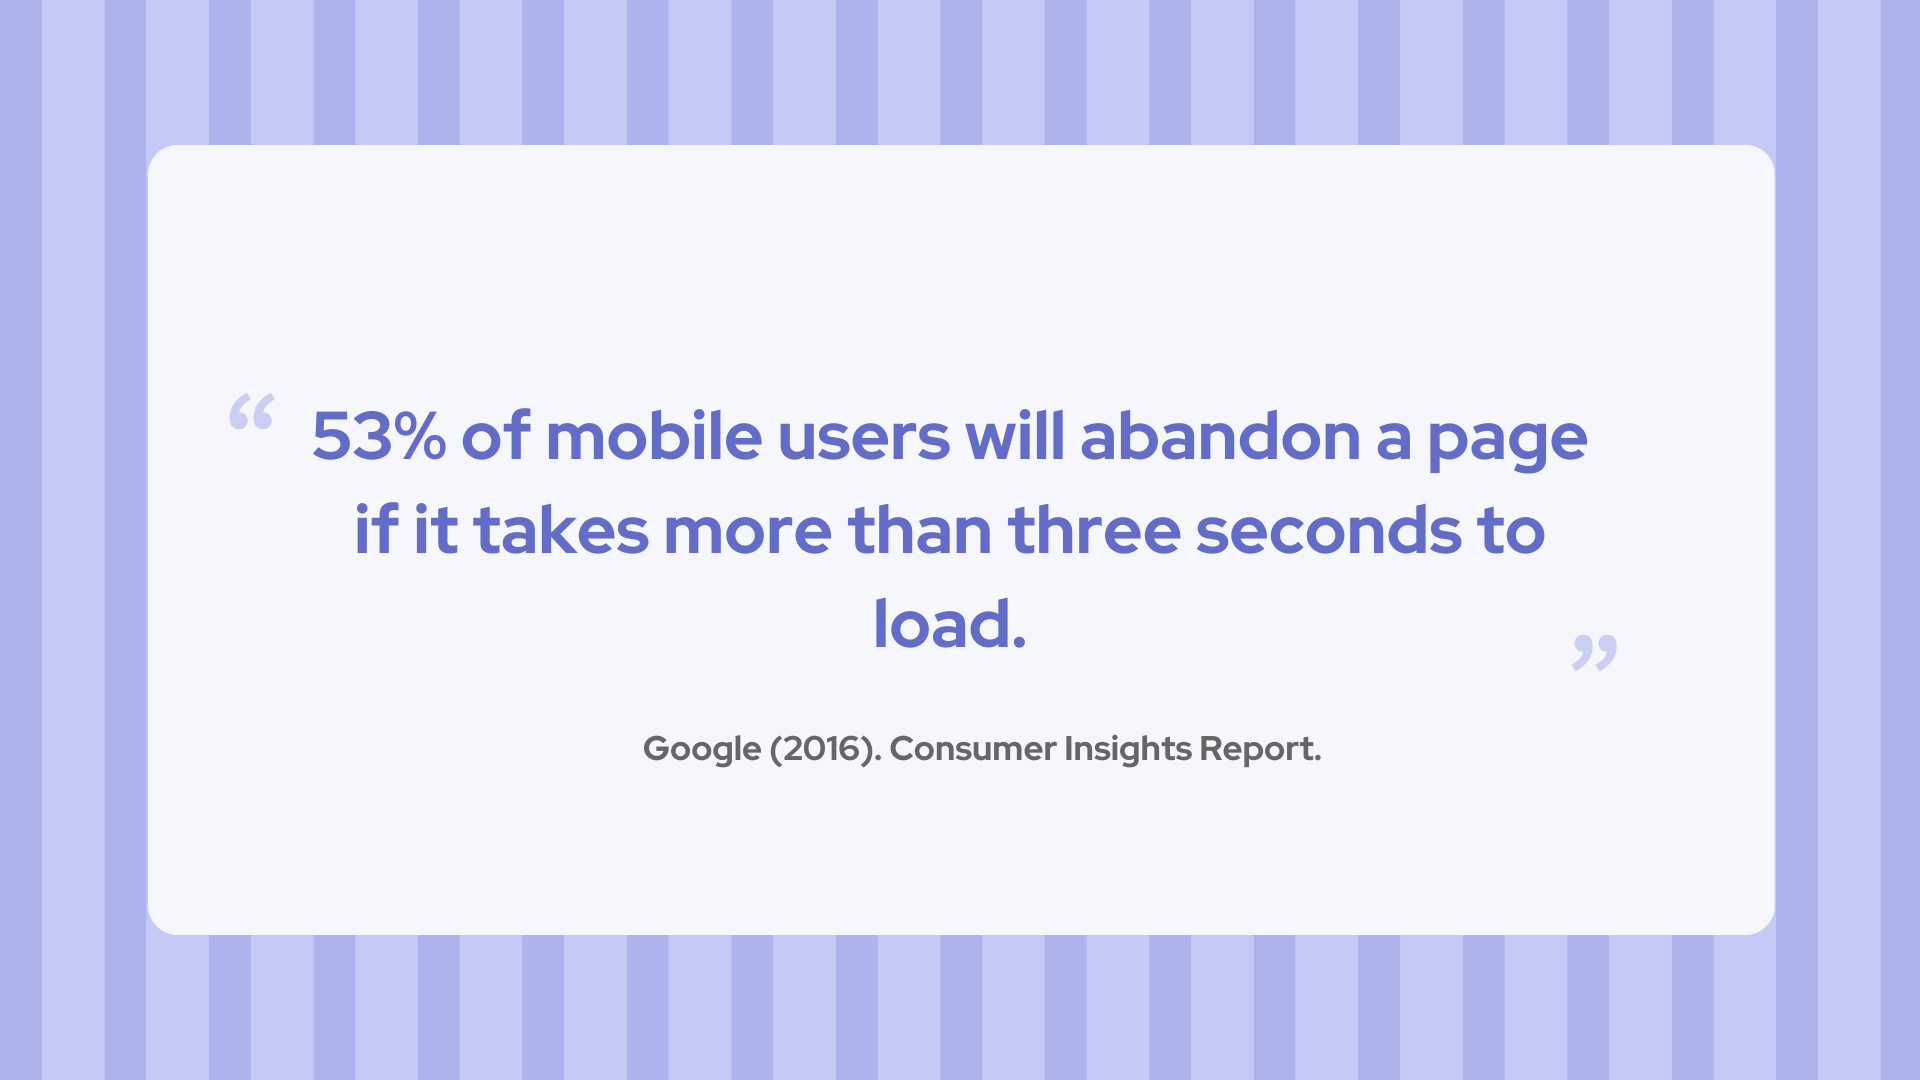
This is especially true for mobile users. As load time increases from 1 second to 10 seconds, the likelihood of a visitor leaving your mobile site increases by 123% (Google Industry Mobile Speed Report, 2018). In fact, 53% of mobile users will abandon a page if it takes more than three seconds to load (Google Consumer Insights Report, 2016). That’s a huge opportunity lost if your site isn’t optimized for speed.
Things to consider
Check Page Load Speed: Ensure all pages load quickly, especially on mobile.
Quick loading times improve the overall user experience, encouraging visitors to spend more time on your site, explore more pages, and ultimately make more purchases. Google has recognized the importance of a great user experience and now favors websites that meet certain standards – like fast loading speeds and mobile optimization – when determining search rankings. So, a faster, more user-friendly site not only keeps customers happy but can also boost your visibility in search results.
Enable Caching: Implement caching to reduce server load and improve speed.
By storing copies of your site’s pages, caching allows returning visitors to load content faster, reducing the need to fetch data from the server every time. This not only improves the user experience but also helps your website handle higher traffic volumes without slowing down.
By compressing images and reducing file sizes, your site will require less effort to load, significantly speeding up the overall process and enhancing user experience.
Reduce Plugin Use: Disable unnecessary plugins that could slow down the website.
Having too many plugins can dramatically reduce your site’s performance. Deactivate any that are not in use, and look for plugins with similar functions that could be consolidated into one. You can also test your plugins individually to pinpoint which one is affecting your site’s speed the most, allowing you to streamline and optimize performance effectively.
Run Stress Tests: Simulate high-traffic loads to ensure the site won’t crash.
In the highly competitive online business world, even a small glitch or moment of downtime can quickly drive users to your competitors. Every second counts and any disruption can result in lost opportunities as visitors seek out alternatives almost instantly.
When it comes to eCommerce, flawless functionality is critical. Every interaction a user has with your website, whether clicking an “Add to Cart” button or applying a discount code, should work seamlessly. A broken button or link during a major sales event like Black Friday can lead to abandoned purchases, driving frustrated customers to competitors.
Just like page speed impacts conversions, so does the functionality of essential elements on your site. If a button doesn’t work, that customer is likely gone for good. Regular testing of buttons and links is necessary to ensure that everything from checkout forms to promotional codes works smoothly.
By automating this process with tools like Ghost Inspector, you can continually monitor your site’s functionality and fix issues before they impact the customer experience. This proactive approach can prevent potential disruptions, keeping your site running seamlessly during high-traffic periods.
Things to consider
Test All CTAs: Ensure buttons like “Add to Cart,” “Checkout,” and “Apply Discount” work properly.
Testing your site’s CTAs is essential, as these are the key drivers of conversion. Whether it’s adding a product to the cart or applying a Black Friday discount, these buttons need to work perfectly under high traffic.
Check Internal and External Links: Verify all links are functional and direct users to the correct pages.
Broken links can severely harm the user experience, especially when shoppers are navigating quickly through your site during Black Friday. Internal links to product pages and external links to shipping policies or customer service must work without mistake.
Review Forms: Ensure contact forms, sign-up forms, and checkout forms are functioning correctly.
Mobile Responsiveness: Test that buttons and forms are easily accessible on mobile devices.
A significant percentage of users will be shopping on mobile during Black Friday, and any small issue could lead to lost conversions. Tools like BrowserStack allow you to test your site’s mobile functionality across different devices and screen sizes, ensuring that users can easily complete purchases no matter what device they’re using.
Cart and Checkout Process
The checkout process is one of the final steps in your customer’s journey, and optimizing it is key to maximizing conversions. One of the biggest challenges eCommerce sites face is cart abandonment, which often happens due to a complicated or slow checkout process. Simplifying this process, such as enabling guest checkout, can significantly boost your conversion rates by removing unnecessary barriers and allowing customers to complete their purchases more easily.
It’s equally important to test your payment gateways, such as PayPal and Stripe, regularly. A glitch or delay during payment can lead to frustration, causing customers to abandon their carts just when they’re ready to pay. Ensuring these gateways work flawlessly during high-traffic periods like Black Friday is vital for a seamless user experience.
Security is another top concern for shoppers. Websites that lack proper security measures, like SSL certificates and encryption, can lose customer trust, particularly during checkout. By securing customer data and displaying trusted security badges, you reassure buyers that their sensitive information is safe, increasing the likelihood they’ll complete their transactions.
Imagine a shopper filling their cart with Black Friday deals only to encounter a slow, frustrating payment process. They lose patience and decide to leave the site without completing the purchase. With a streamlined and well-tested checkout system, businesses can prevent these issues and guide customers smoothly through the final sale.
Things to consider
Streamline the Checkout Process: Simplify checkout by reducing steps and enabling guest checkout.
Test Payment Gateways: Ensure payment gateways like PayPal, Stripe, etc., are working without issues.
Check for Security: Confirm SSL certificates are up to date to ensure customer data protection during checkout.
Ensure Proper Tax and Shipping Calculation: Verify that taxes and shipping costs are calculated correctly.
When it comes to Black Friday, managing your inventory and optimizing product pages are essential for a smooth shopping experience. Running out of stock can quickly lead to customer frustration and missed opportunities. To avoid this, keeping your inventory updated in real time is key.
Things to consider
Verify Inventory Levels: Ensure inventory is up-to-date and reflects accurate stock levels.
Black Friday brings massive spikes in website traffic, which can strain unprepared websites, leading to slowdowns, crashes, and lost sales. To ensure your site performs smoothly under pressure, it’s recommended to have a robust hosting plan that can scale as traffic surges. Businesses often rely on flexible hosting providers and Content Delivery Networks (CDNs) to handle the increased demand, ensuring faster load times and better resource distribution.
Along with upgrading hosting, monitoring website uptime is essential. Downtime during peak shopping periods can result in significant revenue loss, so using monitoring tools and proactive management strategies helps keep your website running smoothly during Black Friday and beyond.
Things to consider
Scalability of Hosting: Confirm that your hosting plan can handle surges in traffic without slowing down or crashing.
Imagine you’re about to buy a big-ticket item during Black Friday, but the website crashes halfway through checkout. To avoid this, ensure your site is supported by a reliable hosting provider like our dedicated servers. These servers offer the stability and power needed to handle high traffic, along with a strong CDN such as Cloudflare to deliver content quickly to users across the globe.
By combining the robust performance of dedicated hosting with the efficiency of a CDN, you can prevent downtime and ensure a smooth shopping experience for your customers.
SEO and Marketing
With consumers becoming more savvy and selective, businesses need to tailor their approach to meet the expectations of today’s shoppers. Focusing on mobile optimization, early promotions, and flexible payment options will not only capture attention but also build customer loyalty.
Staying ahead of consumer trends and leveraging digital marketing tools will be essential to driving traffic and increasing conversions this Black Friday.
As more brands tap into channels including Instagram, YouTube, and TikTok to connect with their audiences, live streaming is becoming a powerful way to stand out, and on TikTok, having access to the TikTok stream key can make all the difference in reaching viewers in real time and creating a more interactive experience.
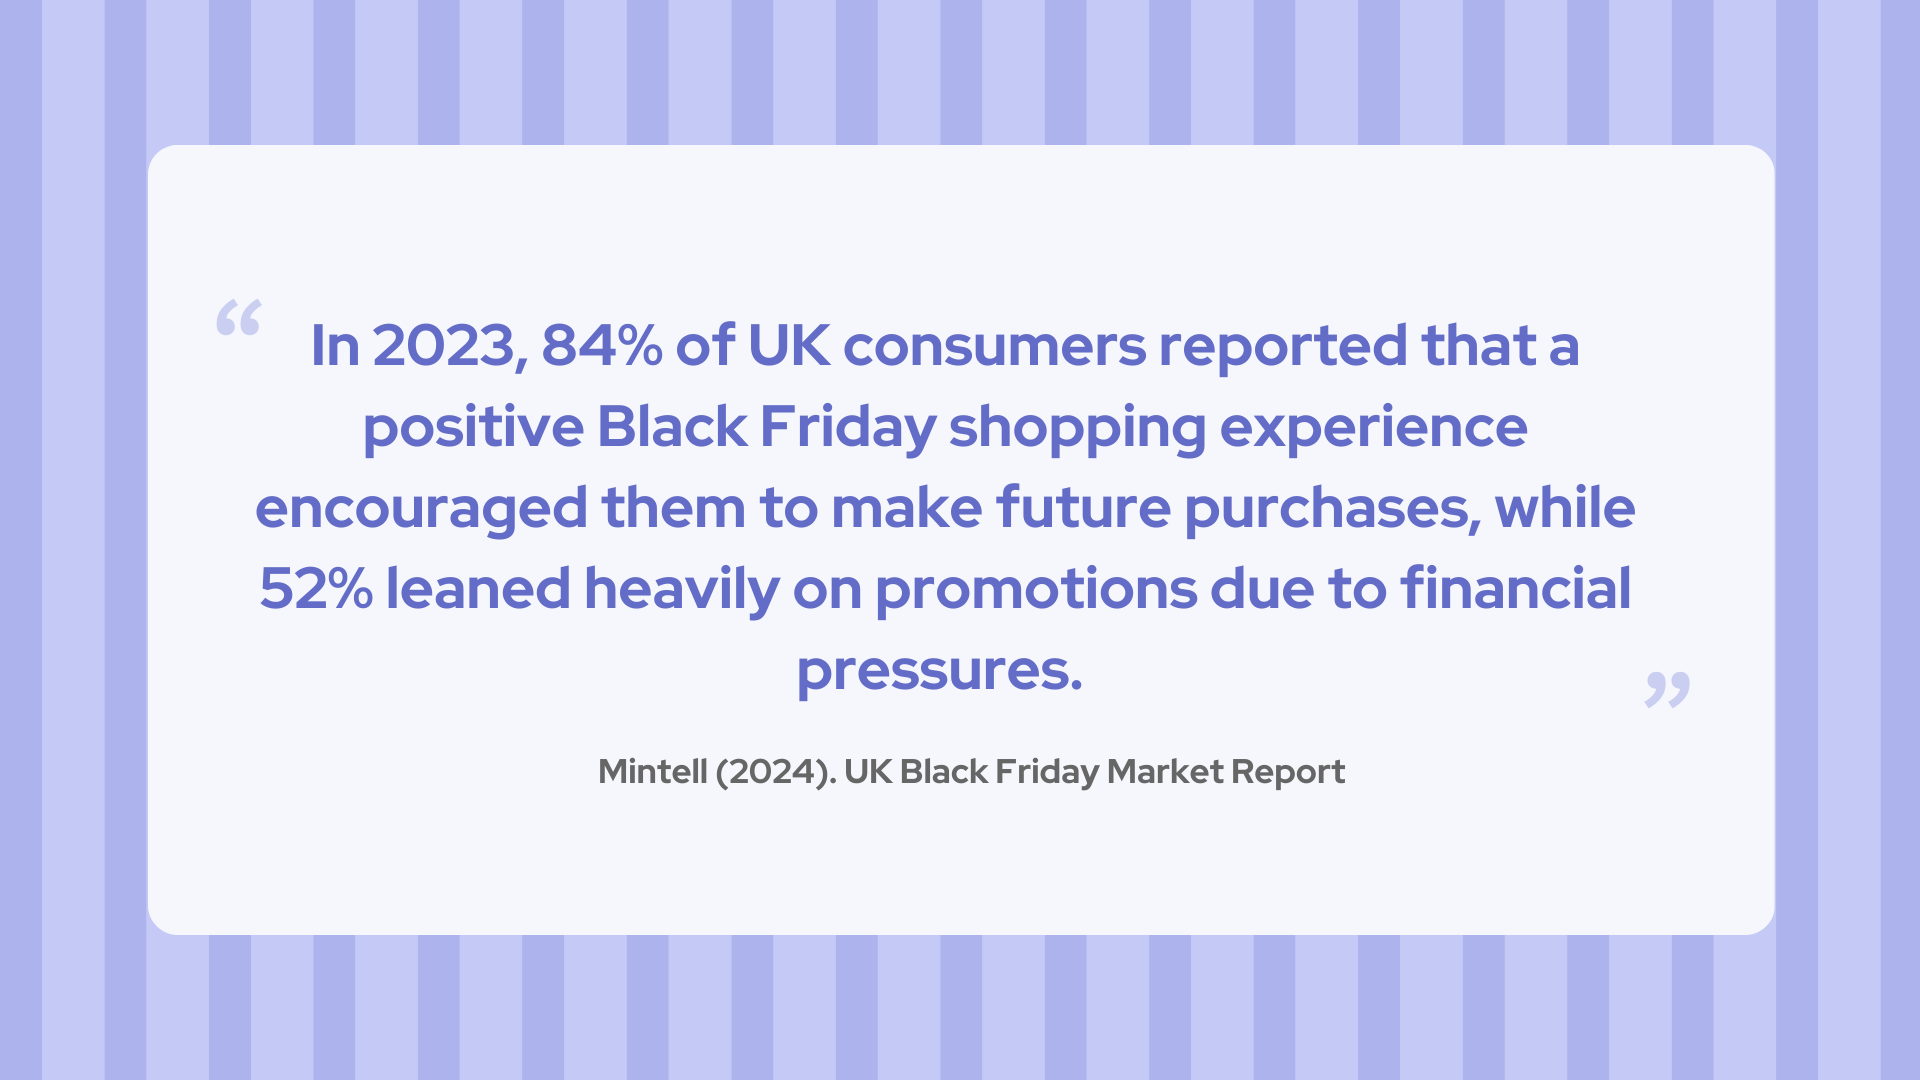
Black Friday 2024 draws near, and learning from last year’s trends is crucial for a successful campaign. In 2023, 84% of UK consumers reported that a positive Black Friday shopping experience encouraged them to make future purchases, while 52% leaned heavily on promotions due to financial pressures (Mintel, 2024).
Looking ahead, the key trends for 2024 include the ongoing growth of mobile shopping, a focus on early deal-seeking, and an increase in buy now, pay later (BNPL) options. With paid search expected to drive the most sales, marketers prepare their promotions earlier than ever (Experian, 2024).
Things to consider
Check Meta Tags and Descriptions: Ensure all product and category pages have optimized titles and meta descriptions.
As online traffic and transactions surge during Black Friday, the risk of cyber-attacks increases dramatically. Cybercriminals often target consumers and retailers using phishing scams and social engineering attacks, aiming to exploit the large volume of credit card transactions. SMBs are particularly vulnerable, with 46% of cyber breaches affecting businesses with fewer than 1,000 employees (Impact, 2023), many of which lack the resources to recover from such incidents.
Investing in proactive website maintenance services helps you stay ahead of potential threats. At tagDiv, we offer regular security updates, real-time monitoring, and threat prevention measures, giving you peace of mind during high-traffic events like Black Friday. With the right security in place, you can focus on maximizing sales without worrying about cyber threats.
In addition to protecting your website, it’s also important to make sure your emails are safe and trustworthy. Setting up a DMARC policy helps prevent hackers from sending fake emails using your domain. This protects your customers from phishing scams and keeps your brand’s emails from being marked as spam. It’s especially important when you’re sending promotions or order confirmations during the holiday season.
Things to consider
Update Security Software: Use firewalls, antivirus software, and monitoring tools to protect your website against cyber threats.
Preparing for Black Friday can make all the difference between a smooth, successful sale and one that falls short. By following this Black Friday eCommerce Checklist, you will ensure your website is ready to handle high traffic, deliver a seamless user experience, and maximize sales potential. Remember, speed, security, and functionality are key.
Black Friday eCommerce Checklist
Performance & Speed
Check Page Load Speed
Enable Caching
Optimize Images
Reduce Plugin Use
Run Stress Tests
Functionality of Buttons & Links
Test All CTAs
Check Internal & External Links
Review Forms
Mobile Responsiveness
Card & Checkout Process
Streamline the Checkout Process
Test Payment Gateways
Check for Security
Ensure Proper Tax and Shipping Calculation
Inventory & Product Pages
Verify Inventory Levels
Check Product Pages
Offer Clear Shipping Information
Add Urgency Elements
Website Traffic & Hosting
Scalability of Hosting
Monitor Server Uptime
Set Up a Content Delivery Network (CDN)
Security & Data Protection
Update Security Software
Enable 2FA (Two-Factor Authentication)
Update Privacy Policies
SEO & Marketing
Check Meta Tags and Descriptions
Prepare for Holiday-Specific Keywords
Enable Social Media Sharing Buttons
Set Up Email Campaigns
FAQ
How do I prepare my website for Black Friday traffic?
You’ll want to ensure your website can handle a surge in traffic without crashing. Look for tips on optimizing website speed, upgrading hosting, and conducting stress tests to ensure smooth operations during peak traffic hours.
How early should I start preparing for my Black Friday campaign?
It’s recommended to start planning at least 1-2 months in advance. Early preparation allows you to optimize your website, fine-tune marketing strategies, and ensure you have enough stock to meet demand.
What tools can I use to monitor and manage website traffic during Black Friday?
Tools like Google Analytics, Pingdom, and Uptime Robot can help you monitor traffic, site performance, and downtime. You can also use load-testing tools like K6 or BlazeMeter to simulate high traffic and ensure your website can handle the Black Friday rush.
How can I make my Black Friday deals more attractive to shoppers?
Consider using countdown timers, exclusive limited-time offers, and early access promotions to build excitement. Personalizing deals through email marketing and social media campaigns can also help you stand out from the competition.
SEO, or Search Engine Optimization, refers to a series of processes to improve a website’s visibility and ranking in search engine results pages (SERP). The ultimate goal of these processes is to generate relevant organic traffic to the website. With SEO, businesses can ensure that their product, service, or product category is more easily found by their target audience through a simple Google search.
Why is SEO important for a business and its website?
According to Forbes (2022), 45.1% of people trust organic results more than paid ones, and the first organic result in the SERP has an average click-through rate of 27.6%. Moreover, the first organic result is 10x times more likely to generate a click than the result in the 10th position (Dean, 2023).
Less than 1% of individuals reach the second page when searching for information (Forbes, 2022). This highlights how crucial it is for a company to optimize its website to gain the authority needed to rank on the first page of search results. Google holds the largest market share among search engines (Oberlo, n.d.), and it is visited by over 85.5 billion people monthly (SimilarWeb, 2024).
Therefore, SEO is a strategy that businesses must pay attention to due to its impact on visibility and online success. Search engines remain the most effective channel for driving traffic to websites.
SEO Strategies and Methods to Improve a Website’s SEO
SEO optimization can be performed internally (On-page SEO) and externally (Off-page SEO). Some essential SEO activities include creating optimized content, improving website technical aspects, conducting keyword research, and increasing the number of backlinks.
On-page SEO vs. Off-page SEO
On-page SEO focuses on optimizing elements within the website itself. This includes enhancing the content and structure of a company’s web pages. Creating a positive visitor experience through user-friendly interfaces is another key factor businesses should prioritize.
On the other hand, off-page SEO involves external factors that companies do not have full control over. This includes activities such as building external links to your page, social media engagement, content marketing, and public relations.
Improving the Technical Aspects of a Website
In addition to internal (On-page) and external (Off-page) SEO, technical optimization is equally important. These activities include improving security, minimizing page load times, and ensuring the website is mobile-friendly. The quality of the code also plays a critical role in avoiding errors or indexing problems.
Increasing the Number of Links to Your Website (Link Building)
Link building refers to increasing the number of external links pointing to your website. The more high-quality links you have, the more authority your site gains. However, it’s not just about quantity—link quality matters too. A backlink from a well-known, authoritative website is more valuable than several from smaller, less influential sites.
Keyword Optimization
According to a HubSpot study, keyword optimization is one of the most effective SEO strategies for improving a website’s ranking.
The effectiveness of keywords depends on their relevance, authority, and search volume. The more a keyword aligns with what users are searching for, and the more strategically it’s placed (in meta descriptions, titles, content, URLs, alt text, etc.), the higher the chances of ranking well in search results.
For more accurate keyword research, using reliable residential proxies can uncover geo-specific search trends and deliver more targeted insights for better SEO performance.
Additionally, it is important to analyze the search volume for a keyword. Ranking highly for a keyword that few people search for will not generate the desired traffic.
How to Create Optimized Content
Improving your website’s visibility in search results can be challenging and require constant time and effort. Here are some SEO tools to achieve better results and save time.
On-page SEO Tools:
Answer the Public: Generate multiple keyword ideas based on a given word;
SERP Robot: Check your ranking for chosen keywords;
Yoast SEO: A WordPress plugin that optimizes articles for search engines.
Valuable Tips for High Keyword Quality:
Ensure the keyword is present in the title, meta description, and URL;
Include the keyword in the page’s content, with at least two mentions;
Ensure image titles are relevant and, if possible, include the keyword.
Off-page SEO Tools:
SEMRush: Perform website audits and check your search ranking;
SERP Snippet Optimization Tool: Test how your pages appear in Google results;
Website Authority Checker: Check your domain rating;
Ahrefs Backlink Checker: Analyze your backlinks;
Google Alerts: Get notified whenever your company or product is mentioned online.
Recommendations for Attracting Audiences and Increasing Website Authority:
Paid articles on niche websites;
Guest posts on other websites, linking back to your company’s page;
Posts on social media channels that include links to your website;
Influencer marketing campaigns.
Technical Optimization Tools:
Google PageSpeed Insights: Check your website’s speed and usability on various devices;
Ahrefs Webmaster Tools: Perform a technical audit of your website;
Google Mobile-Friendly Test: Ensure your website is mobile-friendly.
Google Tools:
Google Analytics: Monitor and analyze website traffic;
Google Search Console: Analyze your website, receive alerts, and track errors;
Google Ads Keyword Planner: Find popular keywords used by your target audience;
Google Trends: Track the relative popularity of topics.
Chrome Extensions:
Ahrefs SEO Toolbar: Check for problematic links, redirect chains, nofollow links, and on-page elements for any webpage.
Conclusion
By correctly implementing SEO strategies and using the right tools, businesses can increase their visibility, outpace competitors, and reach their target audience more effectively. SEO can also reveal new opportunities to grow their brand image and perceived authority in their market.
Although the optimization process may seem complex, the long-term results will justify the effort invested.
Simply having a website online is not enough; it must be well-maintained and regularly updated to provide users with a pleasant and secure experience. According to a study by Adobe, 38% of users abandon a website if it is unattractive or does not function properly. Additionally, data shows that approximately 30,000 websites are attacked daily by cybercriminals (DataProt). These facts highlight the necessity for businesses to invest time and expertise in constantly checking the functionality and updating the content of their sites.
Through regular and well-executed website maintenance, businesses not only ensure an efficient online presence but also protect their site against cyber risks while maintaining a positive user experience.
In the following sections, we will explore in more detail what website maintenance services involve and why they are essential for preventing and solving the problems a website may encounter.
What is website maintenance?
Website maintenance refers to the continuous process of ensuring a website’s functionality, security, and updates through regular checks and updates.
This process can include actions such as monitoring the health and performance of the website, checking the functionality of links, continuously updating content, fixing broken links, and creating backups of the website.
By performing these technical checks regularly, you can maintain the safety and performance of the site while also ensuring a positive user experience.
Benefits of website maintenance
Time and cost savings
A proactive website maintenance service can prevent major issues that could arise unexpectedly, leading to high repair costs. Early detection of problems minimises downtime and the associated costs.
By adopting such an approach, significant issues that could disrupt the functionality of the site and require extensive resources to fix can be avoided. This type of maintenance not only saves money but also reduces downtime, keeping the website accessible and functional for visitors.
Regular updates
Another benefit offered by website maintenance servicesis the ability to carry out regular updates.
These updates are essential to maintain the security and performance of the website. They include security updates, plugin updates, and software updates to reduce the risk of security breaches.
An updated website not only protects business data but also strengthens customer trust. Regular maintenance helps identify and resolve problems before they become critical, ensuring that the website remains in optimal working order.
Security
Given the increasing frequency of cyber threats, website security is a significant concern for businesses. Regular maintenance involves updating security measures, plugins, and software, thus reducing the risk of security breaches. A secure website not only safeguards your company’s data but also fosters trust among your customers.
What happens if website maintenance is neglected?
Security vulnerabilities
Failure to maintain the website exposes it to hacking attempts and other cyberattacks. A website maintenance plan helps protect your business from virtual threats. Regularly updating security software and renewing the SSL certification contributes to protecting website files, which include sensitive information such as passwords and private customer data – including credit card numbers and banking details.
Performance issues
A poorly maintained website may experience performance issues, such as slow loading times, frequent downtimes, and usability problems. Outdated software, overloaded code, or server issues can cause the site’s performance to deteriorate, resulting in a poor user experience, higher bounce rates, and loss of traffic and revenue.
Data loss
Failing to perform regular maintenance increases the risk of data loss or corruption due to server errors or cyberattacks. Regularly backing up the website acts as a safety net for major issues that might arise, allowing for a quick restoration of the site if it falls victim to a cyberattack.
This minimizes downtime and prevents the loss of valuable data, which is especially important for e-commerce sites and businesses that rely heavily on their online presence.
How often should website maintenance be performed?
The frequency of website maintenance depends on several factors, such as the complexity of the site, the volume of content updates, and the specifics of your business. However, as a general rule, it is recommended to perform routine maintenance tasks monthly or quarterly. These tasks include software updates, checking and fixing broken links, reviewing and updating content, and conducting security audits.
To stay on top of these tasks, work management tools help schedule and track progress, ensuring maintenance is done regularly and efficiently.
For most sites, monthly maintenance may seem sufficient, but in the case of online stores, weekly or even daily checks are extremely necessary. This is due to the frequent actions carried out in an online store, such as launching new products or changes at the product level (discounts, stock issues, image optimization, page indexing, etc.).
How much does website maintenance cost?
The cost of website maintenance services can vary depending on several factors, such as the size and complexity of the site, the frequency and purpose of maintenance, and the level of expertise required to carry out the desired tasks. Additionally, the number of services included in the maintenance package will influence the price of the service. For a detailed breakdown of our offer, visit the website maintenance page. Plans starting at 105 EUR per month.
Conclusion
Website maintenance is not just an option but an essential necessity for any business that wants to maintain a high standard of online presence. As discussed above, a website maintenance service comes with many benefits that should not be overlooked.
By regularly performing checks and updates, you can ensure optimal functionality, data security, and a positive user experience. Failing to carry out these procedures can lead to security vulnerabilities, performance issues, and data loss, negatively affecting traffic and revenue.
If you want a secure, fast, and always updated website, we recommend investing in a professional website maintenance service. Visit our website maintenance page to explore the available packages, or contact us for a personalized offer. Keep your business safe and ready for any online challenges!
Cassio Lovo is a free restaurant website template designed for service companies seeking a modern and sophisticated template for their website.
We created this free restaurant website template to showcase the features of this pre-made website template. The website contains all the essential sections that a service-oriented website should have.
Any service company can easily customize this template by substituting the text, images, and possibly the header menu without any coding experience. The important thing to note is that this pre-made website template only works with a Newspaper theme license.
Design
Color scheme
Typography
The Cassio Lovo restaurant website template, available with the Newspaper theme, showcases a sleek and modern aesthetic, largely attributed to its carefully selected typography. At the heart of this design is the Gantari font, which plays a pivotal role in defining the visual identity of the website.
Gantari is a sans-serif typeface that blends contemporary style with readability, making it an ideal choice for both digital and print formats. Its clean lines and balanced letterforms create a professional yet approachable look, perfectly complementing the bold, dynamic layout of the Cassio Lovo template.
The font’s versatility allows it to be effectively used across various site elements, from headlines and subheadings to body text and call-to-action buttons.
Website structure
Header
The header section contains important elements of a service-oriented website, including a phone number for reservations, an “about” page, a “menu” section, a reservation page, a blog, and a contact page. We will discuss each of these sections in the following paragraphs.
In order to ensure easy access and navigation for users, we have implemented a feature that makes the header of our website “sticky,” meaning that it remains fixed at the top of the screen as the user scrolls down the page.
The call button serves as a convenient way for potential customers to get in touch with your company in order to make reservations and to inquire about various aspects of the services you offer.
Homepage
The main page of the website provides comprehensive details about the company, including its opening hours, customer reviews (featuring Yelp reviews and a customer section with sliders), and the precise address where the company is situated (utilizing an integrated Google Maps feature for accurate location information).
As you scroll down, you may notice that certain images and sections move at a different speed compared to the rest of the website content. This is due to the parallax effect used in the design of this website template. The parallax effect enhances user engagement by adding dynamic, interactive layers without overwhelming the experience.
About
The About page is where you can provide a detailed overview of your organization, including its history, mission, values, and key team members. This is your opportunity to tell the story of your organization, its journey, and what sets it apart. It’s a chance to connect with your audience on a more personal level and convey the passion and purpose behind your work.
Menu Page
As a service-based business, it’s important to present your offerings clearly and tangibly to potential customers. When visitors land on your website, their primary reasons for doing so are to view your menu, services offered, and associated costs, as well as to find contact information for inquiries or reservations.
The layout provided in this prebuilt template is thoughtfully designed to cater to the needs of various service businesses, whether it’s a restaurant, barber shop, beauty studio, or dental studio, among others.
Reservation Page
Another essential page is the reservation page, where customers can book a table or schedule any service requiring a reservation.
For this free restaurant template, we included a contact section and also one where visitors can book a table.
Blog page
A blog page offers you the platform to create and share valuable content that can provide insightful information for potential clients. This helps establish your expertise and attract clients interested in your services or products.
If you feel like a blog is not something that you want to offer, you can easily delete this section.
Contact page
The contact page provides the opportunity to include information about your business, including email address, phone number, physical address, opening hours, and social media accounts. It is important to have this page to ensure that potential customers can easily locate you.
Search Bar
Using the search bar, customers can easily locate specific services or, in our case, menu items.
Footer
The footer is divided into three areas: “About Us,” navigation links, and contact information with social media icons.
How can I use it?
To use this prebuilt WordPress restaurant template for free, you must first purchase our Newspaper theme. If you enjoy it and wish to implement it for your business, please ensure you buy the theme beforehand.
Conclusion
Cassio Lovo is a free pre-designed website template specifically built for the Newspaper theme. This template is ideal for establishing an online presence for your restaurant or any other service-based business, such as a dental and medical office, barbershop, or beauty studio. With its user-friendly design and layout, it offers a convenient platform for showcasing your services and attracting potential customers.
To see a live preview of the Cassio Lovo Prebuilt Website Template, click here.
If you’re interested in this template but require a more personalized solution, don’t hesitate to submit a request. We’re committed to connecting promptly to craft a tailored plan that perfectly meets your specific needs.
This website uses cookies to improve your experience while you navigate through the website. Out of these, the cookies that are categorized as necessary are stored on your browser as they are essential for the working of basic functionalities of the website. We also use third-party cookies that help us analyze and understand how you use this website. These cookies will be stored in your browser only with your consent. You also have the option to opt-out of these cookies. But opting out of some of these cookies may affect your browsing experience.
Necessary cookies are absolutely essential for the website to function properly. These cookies ensure basic functionalities and security features of the website, anonymously.
Functional cookies help to perform certain functionalities like sharing the content of the website on social media platforms, collect feedbacks, and other third-party features.
Performance cookies are used to understand and analyze the key performance indexes of the website which helps in delivering a better user experience for the visitors.
Cookie
Duration
Description
AMP_TOKEN
This cookie is set by Google Analytics - This cookie contains a token that can be used to retrieve a Client ID from AMP Client ID service. Other possible values indicate opt-out, inflight request or an error retrieving a Client ID from AMP Client ID service.
Analytical cookies are used to understand how visitors interact with the website. These cookies help provide information on metrics the number of visitors, bounce rate, traffic source, etc.
Cookie
Duration
Description
_ga
2 years
This cookie is installed by Google Analytics. The cookie is used to calculate visitor, session, campaign data and keep track of site usage for the site's analytics report. The cookies store information anonymously and assign a randomly generated number to identify unique visitors.
_gat_gtag_UA_43963494_1
1 minute
This cookie is set by Google and is used to distinguish users.
_gid
1 day
This cookie is installed by Google Analytics. The cookie is used to store information of how visitors use a website and helps in creating an analytics report of how the website is doing. The data collected including the number visitors, the source where they have come from, and the pages visted in an anonymous form.
_hjAbsoluteSessionInProgress
30 minutes
This cookie is used to detect the first pageview session of a user. This is a True/False flag set by the cookie.
_hjFirstSeen
30 minutes
This is set by Hotjar to identify a new user’s first session. It stores a true/false value, indicating whether this was the first time Hotjar saw this user. It is used by Recording filters to identify new user sessions.
_hjid
1 year
This cookie is set by Hotjar. This cookie is set when the customer first lands on a page with the Hotjar script. It is used to persist the random user ID, unique to that site on the browser. This ensures that behavior in subsequent visits to the same site will be attributed to the same user ID.
_hjIncludedInPageviewSample
2 minutes
This cookie is set to let Hotjar know whether that user is included in the data sampling defined by your site's pageview limit.
_hjIncludedInSessionSample
2 minutes
This cookie is set to let Hotjar know whether that user is included in the data sampling defined by your site's daily session limit.
Advertisement cookies are used to provide visitors with relevant ads and marketing campaigns. These cookies track visitors across websites and collect information to provide customized ads.
Cookie
Duration
Description
_fbp
3 months
This cookie is set by Facebook to deliver advertisement when they are on Facebook or a digital platform powered by Facebook advertising after visiting this website.
fr
3 months
The cookie is set by Facebook to show relevant advertisments to the users and measure and improve the advertisements. The cookie also tracks the behavior of the user across the web on sites that have Facebook pixel or Facebook social plugin.
IDE
1 year 24 days
Used by Google DoubleClick and stores information about how the user uses the website and any other advertisement before visiting the website. This is used to present users with ads that are relevant to them according to the user profile.
test_cookie
15 minutes
This cookie is set by doubleclick.net. The purpose of the cookie is to determine if the user's browser supports cookies.
VISITOR_INFO1_LIVE
5 months 27 days
This cookie is set by Youtube. Used to track the information of the embedded YouTube videos on a website.
YSC
session
This cookies is set by Youtube and is used to track the views of embedded videos.