
What would you say to trying out a new yummy recipe? We’ve got just the perfect demo for you to start sharing your new cuisine ideas and inspirations. With delightfully green accent colors, and soft grey tones mixed in, the demo is both fresh and inviting. Let’s jump right into the story behind it, the matching elements, and how to import it for your website with the Newspaper Theme.
Gourmet PRO: the intro
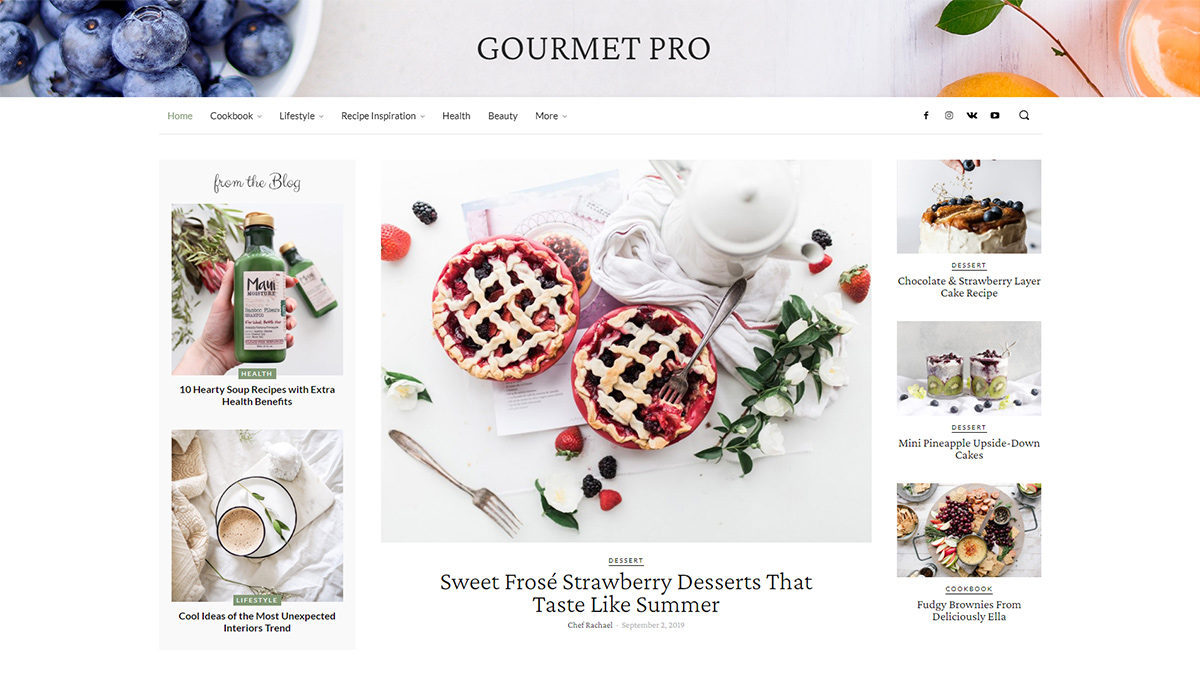
If you’re a foodie and you enjoy cooking, you know that the most crucial aspect to any recipe is the secret flavor added in right at the end. What is the one ingredient that should never be absent from your meal? Love. And as such, while creating Gourmet PRO, Marius, the web designer whose brilliant ideas shaped this stunning demo, used a well-thought-out plan to strike the iron while it was hot.
With lots of care and attention, he molded the demo into everything a cook might need. The fascinatingly entwined combo of serif and sans serif fonts, respectively Crimson Pro and Lato, gives the reader something to latch onto while being guided through the website.
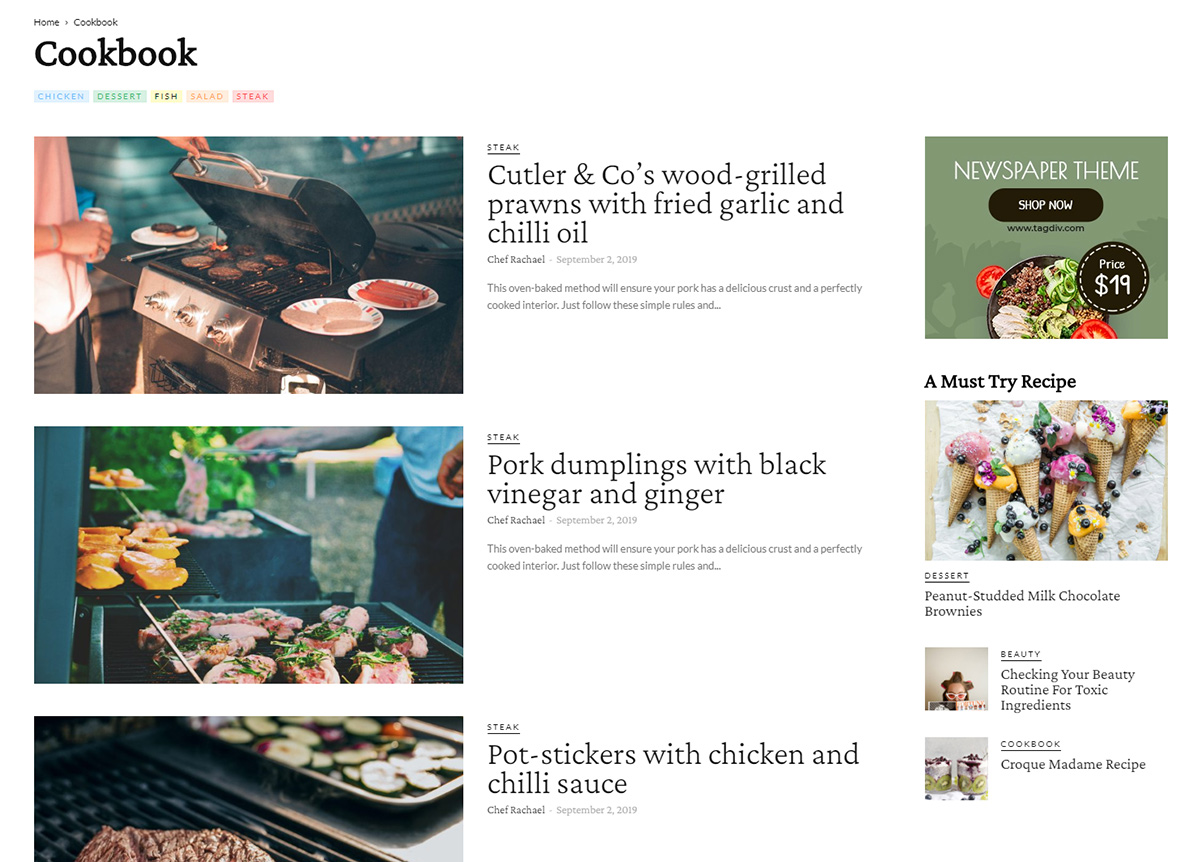
And where else would a food blog be, without a cookbook and a list of recipes? Nestled right into the header, the viewer can hover through the various delicious meals and choose something he is interested in straight away.
Mmm, yummy!
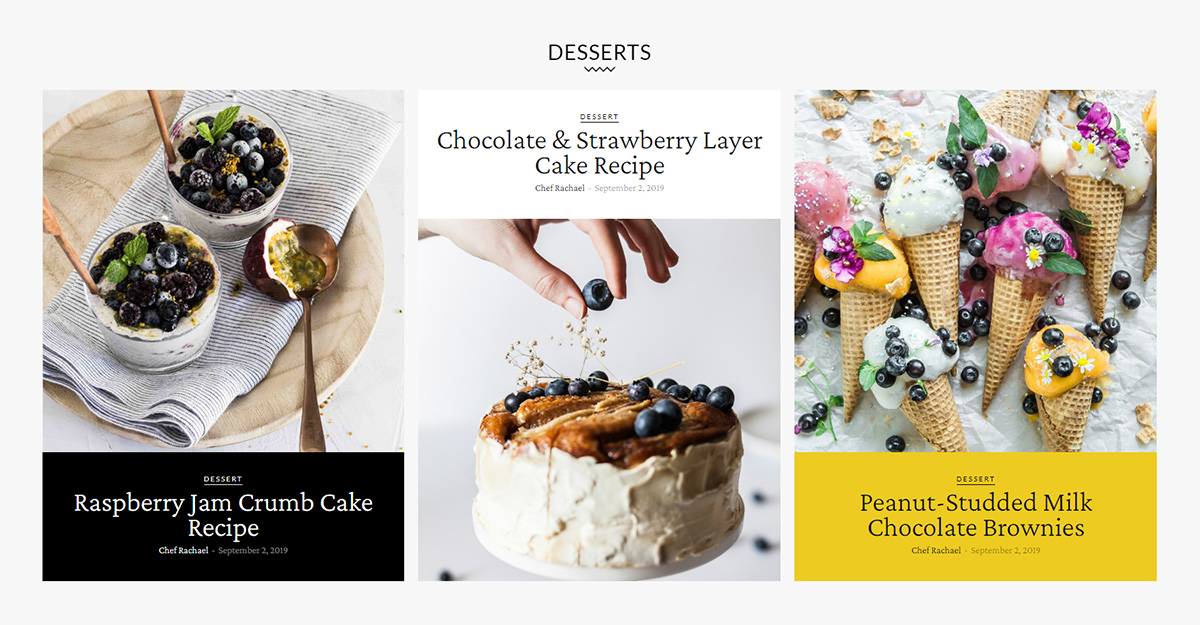
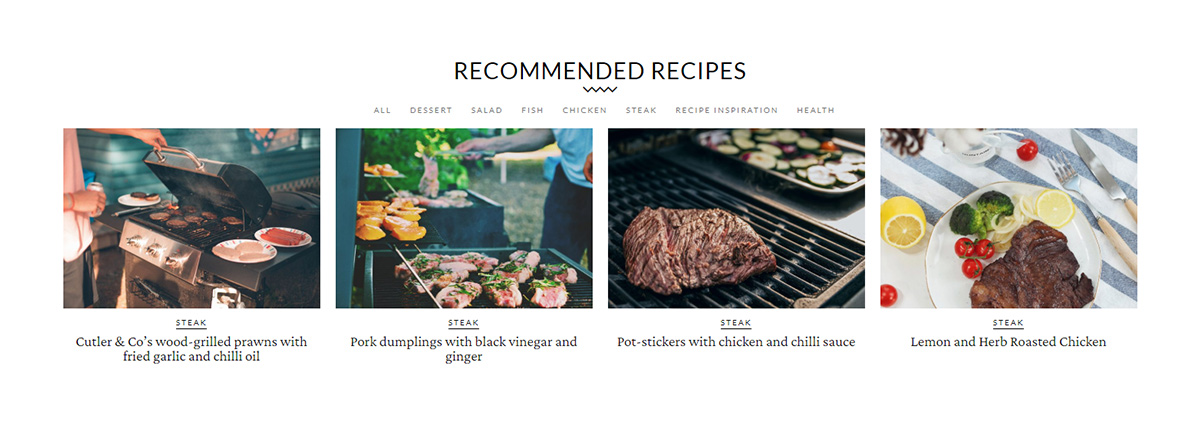
One of the critical parts in creating a demo is choosing the images to go along with it. For this, Marius chose exceptionally delicious looking images of food. Moreover, when you click on any of the recipes, you get two neat little sidebars that showcase more of the tasty goodness you’re bound to come across.
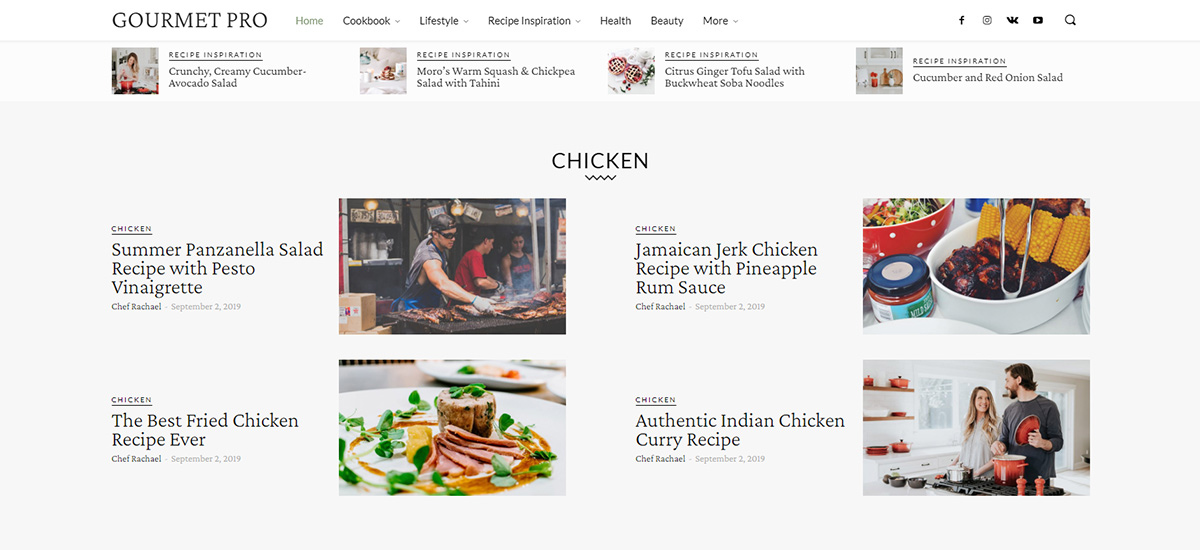
Each category name is underlined to emphasize them further. With a quirky and comforting style, the layout uses white space to distinguish different elements from each other. And with an eye-catching sticky header that featured the latest posts, you can also make waves.
Installing the Gourmet PRO demo
Newspaper Theme 10.3 comes with ten unique demos for you to try out on your website: Beauty PRO, Black Newspaper, Classic Blog, Gadgets, The Critic, Gossip, Pulses, Sports, Style News, and Gourmet PRO. When updating your theme, you have easy-access to all of these with a single click. If you’re new and need more information on how to update your Newspaper theme, check out our informative article here.
From the Admin Dashboard, go to Newspaper > Install Demos and scroll down to Gourmet PRO. When you hover over the demo’s image, you get to choose between Include Content and Design only. Just hit the switch to make your choice. What do these two options mean? When you import the demo with content, it comes with all of its categories, menus, and even posts. If you ever choose to uninstall this demo, all this content gets removed. Design Only lets you import only the layout, so if your website already contains articles, they get pulled into and will automatically show on the Homepage.
Whichever your choice, hit the “Install” button to import this fantastic demo.
Header Logo & Main Menu
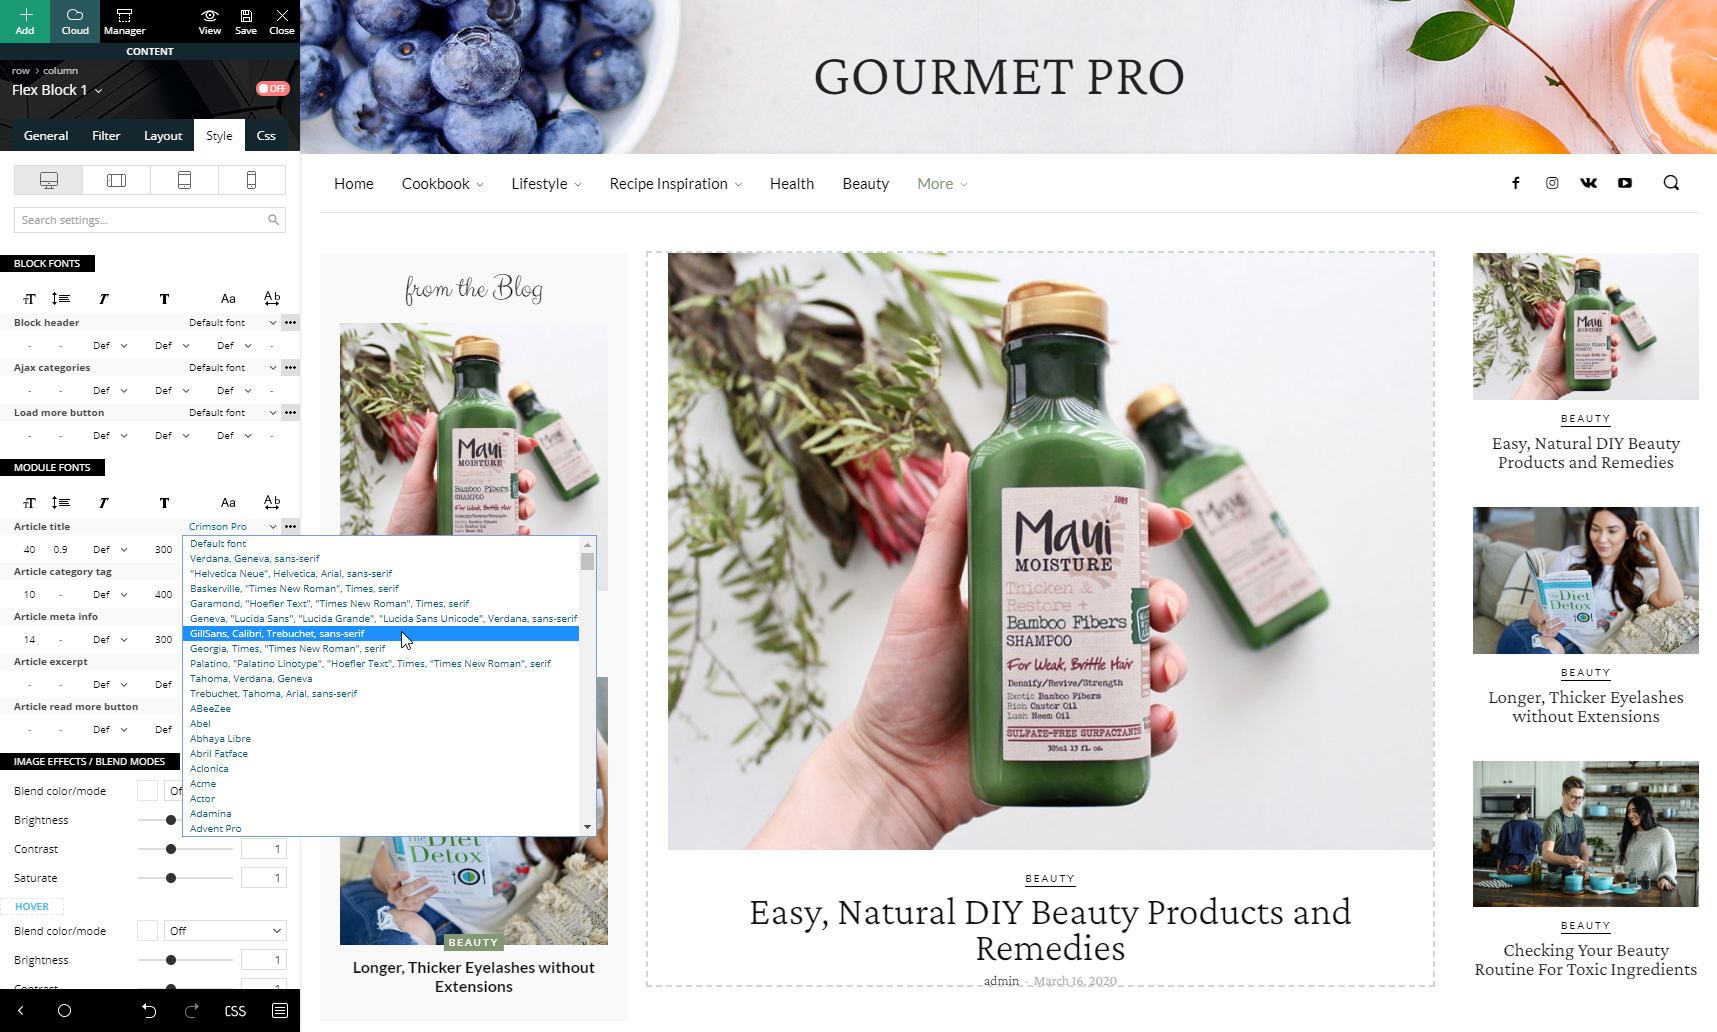
Importing a PRO demo comes with a lot of benefits, one of which is that everything is customizable right on the frontend. So, getting your website up and running requires you to take only a few simple steps. Let’s begin!
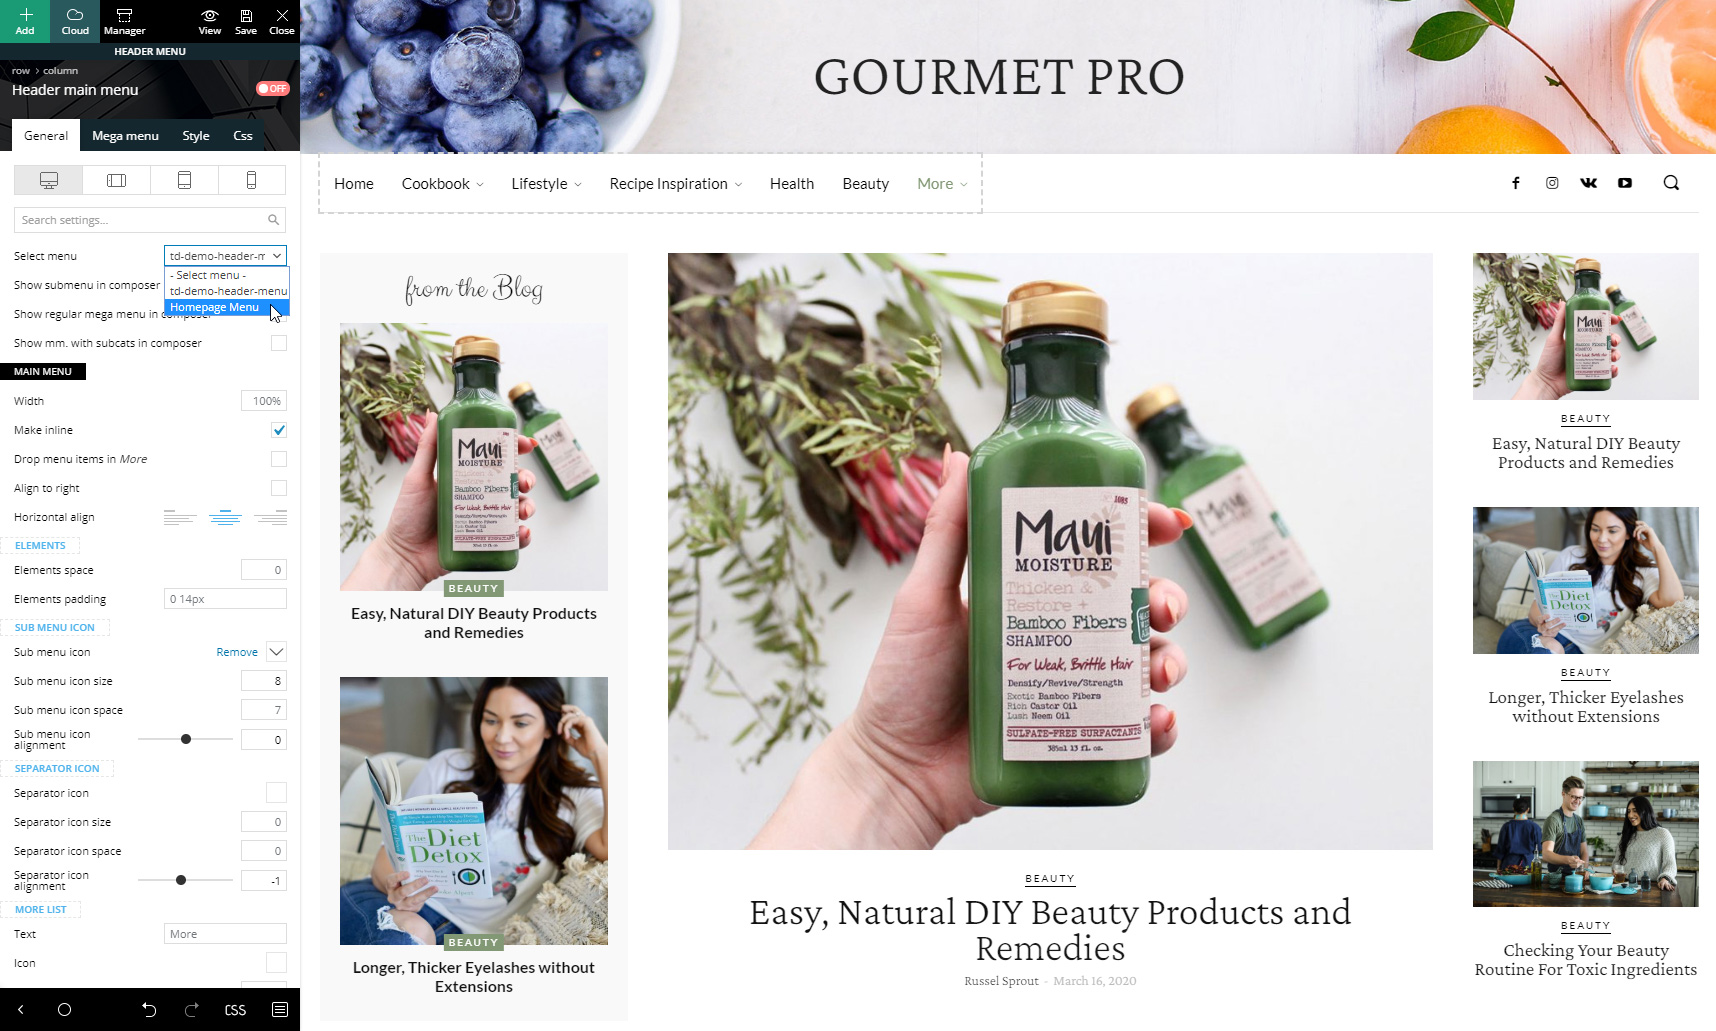
Open the tagDiv Composer on the Homepage. Click on the “Gourmet PRO” logo and scroll down in the General Settings tab until you get to the Logo Text box. Write down the name of your website. click on it, and then under the General Settings tab, select your menu.
If you don’t already have a menu created, save the settings in the tagDiv Composer, and then go to the Admin Dashboard. From there, navigate to Appearance > Menus. Press the “Create a new menu” button after you give it a title. Now drag and drop Categories, Pages, and order them. You can even make some categories mega menu items. When you’re done, save and go back to the frontend of your Homepage.
Choose the menu you’ve just created for the Header Main Menu. Next, click on the Website Manager button that’s on the top of your tagDiv Composer bar. Go through the Mobile menu, Mobile menu Sticky and Main Menu sticky to choose for each of these the menu you’ve created. If you have a parent category that is a mega menu, you may need to create a different menu to display all the nested categories for mobile.
Homepage adjustments
The first section of the page contains 3 different Flex Blocks. If you want to display different posts or articles, you need to either filter them by a tag, post id, author, category, or you need to add an offset to them. To offset the elements, go to the General Settings tab and to filter them go to the Filter tab.
The Sticky Main Menu that you can see once you enable it in the Website Settings window also has a Flex block. You could leave it as it is and have it display your latest posts so that when you write a new article, it immediately shows up for your audience here. Or you can filter it just like you did with the previous ones.
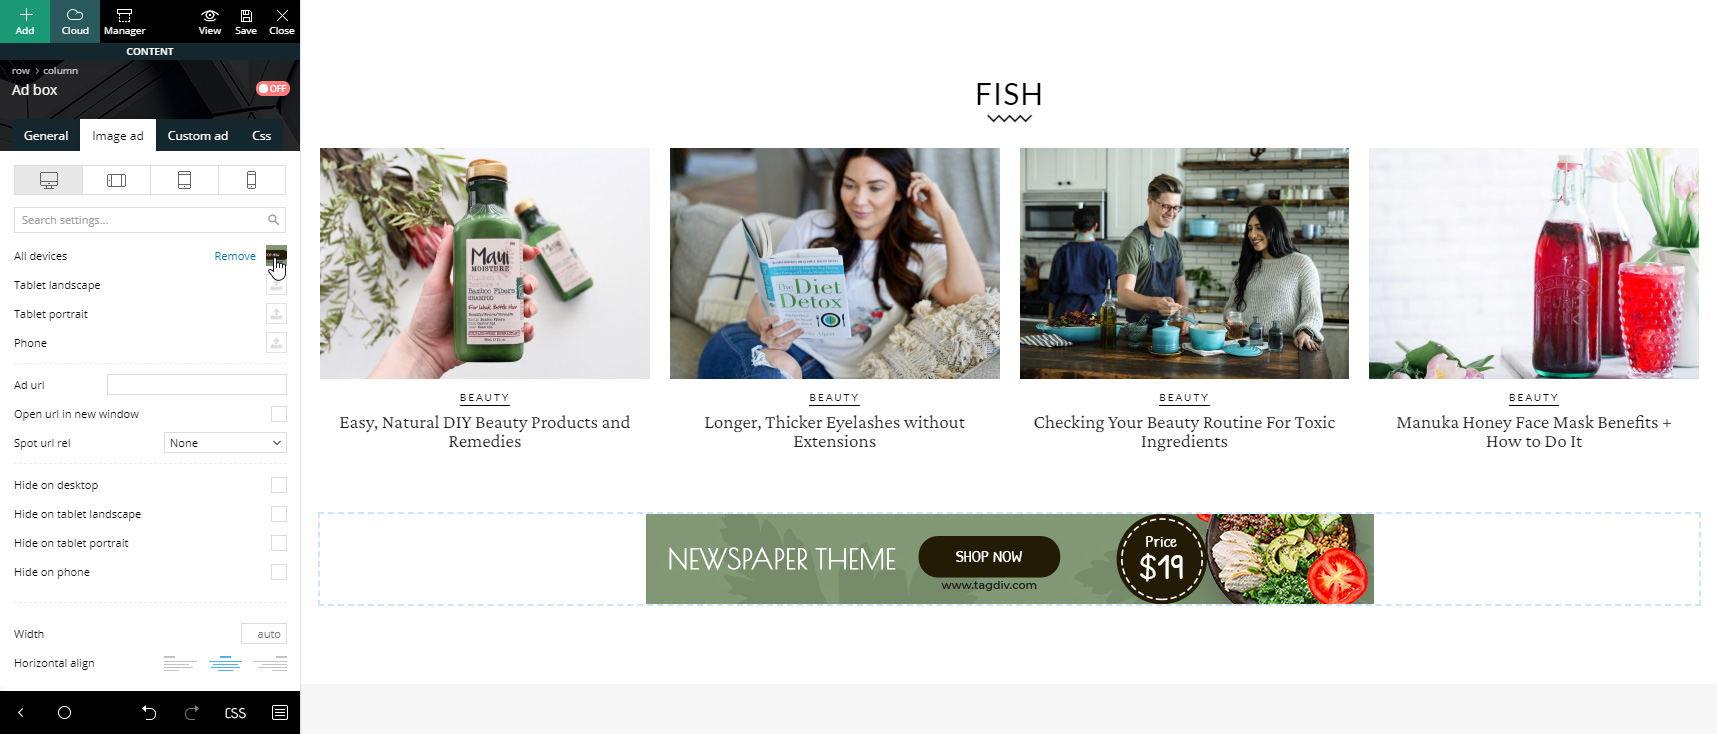
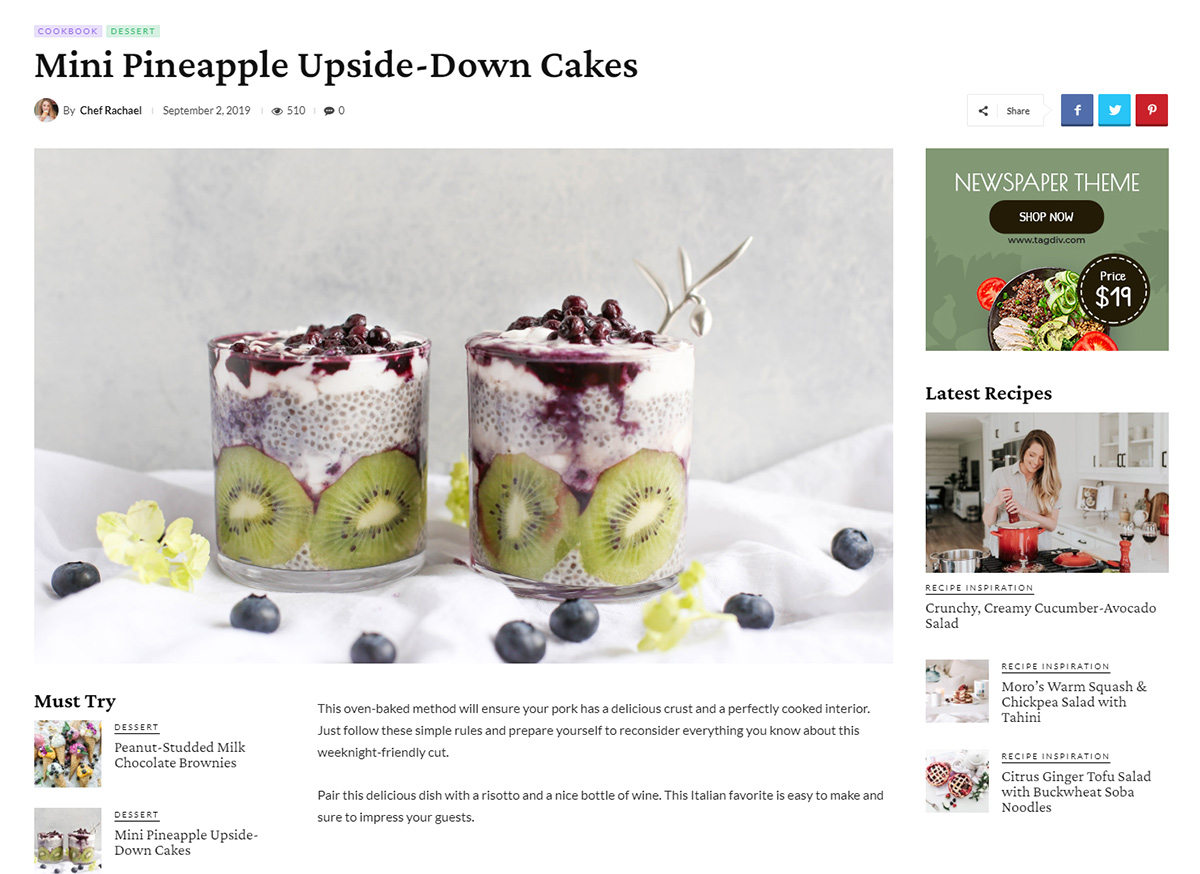
The next section contains an Ad Box, which you can edit to add your affiliates’ ad. Go to the “Image Ad” tab and upload the photo in the “All Devices” box. Now put your affiliates’ URL in the “Ad Url” box. Continue down the page adding offsets and filters to Flex Blocks and changing the titles. When you get to the “Cookbook release” section, click on the inline single Image element to choose a different photo that represents your website.
Write a subheading and a heading for the Inline Text items right next to the image and change the button’s URL by going to the General Settings. Following this section comes a small testimonial that can be replaced with your viewers’ reviews and thoughts about your website. Upload their image, replace the text, and save!
Footer
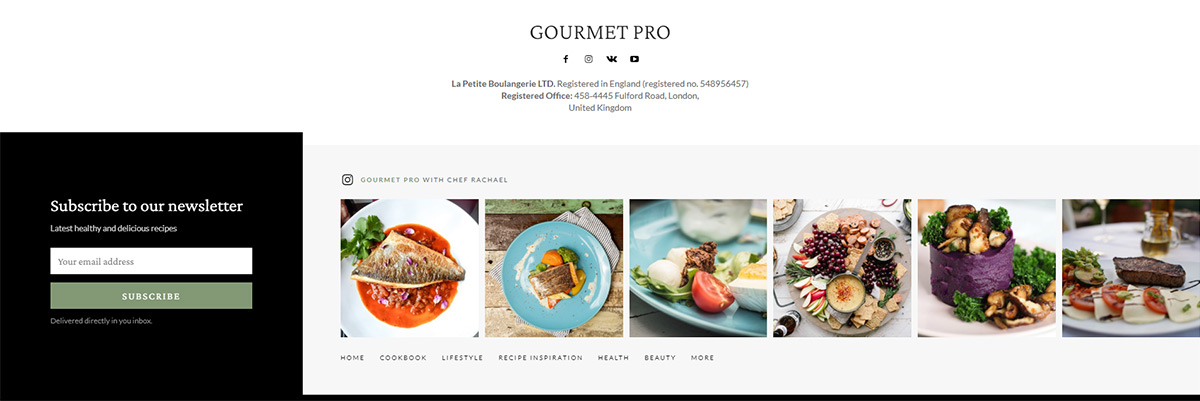
When you get to the bottom of the Homepage, you’re instantly met with a clean and minimalistic segment. At the top, there is a Header Logo, Social Icons, and an Inline Text displaying the contact address. Modify the Logo to display your website’s name, the Social Icons to link to your media, and the text to display your rightful one.
To the left, right below that, you have a subscription box, and to the right, you have an Instagram social network element and a List Menu. Consequently, access your Mailchimp, Mailer Lite, or Feedburner accounts to get the code and copy it. Paste it in the “Embedded Form Code” box.
Now click on the Inline Text item. Write your Instagram name and add a link to it using the <a> tag. For information about adding links to text items such as this, we suggest you take a look at this helpful tutorial. Next, click on the Instagram block and add your social ID in the Instagram Settings tab. This will pull your recent photos and display them on the frontend of your website.
The next element contains a menu. To create a new menu for your footer, refer to our previous instructions above. Change the list to display a different menu by going into the General Settings and choosing it under the “Use Items from” dropdown menu. Save your settings, and you’re done!
Templates
With Gourmet PRO, our Infinite Loading for Posts is enabled from the get-go so your visitors can move from article to article seamlessly. To disable it, just open a post through the tagDiv Composer and hit the menu item on the bottom-right of the frontend pagebuilder. Now, switch the button for “Enable Auto Loading” to off and save.
While you’re still on this template, you can offset or filter the displayed flex blocks just as you did on the menu and add affiliate URLs and images in the Ad Boxes. Don’t forget to save when you finish!
The 404, Date, Tag, Author, and Category Templates all contain Ad boxes and Flex Blocks that you can modify according to what you want to display. However, they need not be modified if you want them to display your latest posts. To make any changes, just open the template with the tagDiv Composer and hit Save when you’re done. That’s it! The demo is now fully integrated with your website and can display the information accurately and precisely.
Make the Gourmet PRO unique
Let’s say your brand already has a different visual but the layout of this beautiful demo appeals to them. No worries! Any PRO demo can be edited right on the frontend with no coding skills required. Just open the tagDiv Composer on any page or Template and begin editing.
Whether you need elements removed, colors or fonts changed, or even new content added into a page or template, this is all possible with a few clicks. If you need an item gone, just right click it and hit the “Delete” button. To add anything else to a page, find it in the tagDiv Composer. Drag-and-drop it in the desired place.
If you need any adjustments made between the spacing of this element and another, you can go into the CSS tab of its settings and input paddings or margins. To change the fonts, go into the “Style” tab and choose the font size, weight, spacing. For colors, stay on the same tab and modify the colors according to your brand’s visuals. Do this for the rest of the website, keeping everything uniform and clean.
Let’s recap
Whether you want to keep Gourmet PRO strictly as it is presented or change it according to your style, integrating it with your website can be done with a few easy steps. Make sure to save often and choose fonts and colors that go well together. For any further information regarding this, you can check out our helpful articles on Color Theory or Typography Basics. Get inspired by the best in the domain you work in. Moreover, browse through various other website designs in search of a beautiful color scheme or font pairing that can go well with the core message you want to transmit your viewers.
If you enjoy the Gourmet PRO demo and what it has to offer, tell us why in the comment box below!


Good evening,
Thank you for the beautiful template which I have purchased.
Could you please tell me how to add a link to my header photo so, when someone clicks it, to lead to my homepage?
Thank you!
Hello Anna! Thank you for choosing Newspaper theme, and for the kind words about it. Can you please send your inquiry via email? Our support team is ready to assist you in this regard. Thanks!
Thanks for sharing your experience
Thank you for commenting!