SPRING SALE! ENJOY 15% OFF

ON ALL WEB DESIGN AND DEVELOPMENT SERVICES

USE coupon

#spring15

in the contact page

Home Blog Page 14

How to Import and Edit a Cloud Library Page

31

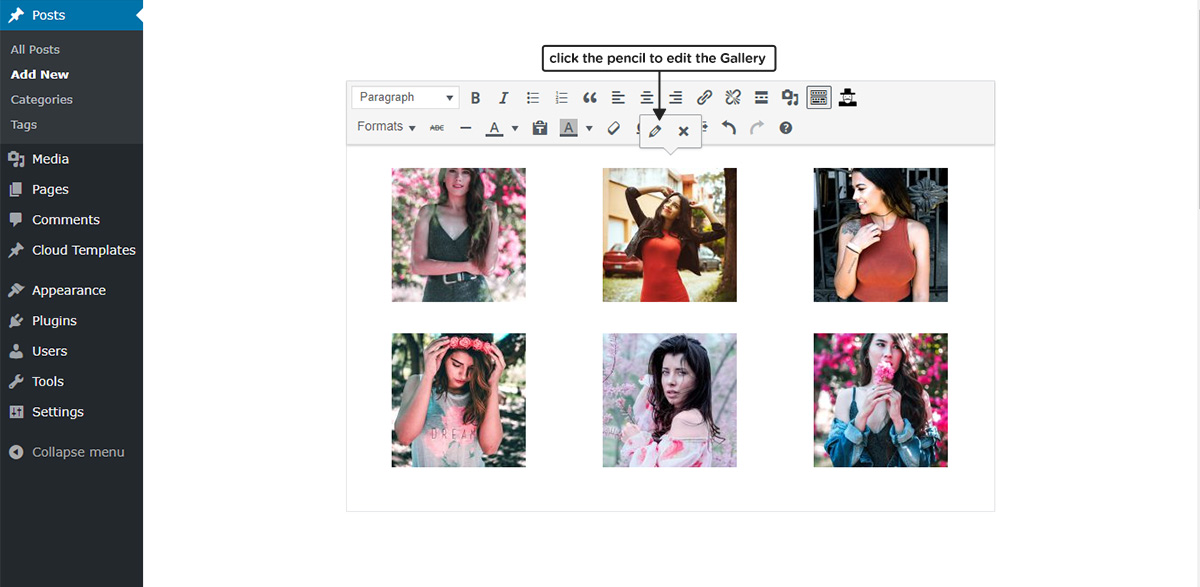
How do you begin the design process? With Newspaper Theme, there’s a hassle-free solution to creating a page from scratch: the tagDiv Cloud Library Page Template. You can import a page’s layout and style within a few seconds and easily add your content to it, without having to create the design from scratch.

Cloud Library Page Template

Hierarchy is important when someone builds a page from scratch. You need to show what’s important first. Scale the other elements down to attract the user’s view to the titles and featured articles, slowly guiding him to the bottom. Each time you create a new page, you try to create symmetry.

The spacing between elements has to follow a pattern that creates harmony. A well-balanced layout is like the structure of a house. To save you time and a lot of effort our design team has worked on building creative and diverse page templates that you can import straight to the website. Each one becomes a new page that is entirely editable and customizable to fit your needs.

How to get a Cloud Library Page Template

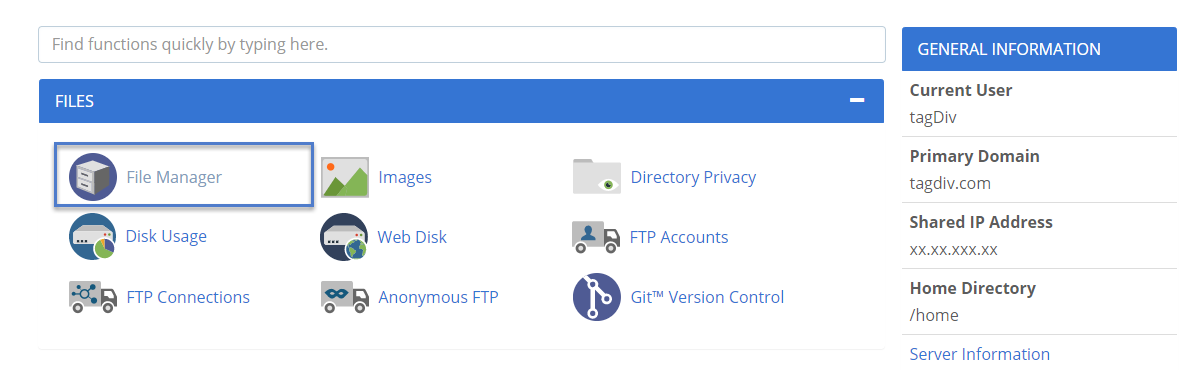
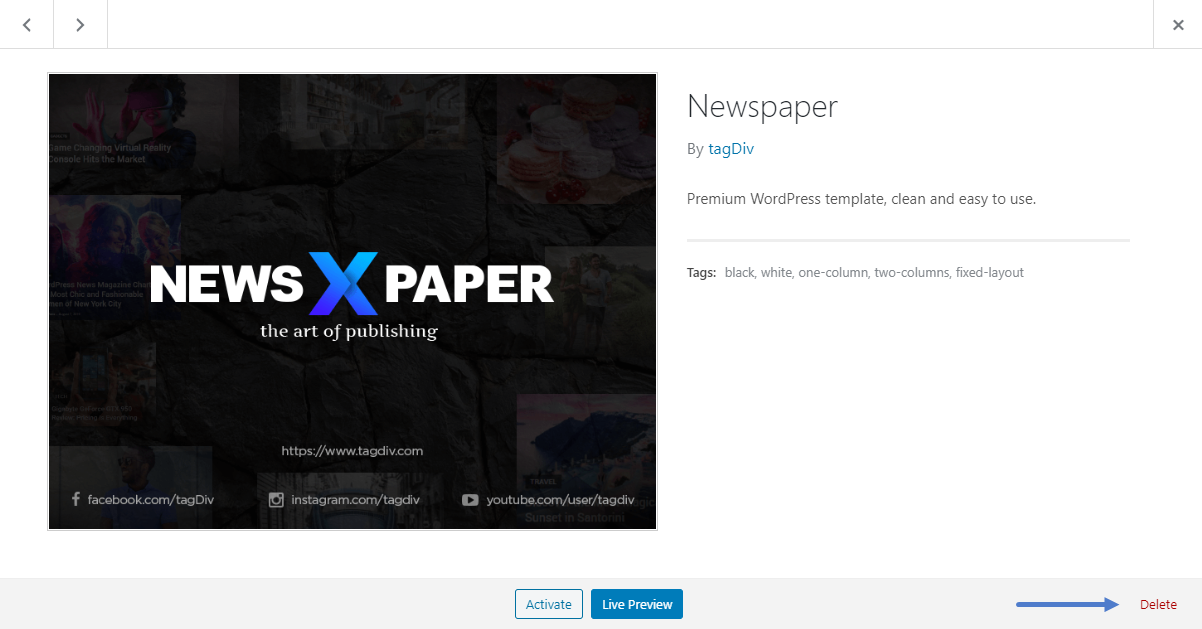
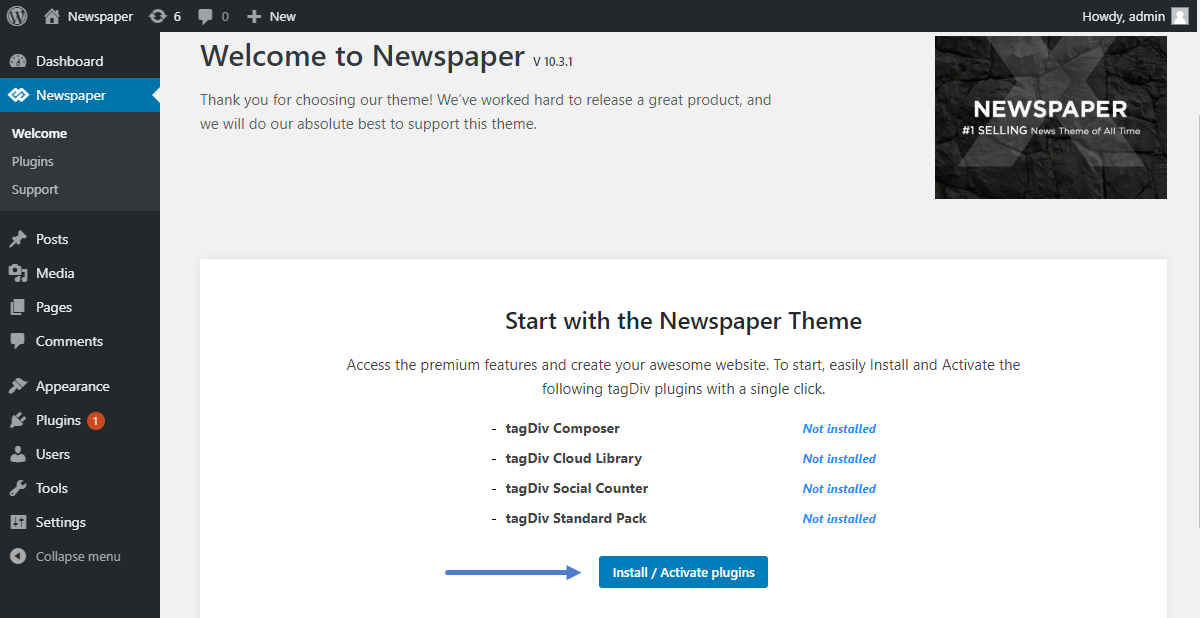
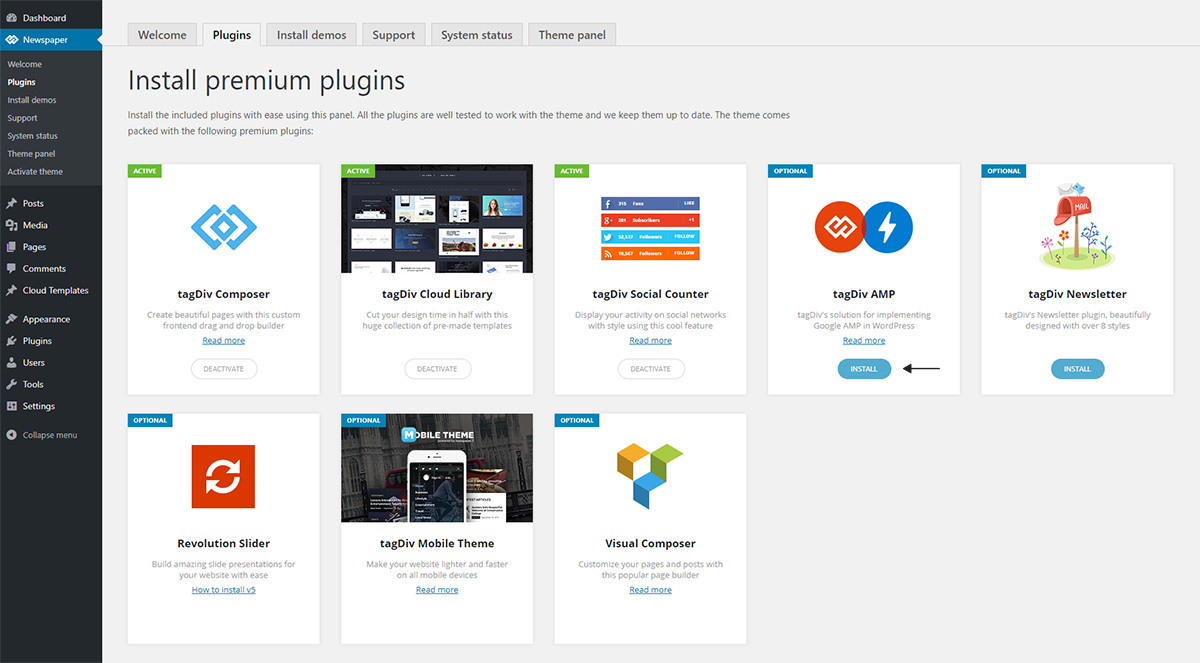
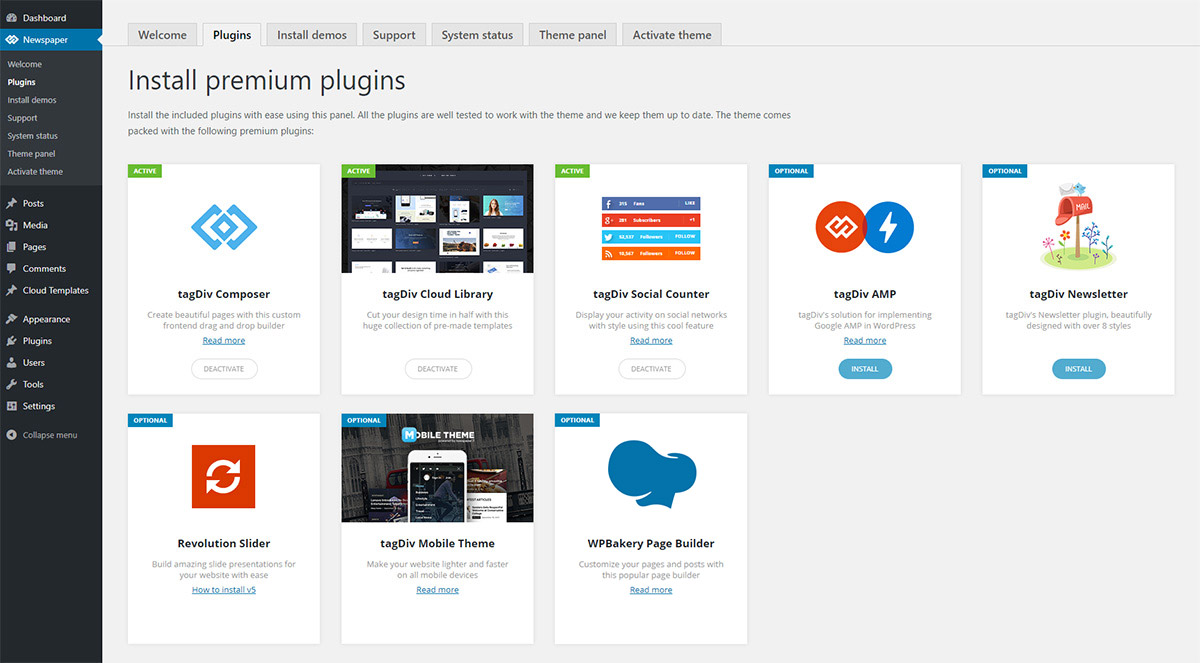
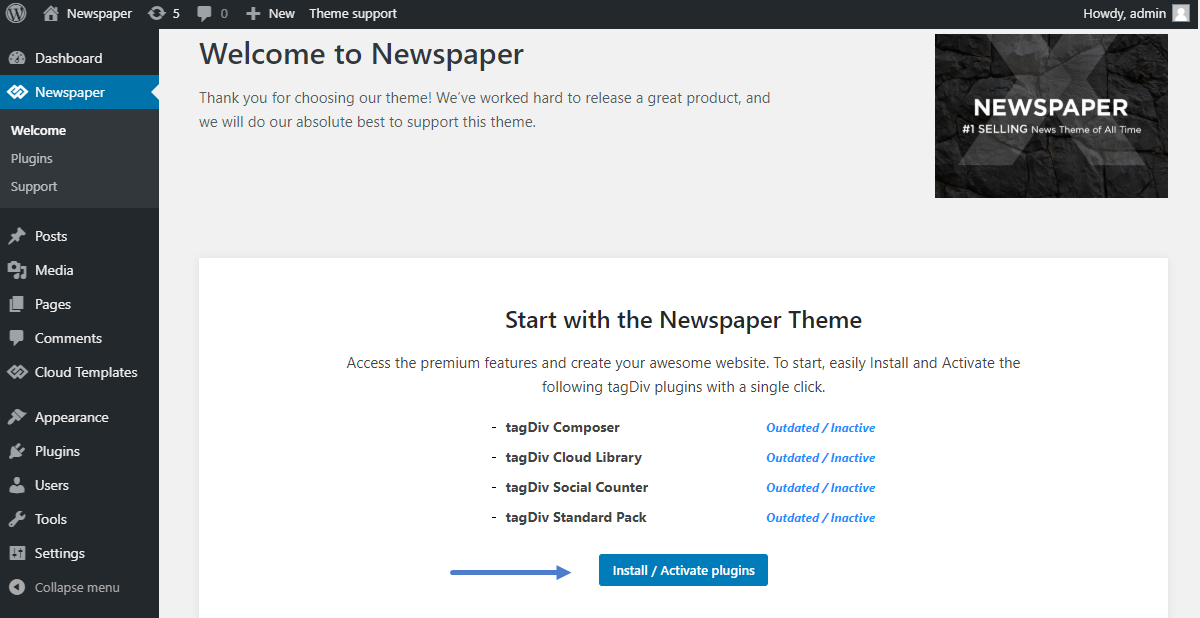
Open the WordPress Admin Dashboard. Make sure that you have the tagDiv Cloud Library plugin installed and active. For more information on how to install and activate plugins, check out this blog post. Now, navigate to Cloud Templates section and click on the blue “Add New” button.

Browse through the “Pages” section to find the perfect layout to use for the site. What type of page are you searching for? For guidance, you can find out more about making one from scratch by creating a Homepage, About Page, Latest News Page.

Click on the template you like and then select the “Create Page” button. The entire page’s design is imported, and you can then edit each section to add your personal information and change the images to fit the intent.

Customize your Cloud Library Page Template

You can model each Cloud Library Page Template to create the perfect form for your beautiful website. The elements of every section can be moved by dragging and dropping them to a different place. Click on an item to access its settings and change them with a few clicks.

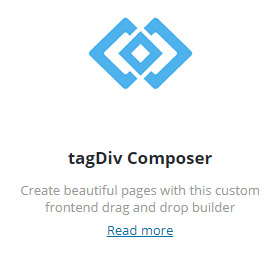
With the tagDiv Composer, you can add more items to the page and customize it without any coding skills. For more information regarding the front-end page builder, visit this link. Once you’re done customizing, save your progress!

Wrapping up

Have you used any of Newspaper Theme‘s Cloud Library Templates, yet? If so, how did you fit them into your website? With each template created, there is a multitude of choices and styling options, but integration is essential for success. Add backgrounds to the rows, change the spacing between elements, choose fonts to go along with the rest of your website and your purpose.

Show us your beautiful results in the comment box below and tell us which Cloud Library Page Template is your favorite! ?

How to use WP Super Cache

35

Guide on how to install and configure the WP Super Cache plugin

A cache plugin generates static pages and improves the site page speed. The cached pages are stored in the memory. When a user makes a request, the process skips the PHP execution and the database requests and delivers the pages from the cache.

WP Super Cache Plugin installation:

  1. Go to WP-Admin area, open the Plugins -> Add new section. Press on the Upload Plugin
  2. Use the search bar to look for WP Super Cache and install the plugin.

Newspaper Theme: Installing WP Super Cache Plugin

WP Super Cache Plugin configuration:

To set up the plugin, you have to go to the wp-admin area and open the plugin settings pane. It’s located in Setting->WP Super Cache. We tested this plugin, and we recommend the following configuration:

Easy

  • Caching On (Recommended)

wp_super_cache_easy

Advanced – enable the following options:

Caching:

  • Enable caching. (Recommended)
  • Caching delivery method. Simple.

Miscellaneous:

  • Don’t cache pages for known users. (Recommended)
  • Compress pages, so they’re served more quickly to visitors. (Recommended)
  • Cache rebuild. Serve a supercache file to anonymous users while a new file is being generated. (Recommended)
  • 304 Not Modified browser caching. Indicate when a page has not been modified since last requested. (Recommended)

Advanced:

  • Mobile device support. (External plugin or theme required. See the FAQ for further details.)
  • Clear all cache files when a post or page is published or updated.
  • Only refresh current page when comments made.
  • List the newest cached pages on this page.

Expiry Time & Garbage Collection:

  • Cache Timeout: 0 seconds
  • Clock: 00:00 HH:MM
  • Interval: Once Daily

WP Super Cache plugin

Set up the Preload like this:

  • Refresh preloaded cache files every 0 minutes (0 to disable, minimum 30 minutes.)
  • Preload all posts.

WP Super Cache plugin

tagDiv Slide Gallery: How to showcase beautiful images in Newspaper Theme

37

Have you ever wanted to showcase your photos in a delightful way? With a unique design and light-box feature, this amazing tagDiv Slide Gallery was built to enhance your articles’ value. Moreover, it can accommodate a different aspect ratio, and also each image displays a description and the copyright information.

The tagDiv Slide Gallery

First things first, to display the thumbnails of the feature, you need to have them enabled in the Newspaper Theme Panel. Go to your WordPress Admin Dashboard > Newspaper Theme Panel > Block Settings. Under “Thumbs on modules and blocks,” enable the 80 x 60 thumbs and 0 x 420. With these settings on, we can start creating our gallery.

Add a new post through the WordPress Admin Dashboard or click on an already written article and edit it. If you want to give your articles a personalized look, import a Single Post Template or create one from scratch using the tagDiv Cloud Library. You can then select to use the template for the post you’re editing by selecting it in the “Post Settings.” For more information, check out this blog post.

How to create an image tagDiv Slide Gallery?

Open the article, and insert a “Classic” element through your Gutenberg editor. Then press the small “Add Media” button.

tagDiv Slide Gallery

Click the “Create Gallery” section. When it opens up, select all the images you want to display. Don’t worry, you can always come back and edit it later. Now press the “Create a new Gallery” to travel to a different window.

tagDiv Slide Gallery

On the right side, there is a section called “Gallery Settings.” Choose “Media File” in the “Link To” drop-down menu. Now the audience can click on any of your photos to display them full-screen. Under “Gallery Type,” select “tagDiv Slide Gallery.”

There are other settings here as well:

  • Pick how many columns you want for the gallery through the drop-down menu.
  • The photos get displayed in the order they were published or added to the Media Library. However, if you enable the “Random Order,” the pictures get arranged differently.
  • Type out a name for the element in the “Gallery Title.”
  • Resize the photos and how they appear for your audience through the Size drop-down menu.

When you’re done, click the “Insert Gallery” button.

tagDiv Slide Gallery

Last Steps

Use the Gutenberg interface to go back to editing the gallery. Just hover over it and then click the pencil icon. So, at any given point, you can add or remove any images.

All that’s left to do now is to “Publish” or “Update” your post. Great job!

tagDiv Slide Gallery

Now, when the users scroll through your post and come across the gallery, they can inspect it further by clicking on any photo. The picture then resizes to be full-screen, and they can use the arrows on the side of the picture to browse through the rest of your photos.

tagDiv Slide Gallery

Conclusions

Newspaper Theme helps you impress the audience feature by feature. With the Slide Gallery, you can easily create a stunning presentation of your beautiful photography. Each post can be a storytelling slideshow, drawing the reader in to explore even further. Take advantage of this and improve the user experience of on your website.

Have you created a tagDiv Slide Gallery, yet? Show us your brilliant results in the comment box below!

How to Update the Newspaper Theme for WordPress

Learn how to upgrade Newspaper Theme to the latest version easily. Choose which way to update: Automatically, via FTP (file transfer) or via WordPress. Everything is done quick and easy. Please follow through the tutorial below.

A. Update the theme Automatically

Our automatic update system make the entire update process so much simpler. In the Newspaper WordPress theme version 10.3.1, we have introduced the Automatic Theme Update feature. Now, every time a theme update is released, you’re at one click away from the new version. Starting with the Newspaper 10.3.2 version, you can automatically update your theme to the latest version available. 

When a new update is found, you’ll get notified in the Update Notification System. When a Newspaper Theme update is available, you’ll see a red notification bullet in the Theme Panel > Updates.

Note: If you have installed a new PRO demo on version 10.3.1 starting on March 29, 2020, it may not appear in the system that a new update is available for you to install automatically. In this situation, we recommend you to manually update the Newspaper Theme to version 10.3.2. If you need technical assistance to update your theme, please send us an email or open a new topic on the forum, and our support team will help you.

All you have to do is click on the Updates tab from the Newspaper Theme Panel and hit the “Install Update” button. The system downloads the latest version from the tagDiv servers and automatically updates the theme’ files and the native plugins. 

Besides the message that notifies you a new update is available, in Newspaper > Updates tab, you can also check out the theme versions’ availability. For example, if you’ve installed the latest theme version – 10.3.2 and you want to go back to 10.3.1, you can now select the theme version from the list dropdown and hit “Install version” button. 

How to  Update Newspaper theme: Previous versions (Time Machine)

B. Update the theme Manually

Important Notes

  • Always check our update notes
  • Always backup the files and the database, in case something goes wrong with the server. You could use the backup to revert to the previous state if you need to. For more information on how to backup check the official documentation.
  • Do not keep older copies of the theme inside WordPress themes folder
  • Reset the cache after you update
  • Update the plugins. The theme required and recommended plugins are included in the theme package inside the ../Newspaper-tf/plugins folder. Please read the plugin update guide.

Download the files necessary from ThemeForest

Log into your ThemeForest account. From the “Downloads” section, look for the Newspaper Theme. Click the download button next to it and choose to download the Installable WordPress Theme (the WordPress file). Great! Now, when the download finishes, choose your update method:

There are 2 ways to update the theme manually. Each method has its own instructions, so let’s start with the first one!

Update the theme via file transfer

You first need to place your website in maintenance mode. Use a plugin to do this, for example, Ultimate Maintenance Mode, WP Maintenance Mode, and many others.

You can use any type of file manager at your disposal: your host cPanel, a FTP client or any file manager plugin. They all provide the same result. Copy, paste and delete files. That is all you need to do.

  • Access the file manager and open the “Themes” folder located in “Your Site’s Name/Wp-Content/Themes” and backup your Newspaper Theme folder by saving it somewhere on your computer or creating a zip archive of the theme (rename it to newspaper_backup.zip for example). Do not keep the archive with it’s original name and do not keep the theme as a folder with a separate name inside the themes section. This is not a good practice.
  • After you make a back-up please delete the theme.
  • Download the newest version of the Newspaper Theme from ThemeForest.
  • Unzip the main “Newspaper-tf” archive if you chose to download the full theme package. You will find the main install-able zip file called Newspaper.zip inside of the Newspaper-tf.zip file.
  • Upload the “Newspaper.zip” file to your “/Wp-Content/Themes” folder.
  • Now Extract the “Newspaper.zip” file.
  • Important: Update all of your plugins. For more information regarding this step please visit this link.

Update the theme via WordPress

You first need to place your website in maintenance mode. Use a plugin to do this, for example, Ultimate Maintenance Mode, WP Maintenance Mode, and many others.

  • Deactivate the current “Newspaper” theme from the Appearance > Themes section by simply activating a different theme. Once you activate a different theme, delete the Newspaper theme. Don’t worry, your content will not be lost.
How to Update Newspaper Theme: Delete the old version
  • Get the “Newspaper.zip” file from your new Themeforest download (Install-able WordPress file only). If you downloaded the “All Files & Documentation” from Themeforest, then you need to unzip the archive file you received, the Newspaper.zip will be inside it.
  • Go to Appearance > Themes, choose Add New Theme, Upload the “Newspaper.zip” and click on the “Install Now” button.
  • After your upload is finished choose Activate the theme.
  • Update and activate the required plugins.
How to Update Newspaper Theme: Install the new update

Conclusions

If you have an old version of our Newspaper Theme, it’s always wise to update to explore new features offered by each version. In the “What’s New” panel, in the main menu of our website, you can read about the new implementations of each theme version.

So, have you updated your Newspaper Theme, yet? Also, which method did you use to do it? Tell us about it in the comment box below!

How to increase page loading speed

66

With the Newspaper Theme, you can increase page loading speed on your WordPress website. To do this, first, you should test your website and take a look at google’s recommendations. In this article, we’ll guide to through the process. Please note that increasing page loading speed optimization may require more than basic server management knowledge.

How to increase page loading speed?

  1. Test your page speed here. Just add your site URL and hit the analyze button. Please remove unnecessary plugins and don’t use Google Ads (Adsense) when testing (you can add them after that).

2. Enable the Gzip compression
3. Set the Leverage Browser Caching
4. Optimize  your images
5. Use a cache plugin (WP Super Cache)
6. Plugin Load Optimization (optional – advanced)

 The list of speed recommendations:

  • We recommend that you use WP Super Cache with its default settings.
  • You can also use the APC full page cache if you have a lot of ram on your server

If you have a dedicated server / VPS:

  • Make sure that you have APC installed or another ‘op cache’ for PHP. This will reduce your server response time. We have received some reports that the accelerator has some problems in some specific configurations with our theme and Nginx.
  • Make sure that you have the compression enabled on your site for HTML/JS/CSS, but not for images.
  • Leverage browser caching https://developers.google.com/speed/docs/insights/LeverageBrowserCaching Google Page Speed requires that you set an expiring cache of 7 days or more

If you use a shared hosting or a low power VPS, please update to a more powerful server for better speed results and performance.

You could also check the WordPress official optimization guide here.

Before you make any changes to your site, please backup the files where you intend to apply the modifications. Let’s modify the .htaccess file. Start by saving a copy of the file on your hard-drive. If something goes wrong, you can use it to return to the previous state. Now, let’s start!

1. Enable Gzip compression

This compresses the HTML and CSS and improves the page loading speed and reduces bandwidth usage.

The setup is different from one server to another, so you may have to look on your host instructions section to see how you can enable it on your site.

The theme demo server is set like this:

<IfModule mod_deflate.c>
<filesMatch "\.(js|css|html|php)$">
SetOutputFilter DEFLATE
</filesMatch>
</IfModule>

2. Set the Leverage Browser Caching

By setting this, you tell your visitors browsers to remember (caching) some of your website resources (that you don’t change so often, like the logo or the CSS/JS libraries, posted images, and many more) and only refresh them after a defined period.

To set it you have to add something like this on your .htaccess file.

NOTE: The setup may differ based on what resources you want to include.

Setup from the theme demo server:

# BEGIN Expire headers
<ifModule mod_expires.c>
ExpiresActive On
ExpiresDefault "access plus 5 seconds"
ExpiresByType image/x-icon "access plus 604800 seconds"
ExpiresByType image/jpeg "access plus 604800 seconds"
ExpiresByType image/png "access plus 604800 seconds"
ExpiresByType image/gif "access plus 604800 seconds"
ExpiresByType application/x-shockwave-flash "access plus 604800 seconds"
ExpiresByType text/css "access plus 604800 seconds"
ExpiresByType text/javascript "access plus 604800 seconds"
ExpiresByType application/javascript "access plus 604800 seconds"
ExpiresByType application/x-javascript "access plus 604800 seconds"
ExpiresByType application/x-font-woff "access plus 604800 seconds"
ExpiresByType application/x-font-svg "access plus 604800 seconds"
ExpiresByType image/svg+xml "access plus 604800 seconds"
</ifModule>
# END Expire headers

3. Optimize images

Images are one of the most abundant resources on your pages and the larger they are, the longer it will take to download, slowing the page loading speed.

To reduce their size and increase the page loading speed, you need to compress and optimize them. There are plenty of guides out there on how you can optimize the images (using software like Photoshop or similar).

Alternative:

Add the following code at the end of the functions.php, which is located in the theme folder. The code automatically compresses each thumbnail to 50%:

add_filter( 'jpeg_quality', create_function('', 'return 50;' ) );

After you add the code, you need to regenerate the thumbs. For this, you can use the Force Regenerate plugin.

The value 50 stands for 50% – if you want a better compression or better quality modify it and regenerate the thumbs. Experiment until you get the optimal value!

4. Use a cache plugin (WP Super Cache)

Find the plugin installation and configuration here – link

5. Plugin Load Optimization (optional – advanced)

Look for methods that allow you to control plugins, for Contact Form 7 check this one.

tagDiv AMP

1

The Google AMP project is an open-source initiative aiming to make the web better for all. The project enables the creation of websites and ads that are consistently fast, beautiful and high-performing across devices and distribution platforms.

Discover the new standards on page loading speed and mobile optimization with the tagDiv AMP plugin. We took the Google AMP plugin and tailored it to perfectly integrate with all the features you love in Newspaper theme. Everything is optimized to work seamlessly, enhancing the capabilities of this template to give you a new definition of performance.

How to install the tagDiv AMP plugin

Firstly, you must access the Newspaper Plugins section, which contains all of the theme’s specific plugins. Then, press the Install button for the AMP plugin.

tagDiv AMP plugin and Newspaper Theme

AMP settings

After installing the plugin, the Theme Panel features a brand new menu at the very bottom of the screen. It contains all of the AMP settings and options.

What settings can you make?

Post Type Support: By default, once you have installed it, the tagDiv AMP plugin becomes active on posts. For pages, you have to activate it by switching ON the option.

tagdiv amp

Important note: The AMP template only works on pages that do not use any page builder. Pages that are created using the standard tiny MCE editor are valid AMP pages.

Colors: In this section, you can select a separate theme accent color for your AMP pages. Also, there are color options for different areas such as menu, footer, sub-footer, icons, and text.

tagdiv amp

AMP Ads

We have also provided an ad section so you can specify different ads for the AMP template. The standard ads placed in the ad spots of the theme ad section will not work on the AMP template. That is why there is a special section destined for AMP ads.

There are a total of 5 ads you can place on the AMP template: A header ad, a footer ad, and 3 article ads.

In order to create specific AMP ads, the theme allows AdSense or non-AdSense ads.

For AdSense ads please only use the data-ad-client and the data-ad-slot of your AdSense code like the below example:

  1. Select the Google AdSense ad type
  2. Place the data-ad-client and data-ad-slot in the designated fields
  3. Select between a fixed and responsive ad size.

For Non AdSense ads, please use the following steps:

  1. Select the ‘Custom Banner’ ad type
  2. Place your HTML based ad code in the ‘Custom Ad’ section of the theme panel.

AMP Excerpts

The AMP template also features a Related articles section as the default desktop theme. You can change the title’s length for this section. Control the number of words you want your titles to display. If you do not want the theme to cut your article titles, you can leave this section empty.

tagdiv amp

Analytics: This section allows you to place the AMP Analytics code in the template header which allows you to track user interactions with AMP pages.

For the proper functioning of the AMP Analytics code, the following implementation is required:

tagdiv amp

For more information on the JSON configuration supplied for Google Analytics, see Adding Analytics to your AMP pages.

To test your site with the plugin and see the results live, you can simply add “/amp” at the end of your URL, as mentioned here.

How to install and update plugins

6

The Newspaper theme comes with some required plugins and optional premium ones, free of charge. The main difference between them is that the required plugins are installed automatically upon theme installation, while the rest of them you can choose to use or not. You can install the plugins in Newspaper Theme only if you need them.

With Newspaper theme, you don’t have to search for plugins, as the most useful are already packed in your favorite WordPress template. You can choose to install as many plugins as you would like, but keep in mind that adding too many plugins can slow your website down.

Newspaper Theme brings you some special premium plugins. The tagDiv plugins are designed to enhance your, and your visitor’s experiences. If you are not familiar with them, let us make the introductions:

tagDiv Composer

Your premium front end page builder. This is a one-of-a-kind page builder designed for the tagDiv themes. Drag and drop dozens of elements into your page, create templates for your articles, build your personal shortcodes, save and reuse them later. Every dream starts with the tagDiv Composer. You can use it free of charge with the tagDiv themes.

tagDiv CloudLibrary

The tagDiv Cloud Library brings you over 45 already-built layouts. We have designed it to simplify the way you create templates in the Newspaper theme and make your website stand out! The innovative system of tagDiv Cloud Library allows you to import layouts and customize them using the drag and drop functionality.

tagDiv Social Counter

The tagDiv Social Counter plugin brings you support for Facebook fans, Twitter followers, YouTube subscribers, Vimeo, Instagram, Google Plus, Soundcloud and Feed subscribers. Use this premium plugin free only in the tagDiv themes. The Social Counter plugin makes it easy to display your social accounts stats.

tagDiv AMP

Discover the new standards on page loading speed and mobile optimization with the tagDiv AMP plugin. We took the Google AMP plugin and tailored it to perfectly integrate with all the features you love in Newspaper theme. Everything is optimized to work seamlessly, enhancing the capabilities of this template to give you a new definition of performance.

tagDiv Newsletter

Do you have news and want to let everyone know about it? The Newspaper theme brings the tagDiv Newsletter plugin and gives you the ability to add newsletter options to your website. It is a very easy to use element, straightforward using tagDiv Composer, the live front end page builder.

Revolution Slider

The Newspaper theme comes with a free license for the Revolution Slider plugin, so you use it to create stunning imagery on your website. The plugin is a bundled one and does not come with an activation code. We provide regular updates for the plugin, so you do not need to purchase it to have access to its functionality, and features. Again, you don’t need to buy or registered this plugin!

tagDiv Mobile Theme

The Mobile Theme is a feature specially designed to maximize the theme performance on mobile devices. This is the ultimate challenge: making mobile experiences as fast and rewarding as the desktop ones. We took all these aspects back to the design board and solved them by creating the new Mobile Theme feature.

WPBakery page builder

WPBakery is a popular page builder you can use with the Newspaper Theme. You don’t have to buy or update this plugin. As the author is updating the plugin, we test the changes for compatibility and release a new version of Newspaper Theme that includes the WPBakery update.

Installing premium plugins in Newspaper Theme

Installing a plugin is quick and easy with the click of a button. Access the Theme Panel -> Plugins area and click on the install button. This button is dynamic as it will change its functionality based on your plugin status. It should change from “install” to “activate” to “update” depending on the scenario.

Updating Plugins in Newspaper Theme

In this section, we cover the necessary steps required for updating a plugin. We will show how to update a plugin in Newspaper theme using as an example the tagDiv Composer. The Theme package includes the latest version for each plugin.

Plugins in Newspaper Theme

Automatic Update

The theme features an automatic update system for the tagDiv plugins. If an older version of the plugin is active, Newspaper automatically disables it, and you will be prompted to start the update.

The update process is simple and effective with just a push of a button.

Access the theme panel welcome screen and press the “Install/Activate” button:

Manual Update

We are highly recommending you to make a manual update only when you have the latest version of the theme package downloaded so that you can upload the newer version of the plugins. This is how you can do it:

1) From the WP-Admin > Plugins section, deactivate and delete the plugin you want to update.

install and update plugins

2) Go to WP-Admin > Plugins > Add New section
3) Press the “Upload Plugin” button
4) Press the “Choose File” button
5) Select the Newspaper-tf/plugins/td-composer.zip file from the latest theme package you downloaded from your Envato account and then press Open
6) Press the Install button

7) Now you can activate the plugin, and your tagDiv Composer will be up-to-date.

install plugins

Following these steps, you can update each plugin with ease. Now that your theme and plugin are ready, start creating the website of your dreams. Have fun while building your website!

Revolution slider

33

The Newspaper theme comes with a free license for the Revolution Slider plugin, so you use it to create stunning imagery on your website. In this article, you have a step-by-step guide on using the Revolution Slider plugin with Newspaper Theme.

The license is a bundled one and does not come with an activation code. We provide regular updates for the plugin, so you do not need to purchase it to have access to its functionality, and features. Again, you don’t need to buy or registered this plugin!

Using the Revolution Slider plugin with Newspaper Theme

Our “Plugins panel” has to have all the plugins bundled into the main theme .zip file to be able to install them. We’re always trying to keep our theme’s file under 8 MegaBytes, the default upload limit on most hosting environments. Revolution Slider 5 has grown from 1.5MB to almost 5MB.

Due to licensing restrictions, we cannot download it from our servers to your host. So, the solution is to pack it in the plugins section of the Newspaper Theme in a bundle.

You can find Version 5 of the plugin under the following folder structure:

Newspaper-tf\plugins\revolution_slider_5


How to install Revolution Slider 5

Go to your WordPress admin panel and open the Plugins > Add New section. Click on the Upload Plugin button and browse your local computer to find the Newspaper-tf  > Plugins > Revolution Slider 5 folder. Select the revslider.zip file and click the Install Now button.

After the process is over, activate the plugin.

Importing sliders for theme demos

The theme provides many predesigned sliders that are used together with the theme demos which you can import and use freely on your website.

Using the Revolution Slider plugin with Newspaper theme is a sure way to create visually impressive pages. Our designers used sliders in the demos. This is the reason why, before using a predefined demo that contains a slider, you need to make a few adjustments:

1. After you have the demo installed, you must install the Revolution Slider plugin and activate it in the Plugins section.

2. Click the Import Slider button in the Revolution Slider section:

Revolution Slider plugin with Newspaper Theme: Getting Started

3. Choose the slider associated with your theme demo (you can find it as a .zip file in Newspaper-tf\demo_sliders folder) and click the Import Slider button.

Revolution Slider plugin with Newspaper Theme: Importing Sliders

4. Once you complete the installation, you can find it in the Revolution Slider section. You have to click the Settings symbol:

Revolution Slider plugin with Newspaper Theme: Settings for Sliders

5. The slider requires a category to extract posts from, so you have to choose it from the list:

Revolution Slider plugin with Newspaper Theme: Importing slider for demos

6. With the category set, all you have to do is save your changes by clicking the Save symbol on the right side of the page.

Now, you are ready to use the demo. You can also create a slider where you need it with ease. Have fun creating your website!

How to set up Cloudflare CDN

13

Cloudflare is a free CDN service which speeds up your website. Knowing how to set up Cloudflare CDN is a vital skill on WordPress as it caches substantial resources from your site, and delivers them to your visitors from servers spread all around the globe. In this step-by-step guide, we will present how to configure this service to obtain the best results with our themes.

Cloudflare CDN installation:

  • First, create a Cloudflare account – here
  • This guide will not cover this setup, please check Cloudflare official guide – here

How to set up Cloudflare CDN (configuration):

  • Log into your Cloudflare account;
  • Through the DNS, make sure that the traffic is going through CloudFlare only for the areas accessible to the site visitors;

Newspaper Theme: Set up Cloudflare CDN

  • On Crypto enable the encryption, this option includes multiple options (full, flexible, strict), check the “help” section present on the page and chose the one which works best for your case.

Newspaper Theme: Set up Cloudflare CDN Crypto

  • The Firewall section allows you to set the security level and to set access rules for specific IPs or countries.

Newspaper Theme: Set up Cloudflare CDN Firewall

  • The Speed section comes with minification options – to avoid any issue, please disable the Rocked Loader (beta) feature.

Newspaper Theme: Set up Cloudflare CDN for speed

  • From Caching you can change the cache expiration time, and you can purge the files. This function resets the cache and fetches a fresh version of those files from your web server.

Newspaper Theme: Set up Cloudflare CDN Caching

Wrapping up

If you are searching for a step-by-step guide to help you set up Cloudflare CDN, this is the perfect start. Keep in mind, it presents an example, and the rest of the settings are on default. For other situations, you’ll need to check for additional help on the CloudFlare documentation.

If you don’t have coding skills, it’s vital and it worths the effort of setting up the Cloudflare CDN on your website. These few steps can also make the difference between a website visited and loved by users and a slow loading one.

tagDiv Newsletter

74

Do you have news and want to let everyone know about it? Version 8.7 of the Newspaper theme brings the tagDiv Newsletter plugin and gives you the ability to add newsletter options to your website. It is a very easy to use element, straightforward using tagDiv Composer, the live front end page builder.

Installing the plugin

You can find the Newsletter plugin in the theme plugins section, where you can install and activate it.

tagDiv Newsletter plugin: Install plugin

How to use the tagDiv Newsletter plugin

Once the plugin is installed and activated, you will find a new element in your tagDiv Composer element list:

tagDiv Newsletter plugin: tagDiv Composer Element list

Drag and drop it into your page, and then you can customize it from the plugin settings.

You can set the title for your widget, a description in a few words, a disclaimer, an input test for your form, and the preferred alignment.

tagDiv Newsletter plugin: Options panel

Afterward, you must choose the embed form provider. The Newsletter plugin requires an embed code from one of three sources: MailChimp, Mailer Lite or FeedBurner. You need to have an account created for your preferred newsletter form provider. Copy and insert the embedded form code into the newsletter options.

MailChimp

Create a new account or access your existing one, and navigate to Lists-> Sign-up forms and then click ‘Embedded forms.’

tagDiv Newsletter plugin: MailChimp List


From here, copy the code and paste it in the Newsletter plugin ‘Embedded Form Code’ section.

tagDiv Newsletter plugin: MailChimp script

Mailerlite

Either create a new account or access your existing account and access the  ‘Forms’ section. Once you create your form, you can get the code from the ‘Embed form’ -> HTML code section:

tagDiv Newsletter plugin: Mailerlite

Feedburner

Feedburner only needs an ‘ID’ to work, not the whole embed code.

You can find the Feedburner ID by editing your account:

tagDiv Newsletter plugin: feedburner


Once you set everything up, the newsletter form will be available on your page for users to sign up to.

tagDiv Newsletter Plugin